


Walk into your workshop with a few boards under one arm and walk out a few hours later with a sturdy, useful and attractive workshop stool.
A full day
Beginner
$51–100
Introduction
What's better than a simple stool project? A ridiculously simple one. Here are plans for a workshop stool you can make, inspired by that 'simpler is better' concept.
Tools Required
- 1/4-in. round-over bit
- Circular saw or miter saw
- Cordless drill
- Router
Materials Required
- 1-1/4-in. screws
- 16' 1x3
- 2-in. screws
- 2' 1x4
- 3' 1x6
- 4' 1x8
- Hinges
- Wood glue
Project step-by-step (3)
Step 1
Build the two side ladders for the workshop stool
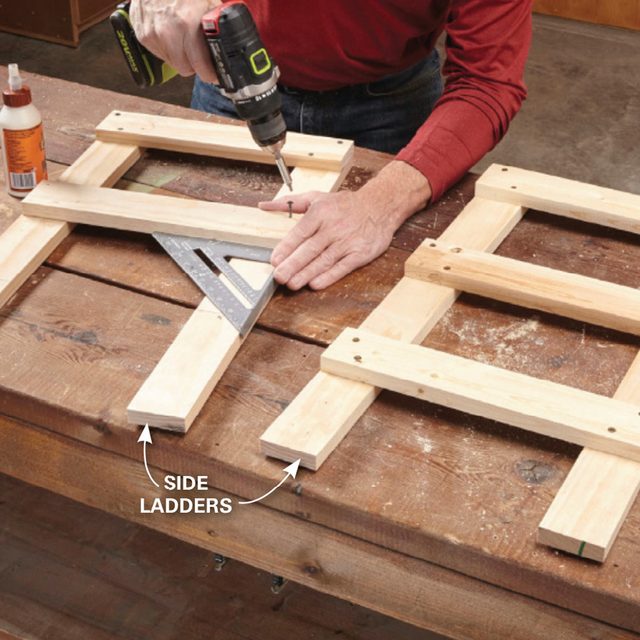
To begin building this simple workshop stool, cut the pieces to length, then glue and screw the crosspieces to the legs. Use a square to ensure the assemblies are square. Begin by building the two side ladders using the spacing shown in Figure A. Use a square to ensure each ‘rung’ is square to the leg, then secure each using glue and 1-1/4-in. screws. Use a 1/4-in. round-over bit to soften the outer edges of each leg. Stand the two ladder sides facing each other and install the two steps and the back brace. Predrill the holes to prevent splitting.
Step 2
Figure A: Workshop stool project illustration
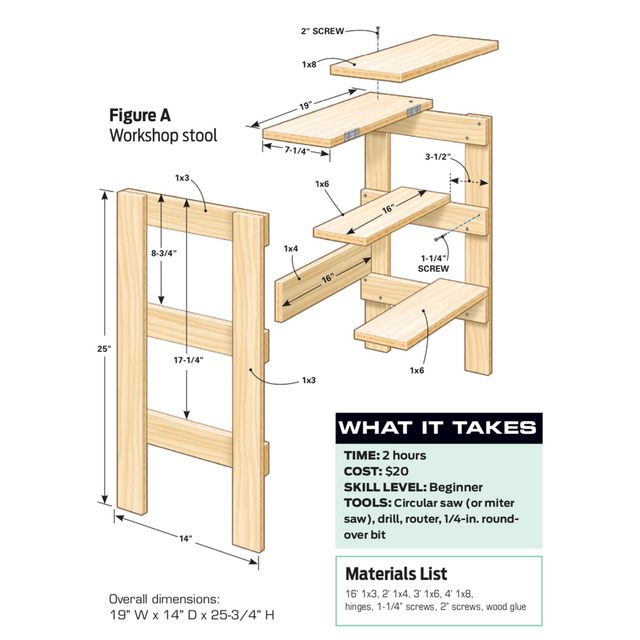
Flip the top down and you have a workshop stool for sitting or working; flip it up and you have a small stepladder for reaching. Build two of them and you have sawhorses for supporting sheets of plywood or long boards when working. Download the wood stool plans using the links below. Saturday Morning Workshop: Kitchen Stool
Step 3
Assemble and Finish the Workshop Stool
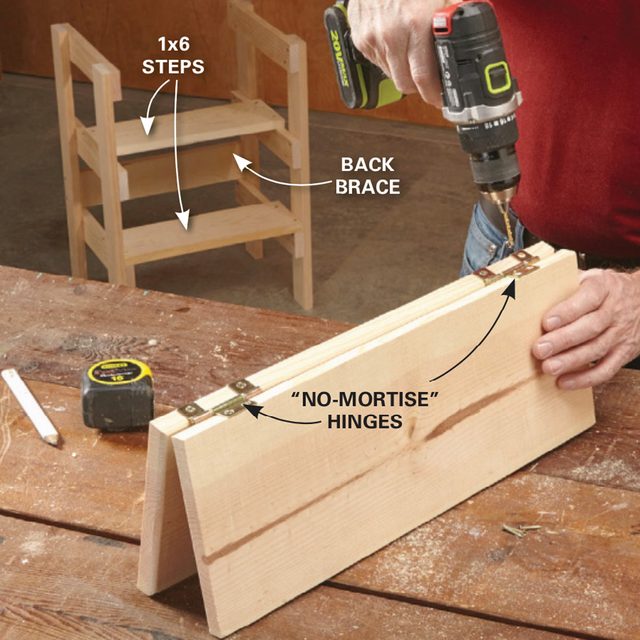
Attach the two steps and the back brace to the ladder sides. Use hinges to join the two top pieces, then secure one of the boards to the top ‘rungs.’ Cut the two top boards to length and round over the top edges. Secure the two top edges to each other using 2-1/2-in. no-mortise hinges; regular hinges will also work but will leave a slightly wider gap. Position the hinged-together top boards so they overhang the sides of the legs by about 3/4 in. and the front and back by about 3/8 in. Attach one of the top boards to the top ‘rungs’ of the ladder using 2-in. screws.
Project PDF Files
Click the links below to download the materials list and drawings for this workshop stool project.
Project Drawings and Materials List