Tips for sharpening and using a chisel, one of the carpenter's basic tools.
An hour or less
Intermediate
Less than $20
Introduction
A sharp wood chisel can cut mortises, shave rough surfaces, chop out corners and scrape off glue. We'll demonstrate these techniques and show you how to sharpen your chisel.
You may not need one often, but when it comes time to carve out a recess for a hinge or strike plate, nothing beats a razor-sharp chisel. We’ll show you basic chiseling techniques and sharpening tips so you’ll be ready for any chiseling task with a woodworking chisel set.
Start with a new sharp 3/4-in. chisel for all-purpose use. (Keep your old dull chisel handy for jobs like cutting nails or scraping caulk.) Buy one with an impact-resistant plastic handle. You can pound on these with a hammer without damaging them. Good-quality chisels don’t cost much, and if you have a little extra cash, buy three—1/2-in., 3/4-in. and 1-in.—for a good starter set.
Even new chisels need sharpening. Polish the machine marks from the first 1 in. of the back of the chisel and hone a bevel on the face. Put your chisels in a sock or a special canvas roll between uses to protect the cutting edge.
Tools Required
- Hammer
- Wood chisel
Materials Required
- Wet/dry sandpaper
Project step-by-step (6)
Step 1
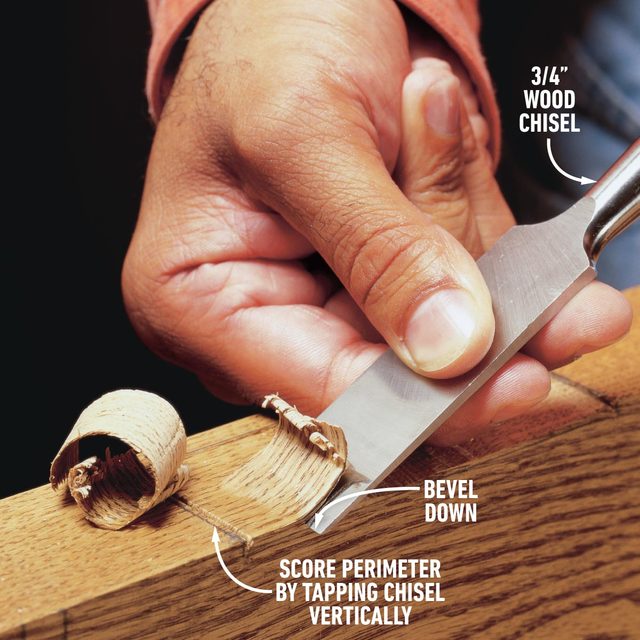
Mortise cut
Start recesses or mortises by outlining the area with a sharp utility knife or by making a series of shallow chisel cuts perpendicular to the surface. Skip this step and you risk chipping wood outside the mortise. Then remove thin slices by tapping the chisel with a hammer, bevel side down, to carve out the wood inside the perimeter.
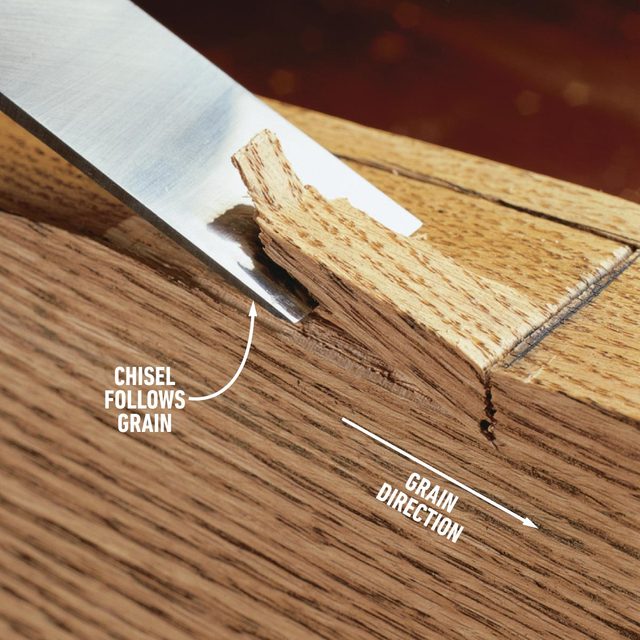
Oops!
Chiseling with the grain can sometimes have disastrous results. If the grain runs deeper into the wood, it’ll direct the chisel too deep. Stop and chisel from the opposite direction if you feel this happening.
Step 2
Shave the wood
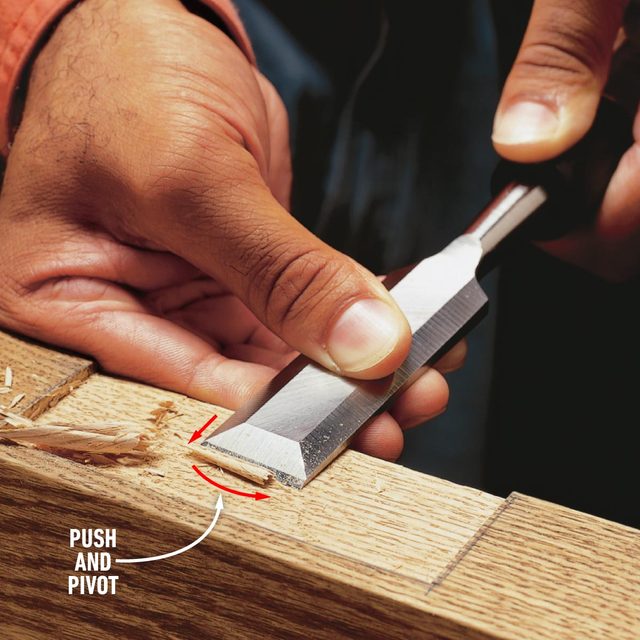
If the recess is open on one side, like a hinge mortise, flatten the bottom by paring off thin slices with the back, unbeveled side of the chisel held flat to the wood.
In general, when you’re shaving into a piece of wood, face the bevel down. When you’re flattening a cut and have access from the side, face the bevel up and hold the back of the chisel tight to the surface.
Step 3
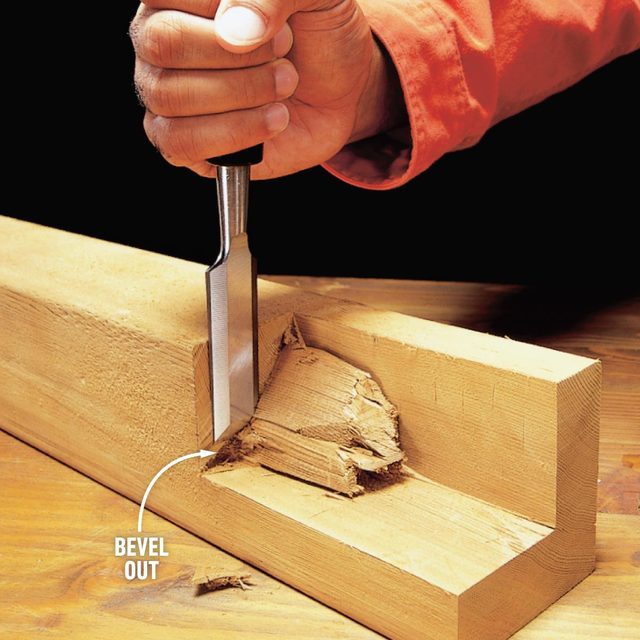
Remove chunks of wood
Caution: Wear safety glasses.
Set the chisel alongside one cut edge and strike it sharply with a hammer to remove wood from notches. This isn’t fine work; the cut will be hidden by another board.
Step 4
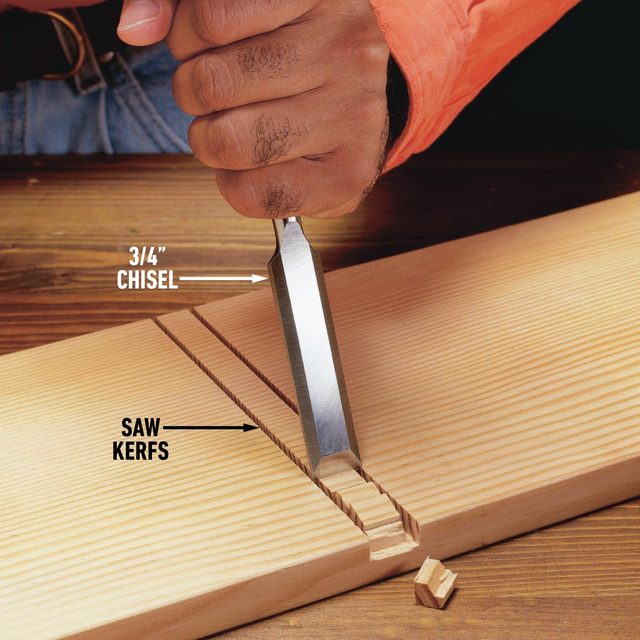
Chisel a dado
Cut a groove, or dado, by first sawing along both edges to the desired depth. Then break out the wood in the middle with your chisel. Space the chisel cuts about 1/2 in. apart.
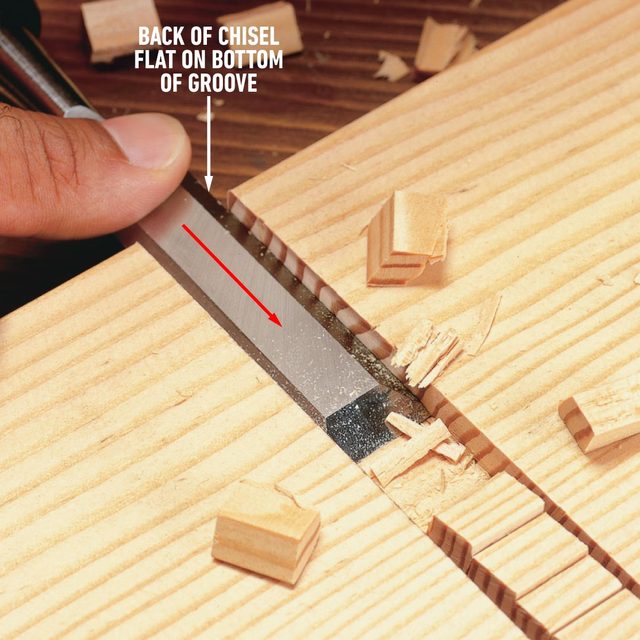
Fine-tune the dado
Smooth and flatten the bottom of the dado. Keep the back of the chisel flat to the bottom of the groove. Work from both ends into the center to avoid splintering the edge.
Step 5
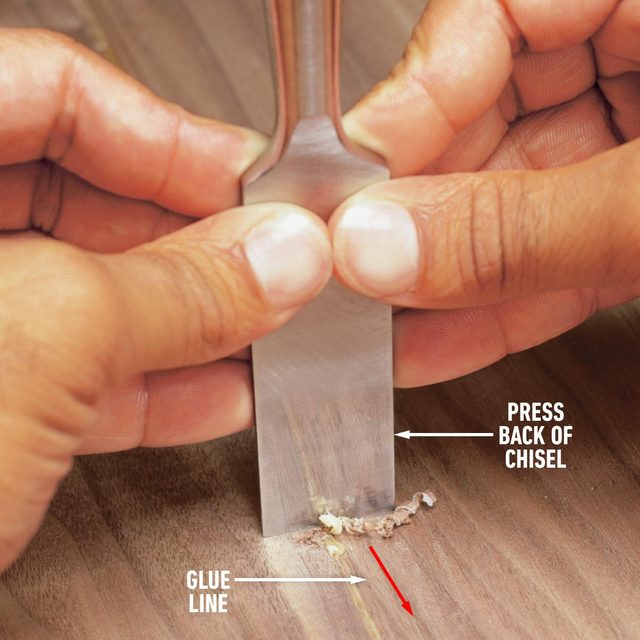
Scrape a glue joint
Scrape glue joints or other imperfections from wood projects by holding the blade at a right angle to the wood with the back of the chisel facing you. To remove thin shavings, support the blade with your fingers and press down while you draw the chisel toward you.
Scraping requires a perfectly flat, sharp edge. The chisel tip should scrape cleanly without leaving scratch marks in the wood.
Step 6
Woodworking Chisel Set Sharpening Basics
Old chisels with nicked or rounded tips will need to be reshaped. Use a belt sander or grinder to remove nicks and shape the chisel to a 25-degree angle. If you’re using a grinder, dip the chisel in water every two or three seconds to prevent the tip from overheating and turning blue. If this happens, the chisel won’t hold an edge for long.
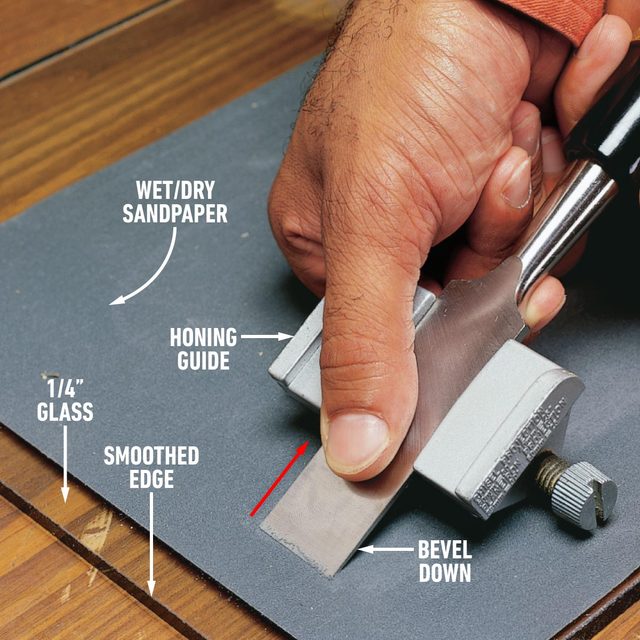
Next, polish the back of the chisel by rubbing it back and forth over progressively finer wet/dry sandpaper, pressing the back perfectly flat to the paper. For all sharpening, a good progression of paper is 120, 220, 400 and 600 grit.
Finally, set the honing guide to hold the chisel at a 30-degree angle to create a “secondary bevel” and run through the grits, starting at 220. Lightly glue the wet/dry sandpaper with spray adhesive to a piece of 1/4-in. glass with smoothed edges. Roll the chisel back and forth over the sandpaper until a burr forms on the back of the blade. Turn the chisel over and stroke it flat on the sandpaper to remove the burr. Then move to a finer-grit paper and repeat the process.