Install a new splash guard in 20 minutes.
Introduction
Fix a torn splash guard on your garbage disposal by removing the disposal and installing a new guard. It's a quick and simple fix.
Do you have a garbage disposal that spits garbage at you? There’s no need to replace the entire unit. Instead, you can install a new splash guard in about 20 minutes. You don’t need any special tools or training— just some free time in the kitchen.
Tools Required
- 4-in-1 screwdriver
Materials Required
- New splash guard
- Wood shims
Project step-by-step (3)
Step 1
How to remove a garbage disposal
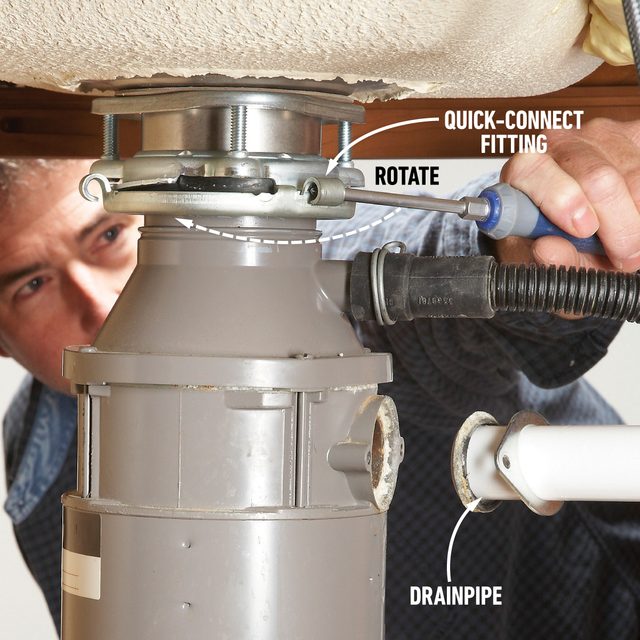
If your garbage disposal is hardwired, start by flipping off the circuit breaker. If it plugs in, unplug it. Take care and double-check that you’ve done it correctly so that you don’t electrocute yourself. Then, stack up books or lumber to support the disposal. Next, remove the drainpipe and disconnect the quick-connect fitting.
Jam a screwdriver into the locking ring and rotate it away from you. The garbage disposal will drop onto the books. Support it with one hand so it doesn’t tip over.
Step 2
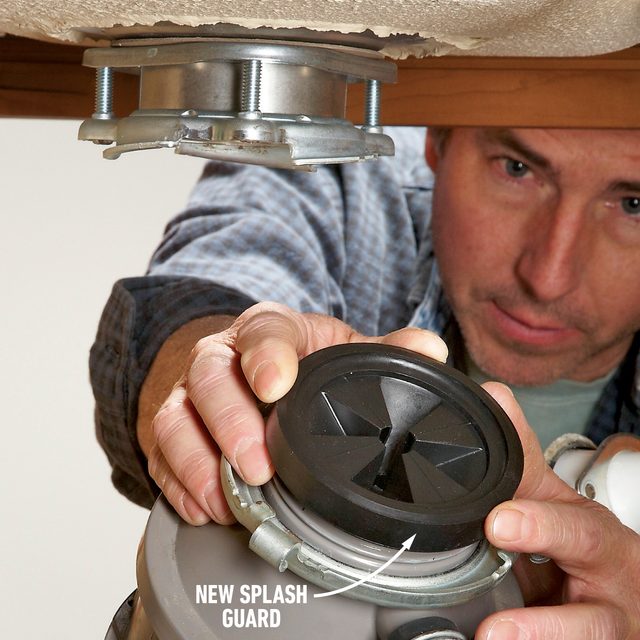
Replace the kitchen sink splash guard
Grab the lower edge of the old garbage disposal rubber guard and peel it up and off. Then, slip the new one on and push it down until it sets. You want to make sure that it’s secure here; there’s no sense in doing all the work to replace a splash guard only to leave it improperly placed.
Step 3
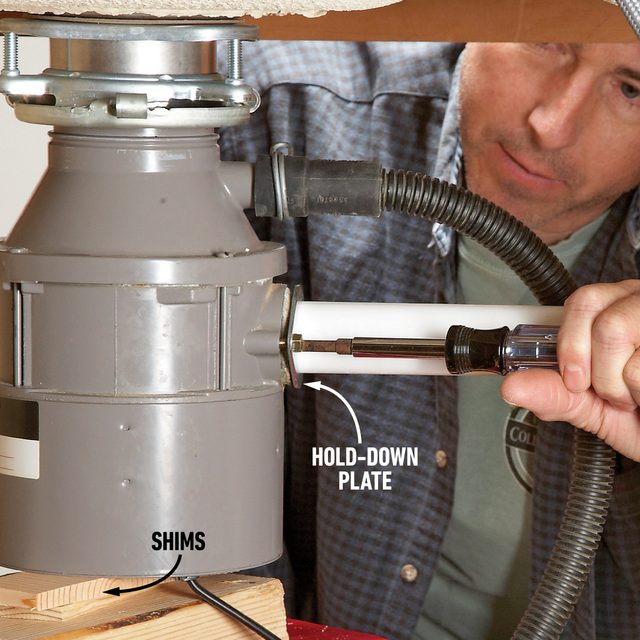
Reconnect the disposal
The hardest part of reinstallation is hoisting the disposal up and into place with one hand while you try to engage the locking ring with the other. Forget about that. Instead, shove several shims between the books and the bottom of the disposal until the locking ring just touches the sink flange. Then just rotate the ring to lock it in place. Reinstall the drain line, do a leak test and grind away.
You’ve done it! Your garbage disposal is serviceable again, and now you know how to replace a splash guard if the issue arises again years down the line.