


Make the most of your pile of hardwood offcuts and build this simple and elegant candle holder.
1 - 2 hours
Beginner
$10-$20
Introduction
Having difficulty finding a candle holder that matches the woodwork in your dining room? Try building your own with this simple project.
Introduction
Sure, you can buy a candle holder, but why not make one? Even better: Why not dive into your pile of never-to-be-used wood scraps that you can’t bring yourself to throw away and make a bunch of candle holders to give away as gifts? The design possibilities are endless.
Cutting List
| KEY | QTY. | PART | DIMENSIONS |
| A | 1 | Candle block | 1-1/2″ x 3″ x 12″ |
| B | 4 | Base verticals | 1/2″ x 1/2″ x 3″* |
| C | 2 | Base horizontals | 1/2″ x 1/2″ x 2-3/8″* |
*Indicates rough length. Cut these pieces to fit.
Overall dimensions: 2-1/2-in. H x 12-in. L x 4-in. D.
Tools Required
- 1-5/8-in. Forstner or spade bit
- Drill press or hand-held drill
- Miter saw
- Painter's tape
- Sandpaper
- Table saw
Materials Required
- Hardwood lumber scraps
- Wood glue
Project step-by-step (6)
Step 1
Make the Wood Candle Block
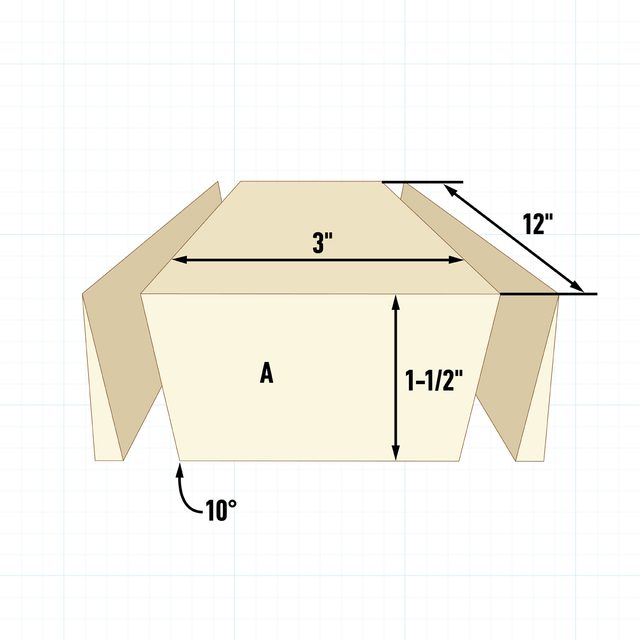
Cut the candle block (A) to length and thickness. Tilt your table saw’s blade 10 degrees, then rip both edges of the candle block.
Step 2
Lay Out the Recesses
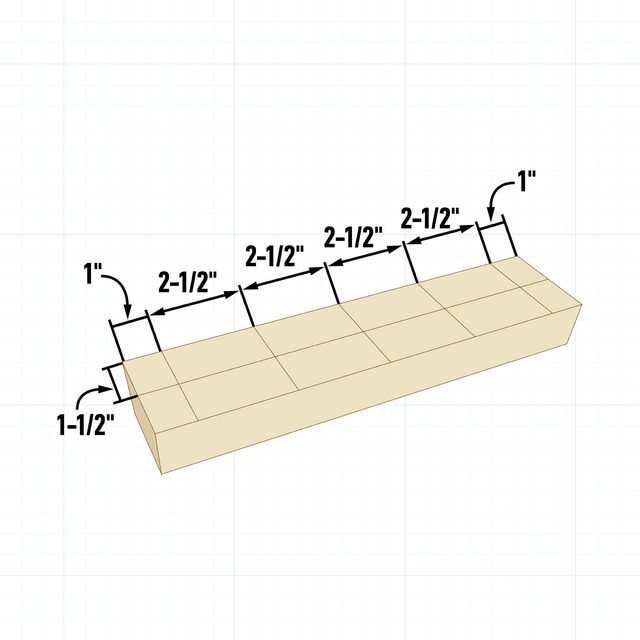
Using the dimensions shown above, lay out the candle recesses.
Step 3
Drill the Recesses
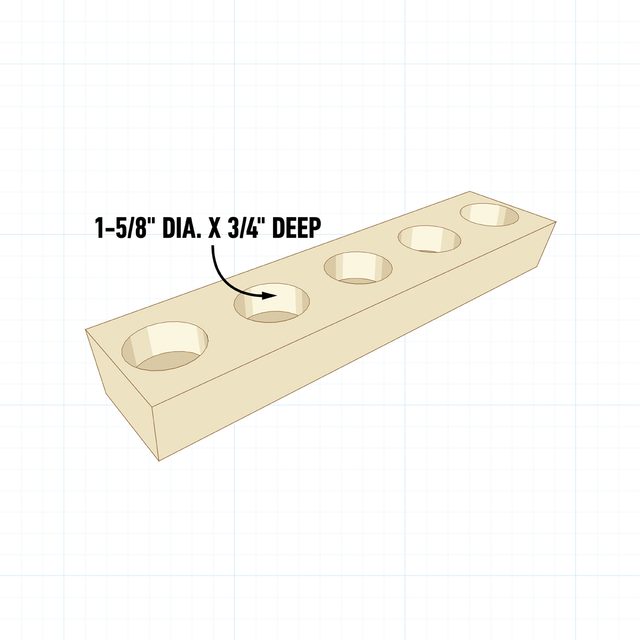
Using a Forstner or spade drill bit, drill the candle recesses to a depth that makes the candles sit almost flush when they’re in place. These recesses are 3/4-in. deep x 1-5/8-in.-dia. for standard tea lights.
Step 4
Cut the Base Parts
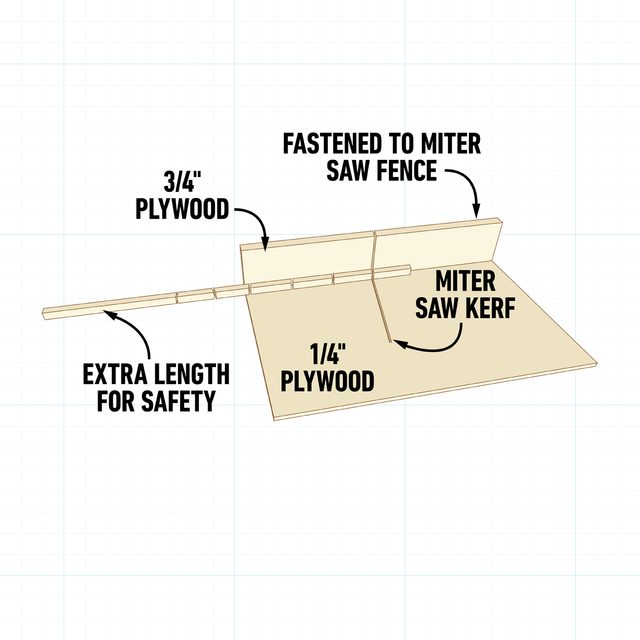
Rip a long piece of stock from which you’ll cut the base parts (B & C). Give yourself at least eight more inches than you need for the parts themselves to keep your fingers away from the blade. You can cut these pieces with a miter gauge on your table saw, or on a miter saw.
To cut small parts like this safely on a miter saw, make a zero-clearance fence/base as shown above. Glue the fence to the base and fasten the fence to your saw’s fence. Make a cut at the desired angle and you’re set.
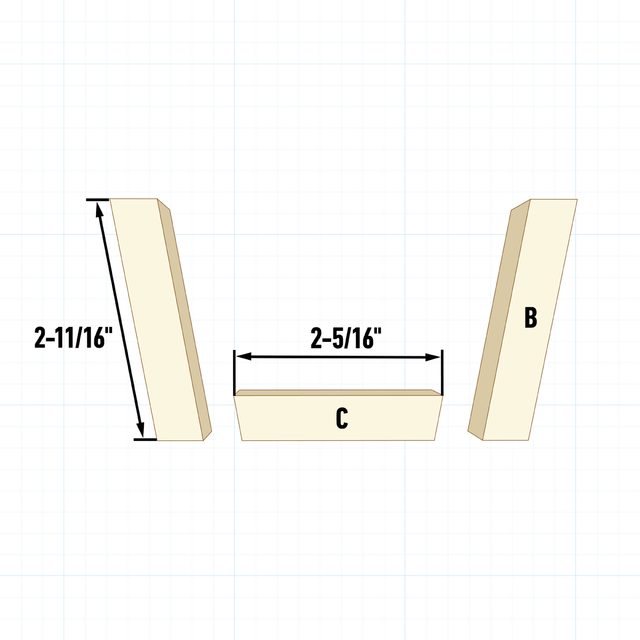
These base pieces all have 10-degree angles on their ends. The length of the verticals is arbitrary. The final length of the horizontal piece is 2-5/16-in. from long point to long point.
Step 5
Make the Base
Assemble the base parts with wood glue. Hold the joints tight with painter’s tape until the glue dries.
Step 6
Attach the Base
Mark the base positions on the block. Apply a dab of wood glue to each base vertical where it contacts the block, then slide the bases in place. When the glue dries, sand the whole thing up to 220-grit and apply a finish of your choice.
