Fix old-house wiring problems. Bring old light fixtures wired with knob-and-tube wiring up to code by installing an electrical box in the plaster wall. Here's how to do it without breaking the plaster and lath.
A full day
Beginner
Less than $20
Introduction
Fix old-house wiring problems. Bring old light fixtures wired with knob-and-tube wiring up to code by installing an electrical box in the plaster wall. Here's how to do it without breaking the plaster and lath.
Tools Required
- Needle-nose pliers
- Non-contact voltage tester
- Utility knife
Materials Required
- Electrical box
- Metal support arms
- Wire nuts
Project step-by-step (4)
Step 1
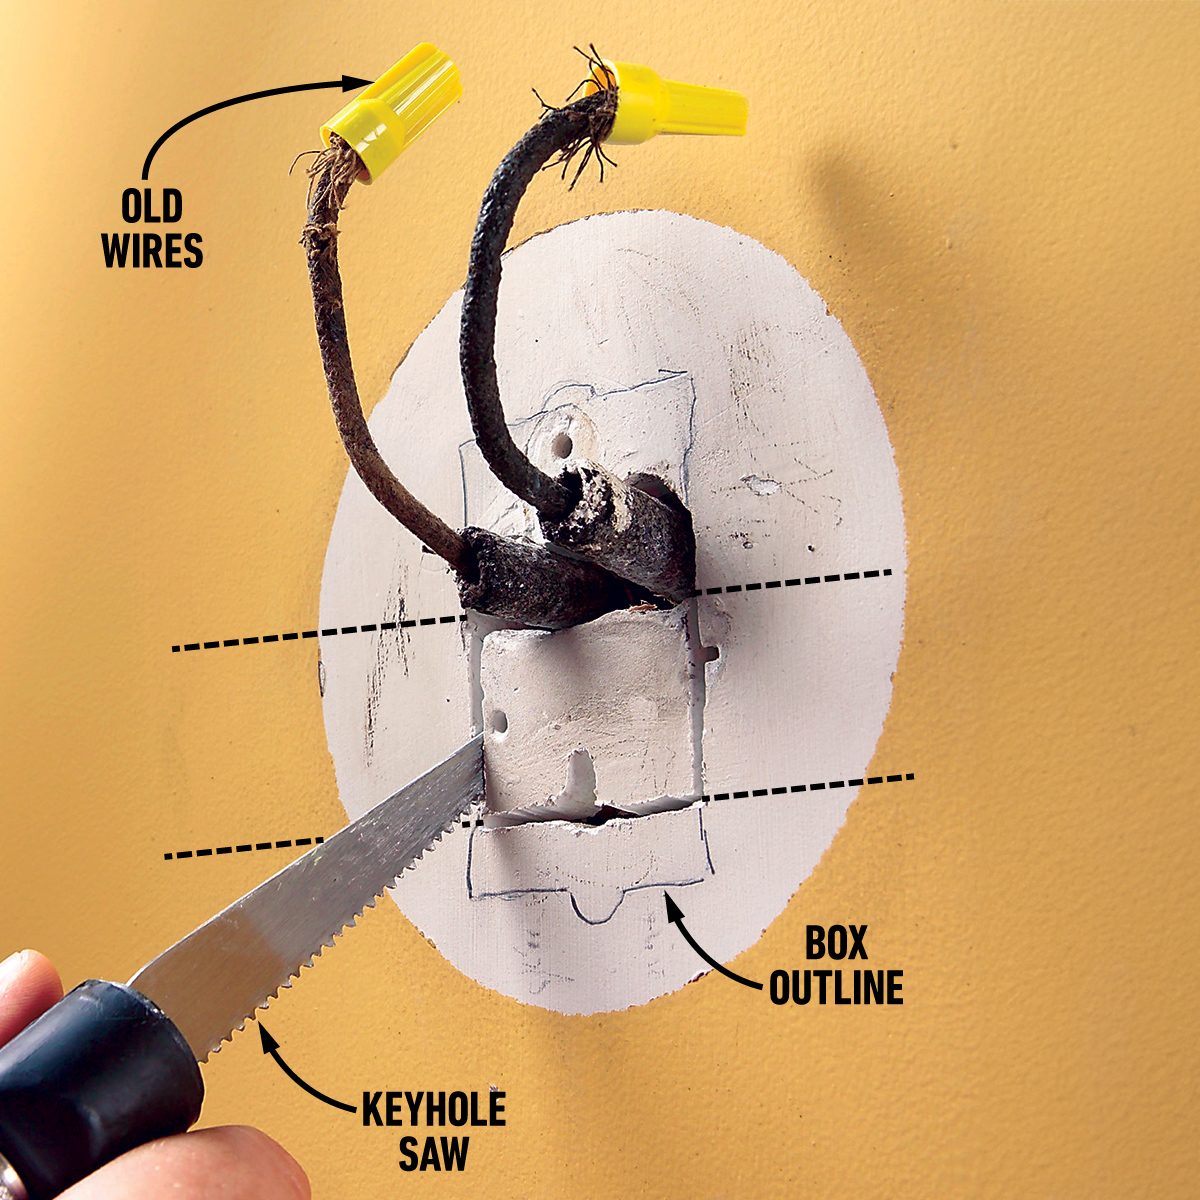
Cut the outline of the box
Houses built before World War I often have plaster walls and original “knob-and-tube” wiring, which was installed according to old, outdated electrical code that did not require electrical boxes for light fixtures. When you change the fixture, The National Electrical Code requires you to install an electrical box and update the wiring method to the current code. The old electrical wiring is still acceptable as long as the insulation on them is intact. However, the connections must be made within an approved electrical box.
If the wires emerge alongside a stud or other framing member, you can screw a metal box directly to the stud. However, it’s likely that the light fixture was mounted in the middle of a stud cavity, which makes mounting a box that can support the weight of the fixture more difficult.
First, turn off the power to the fixture, then check the wires with a non-contact voltage tester before beginning work. Probe the existing hole with a keyhole saw to find the horizontal edges of the lath. Center the box on the lath and draw its outline. Cut down on both sides of the center lath and remove it.
Step 2
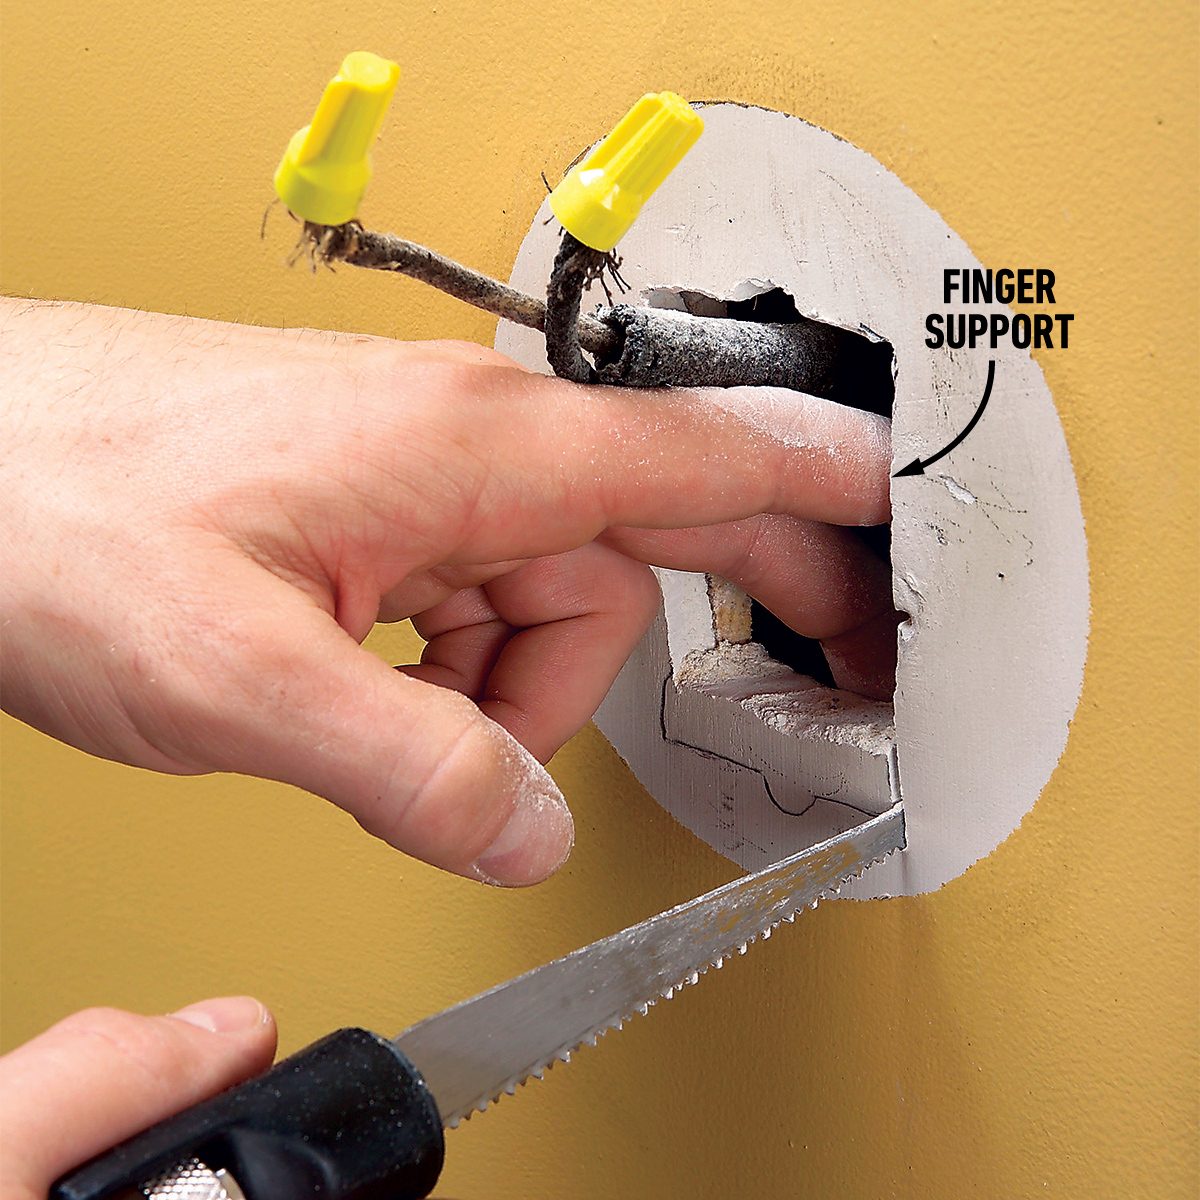
Saw lath carefully
Support the top and bottom lath with your fingers while you cut out about half of each to fit the rest of the box profile. Push the wires to the side so you don’t nick them.
Step 3
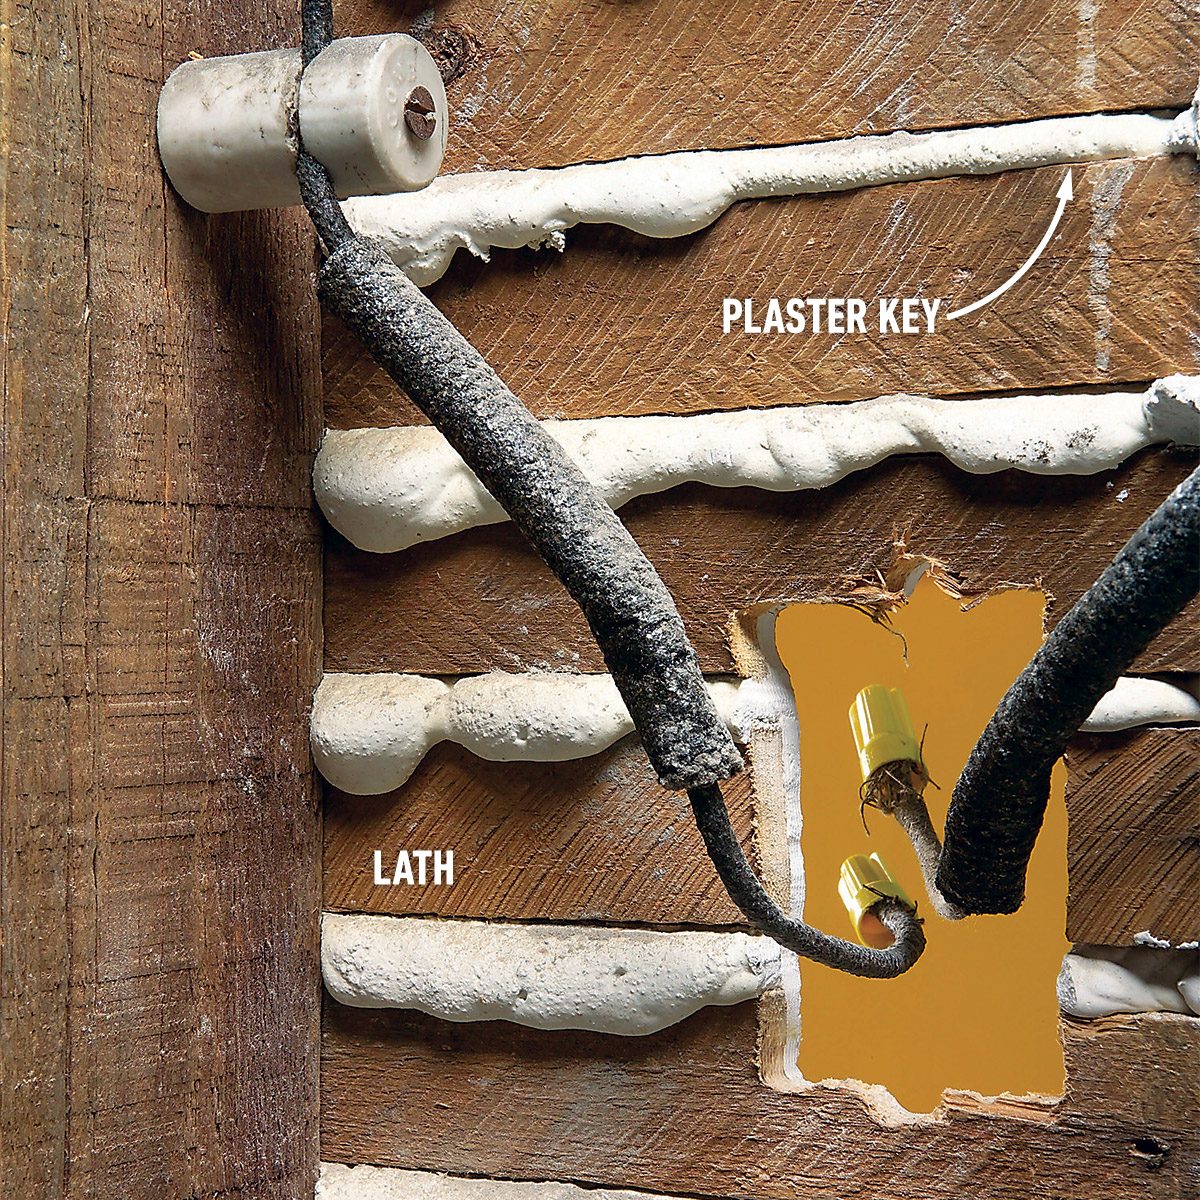
Leave plaster keys intact
Cutting the hole accurately is critical so that the box ears have solid bearing on the plaster. Partially cut lath will support the top and bottom.
Step 4
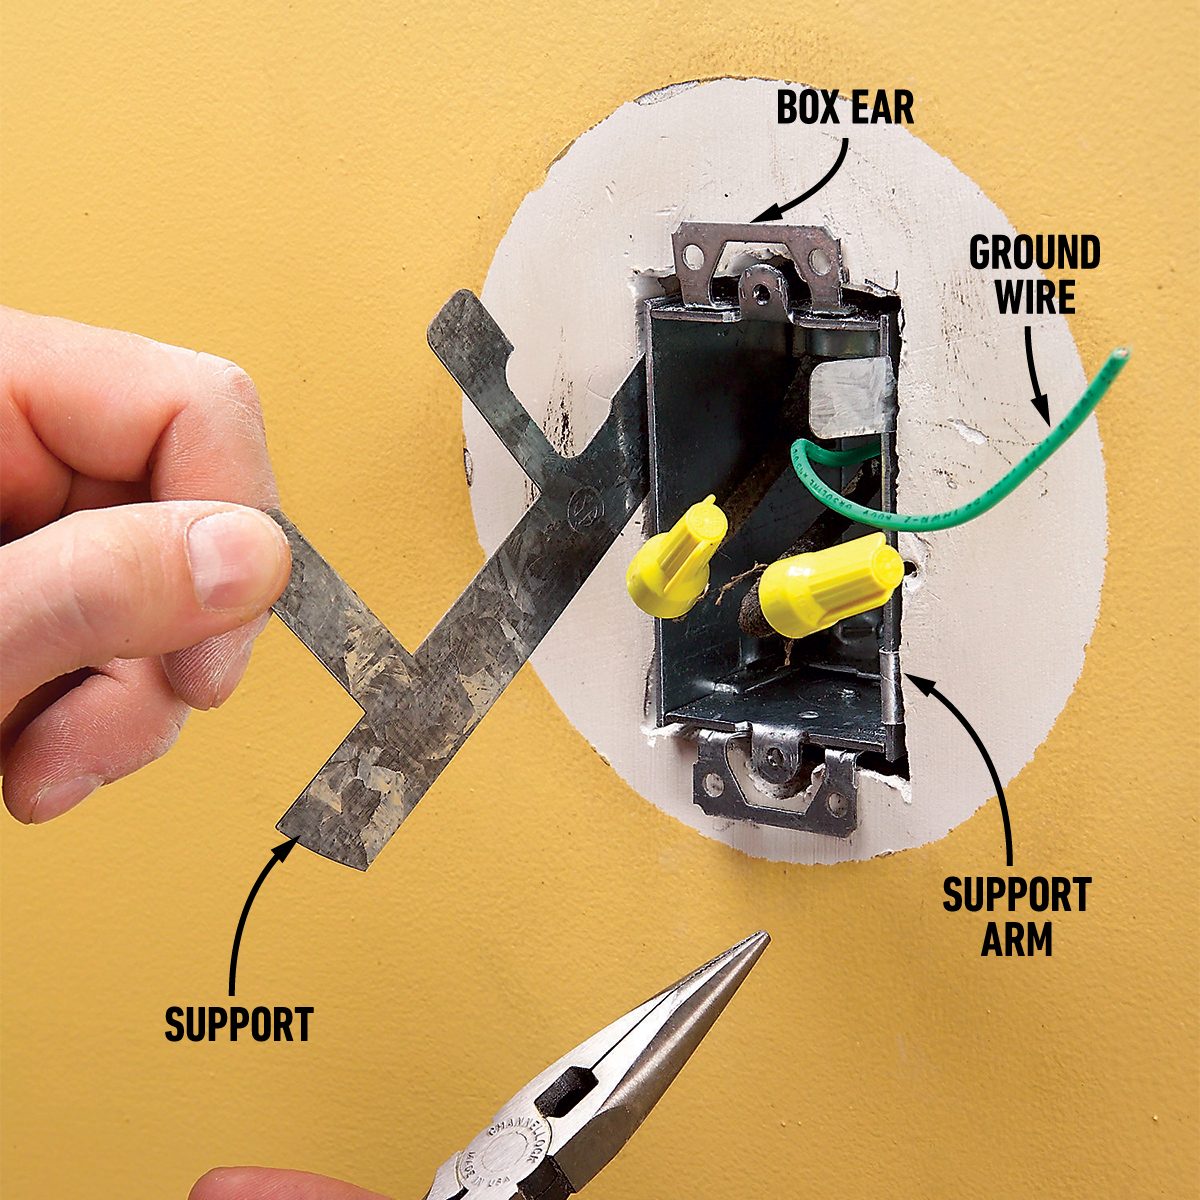
Anchor the box
Insert the wires through the box clamps and insert the new box. Slip metal box supports along each side and bends the arms around the box edges to anchor it solidly. Mount the fixture.
Finally, mount the fixture according to the directions. When you attach the mounting strap to the box, use the same size screws you use to mount receptacles and switches.