Attractive and functional DIY closet shelves you can build in a day.
Our editors and experts handpick every product we feature. We may earn a commission from your purchases.Learn more.


Published on Jan. 31, 2025
Attractive and functional DIY closet shelves you can build in a day.
Our editors and experts handpick every product we feature. We may earn a commission from your purchases.Learn more.
A full day
Intermediate
$100 - $150
Transform your cluttered closet with this DIY-friendly project on how to build closet shelves from scratch.
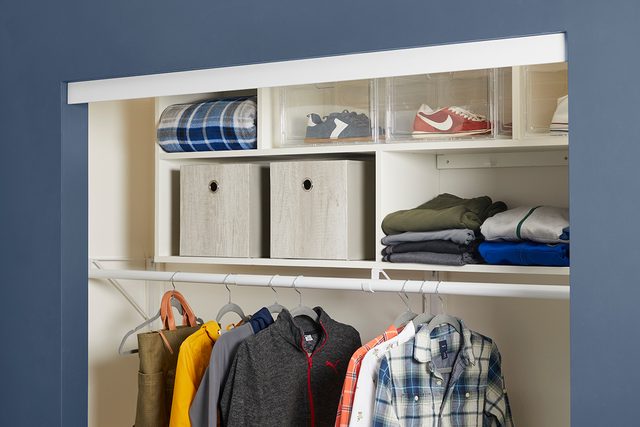
Closet storage and organization starts from the top down. What does one do with that space above your clothes rod? If you have standard ceilings there could be a good 24 to 30 inches of open space above the rod in your closet. To throw one shelf above a clothes rod in a closet would be easy but, why not take advantage of all that space and customize it a bit further to fit closed plastic shoes bins and fabric boxes?
I will admit, when it comes to organization, I am a bit fastidious. I truly believe the only way to find what you know you already have is to give it a specific place to live. My closet is no exception so, off I went and purchased some bins to make a custom two-tiered closet organizer shelf for the upper portion of my closet.
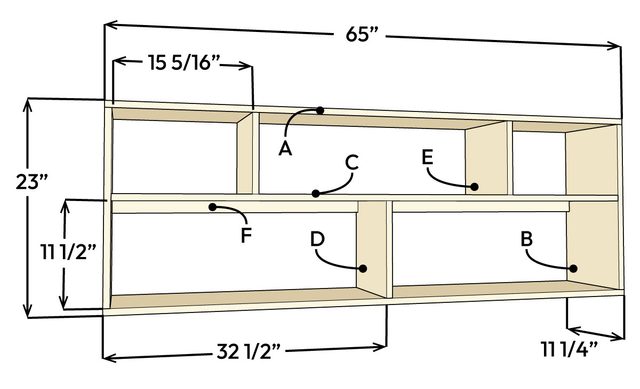
| KEY | QTY. | PART | DIMENSIONS |
| A | 2 | Top/bottom | 3/4″ x 11-1/4″ x 65″ |
| B | 2 | Side | 3/4″ x 11-1/4″ x 21-1/2″ |
| C | 1 | Middle shelf | 3/4″ x 11-1/4″ x 63-1/2″ |
| D | 1 | Lower shelf divider | 3/4″ x 11-1/4″ x 11-1/2″ |
| E | 2 | Upper shelf divider | 3/4″ x 9-1/4″ x 11-1/4″ |
| F | 2 | Hanging ledger | 3/4″ x 1-1/2″ x 31-3/8″ |
Cut all the pieces listed in the cut list above from the 1×12 primed lumber. Pre-paint all the pieces before building the closet shelves to make touch-ups easier with fewer coats to build up at the end.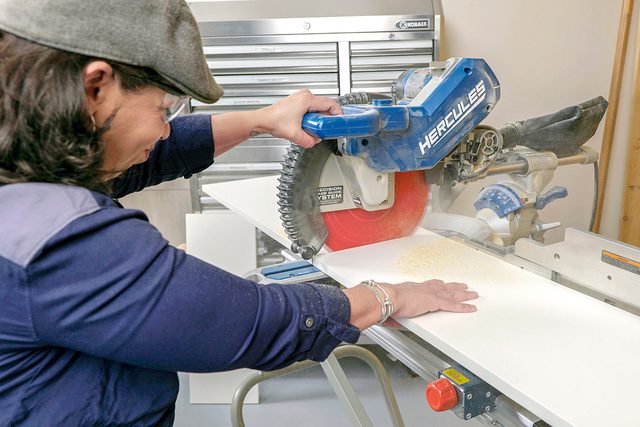
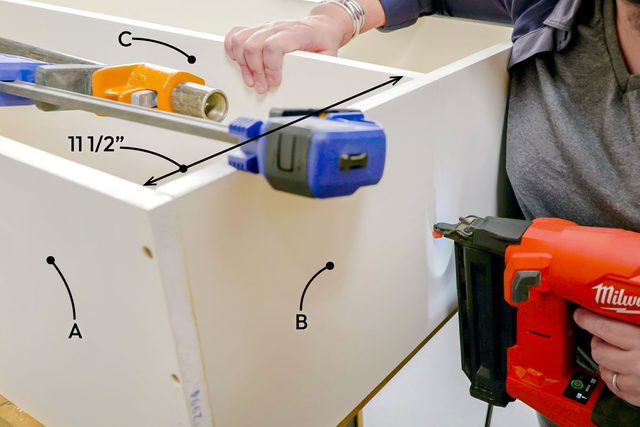
Construct a square from the top and bottom (A) and two sides (B). Use wood glue and 1-1/2-in. 18ga. brad nails to pin the top and bottom into the edge of the sides, and countersunk #8 x 1-1/2-in. screws to set the pieces into place. This is the method of assembly I use for all the pieces of the closet shelves: glue and brad nail, then set with screws.
Inside of the square you just built, secure the middle shelf (C) to the two sides (B) so there is an 11-1/2-inch opening left below it.
Install the lower shelf divider (D) centered on the bottom (A) of the unit and middle shelf (C), 32-1/2-inches in from either side is center of the unit. Use a square to ensure the openings end up straight and square.

Install the two upper shelf dividers (E), securing them to the top (A) and middle shelf (C) to create three openings. The upper dividers should be attached so they are centered over the two bottom openings that were created when the lower divider (D) was installed, which is set in from the sides by 15-5/16 inches.
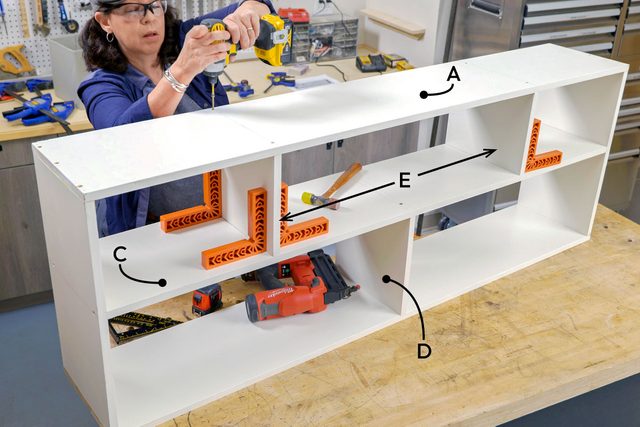
For secure hanging of this unit, install two ledger pieces (F) along the bottom, back edge of the middle shelf (C). Use wood glue, nails, and screws to attach the ledgers, not only through the middle shelf (C), but also the sides (B) on each end. These will give you a place to screw into the wall studs and give the structure sheer support for longevity.
Once the ledger is secure, use a nail set to ensure all the nails on the entire unit are set below the surface. Then, fill the nail and screw holes with filler, sand them back when dry, and retouch the paint on the shelving unit before hanging it on the wall.
Using a stud finder verify where studs are located under the drywall. This will determine where you can screw directly into a stud and where you will need to use drywall anchors.
Place the shelf unit on top of brackets supporting the clothing rod, centering the whole unit from side to side. If you don’t have center clothing rod support brackets to rest the unit on, you’ll need to use a helper to hold the unit in place while you install it. If this is the case, make sure the bottom of the unit is installed at least 2-inches above the top of the clothing rod to ensure you can easily take clothing hangers on and off of it.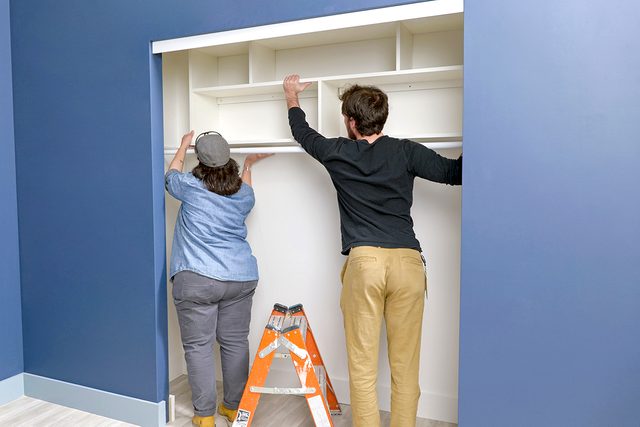
Level and screw the ledger of shelf unit directly into at least three wall studs. Pre-drill pilot holes through the ledger to make it easier to secure. In other locations where the ledger hits hollow drywall, install properly rated drywall anchors to secure it at that location.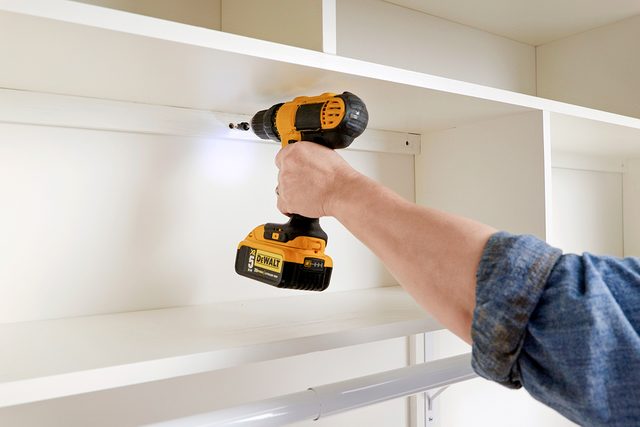
Screw shelf unit to clothing rod brackets from underneath the unit. This will give it stability and help keep the unit in place. If your brackets do not provide holes. Drill holes with a metal drill bit.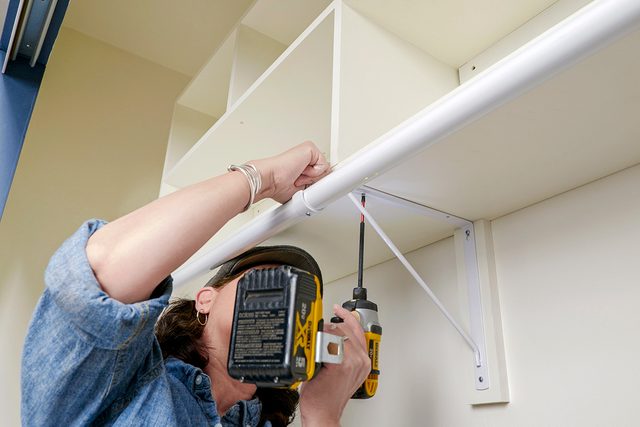
A shelf that is 11-12 inches wide will work well for a standard 24-inch reach-in closet. However, if the bedroom closet is deeper, a shelf of up to 16 inches can be used.
Plywood, or solid wood such as poplar, pine, or hardwoods, are all suitable materials for building closet shelves.