


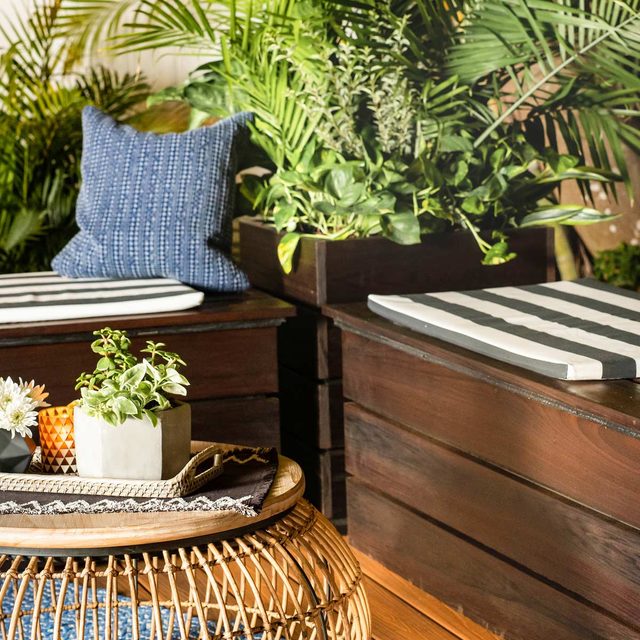
Elegant outside, enormous storage space inside!
A full day
Beginner
$251-500
Introduction
While looking for patio bench ideas, I came across a sleek modern design with tons of storage inside. Perfect. The price tag—over $1,000—wasn’t a problem because I knew I could build my own version, and in just a day. And so can you. It’s really just a plywood box dressed up with solid wood slats.
Money and Materials
This outdoor storage bench is mostly treated plywood, which stands up to the elements but can be unfriendly to work with. It’s often slightly damp, if not soaking wet, so let it dry in your shop for a week or two before cutting. Store it flat to minimize warping as it dries. Caution: Warped boards are dangerous to cut on a table saw. A circular saw with a cutting guide is a safer option.
I used TMW for the bench’s exterior, which drove up the cost to $600. Building the bench with cedar decking, which is rot-resistant, would cost $300. The least expensive choice is construction-grade pine ($100), which would give the bench a more rustic look.
Thermally Modified Wood
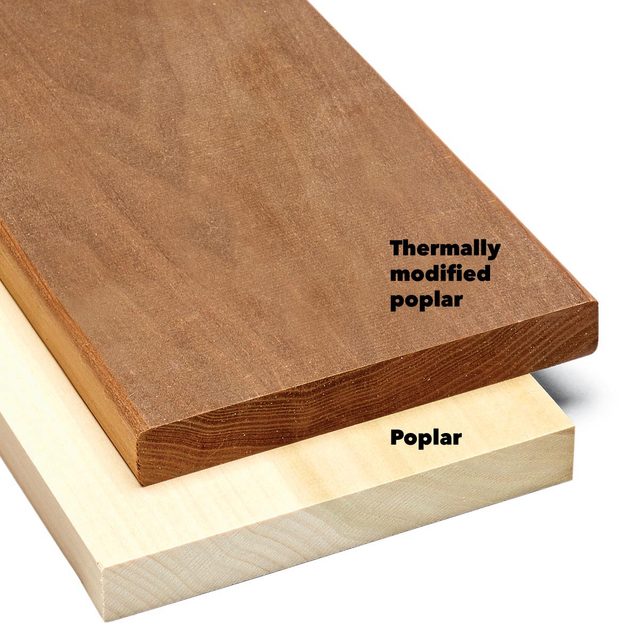
I chose thermally modified poplar for this bench. Normally, poplar would be a poor choice for an outdoor project, but thermal modification changes the rules. Thermally modified wood (TMW) has essentially been cooked, removing the organic compounds. The chemical-free process makes wood more stable and resistant to decay and insects.
This process naturally darkens the wood. Left unfinished, it will weather gray like any other wood.
The price of TMW varies. At the time this article was published, my supplier had pine for $1.25 per linear ft., poplar for $3.80 and ash for $4.20. To find TMW, ask your local hardwood lumberyard or search online.
Cutting List

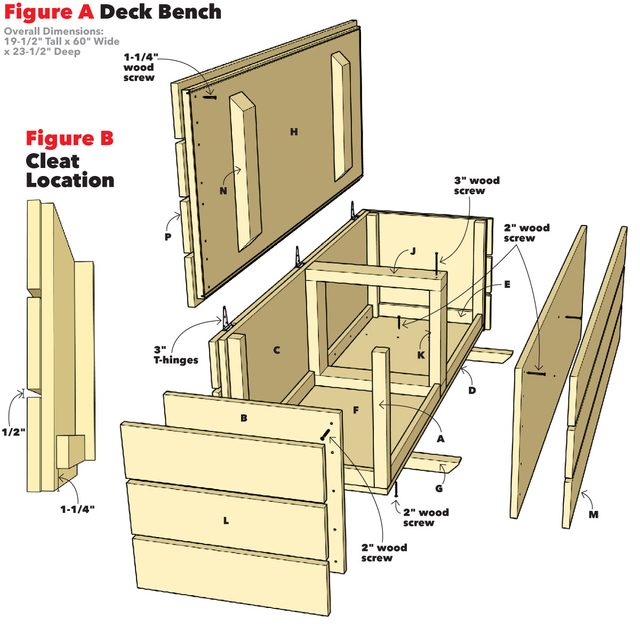
Outdoor Storage Bench Project Plans
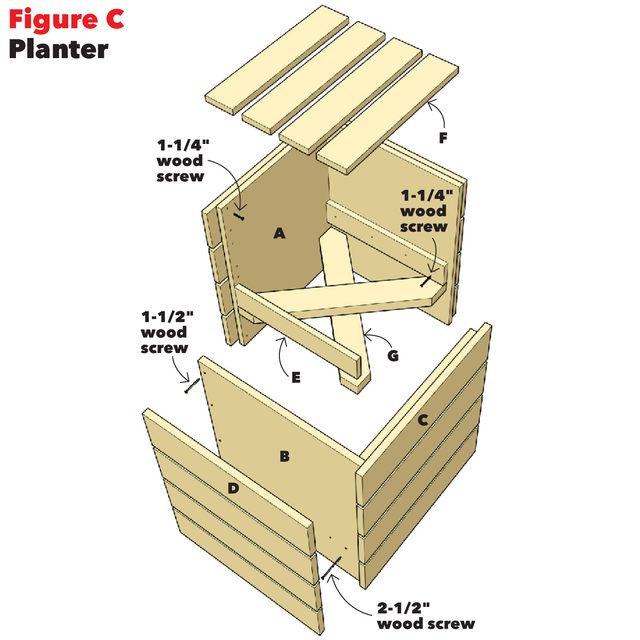
Matching Planter
The planter is even simpler to build than the bench because the inner box has no top or bottom. Glue and screw the sides together, screw in the diagonal braces and then paint any visible surfaces. Add the slats using the same method as for the bench. Position the side cleats at a height suitable to the pot you’re setting in the planter. Don’t attach the platform slats. If the wood rots, they’ll be easier to replace.
Planter Plans
Tools Required
- Circular saw or table saw
- Clamps
- Drill/driver
Materials Required
- 1-1/4" exterior wood screws
- 2" exterior wood screws
- 2x2 x 8' treated pine (2)
- 2x4 x 10' treated pine (add one 2x4 x 8' for the planter)
- 3" exterior wood screws
- 3/4" x 4' x 8' sheets treated plywood (2)
- 70 linear ft. of 1x6 lumber (add 30 ft. for the planter)
- Construction adhesive
- Douper 200N/44lb Heavy Duty Gas Springs Lid Support Hinge
- Exterior latex paint and primer
- Tee hinges (3)
- Wood glue
Project step-by-step (11)
Step 1
Assemble the Box Sides
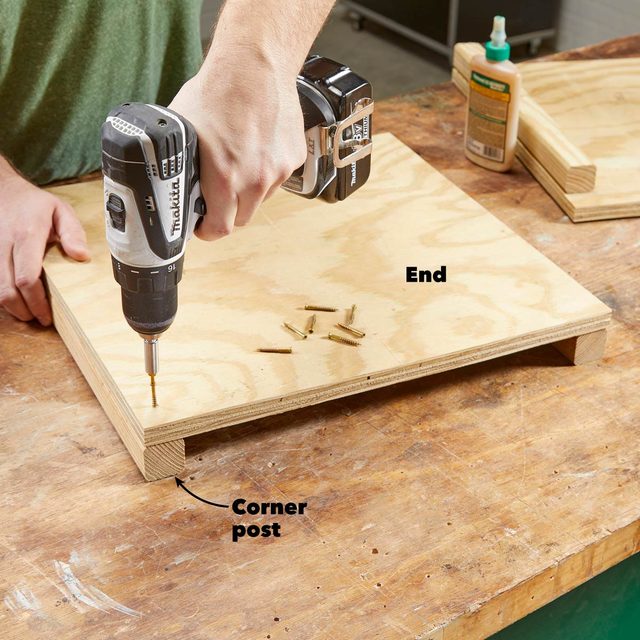
Attach the corner posts (A) flush with the long edges and tops of the box ends (B). Glue and screw the sides (C) and ends together. Be sure to use a waterproof glue.
Step 2
Install the Bottom
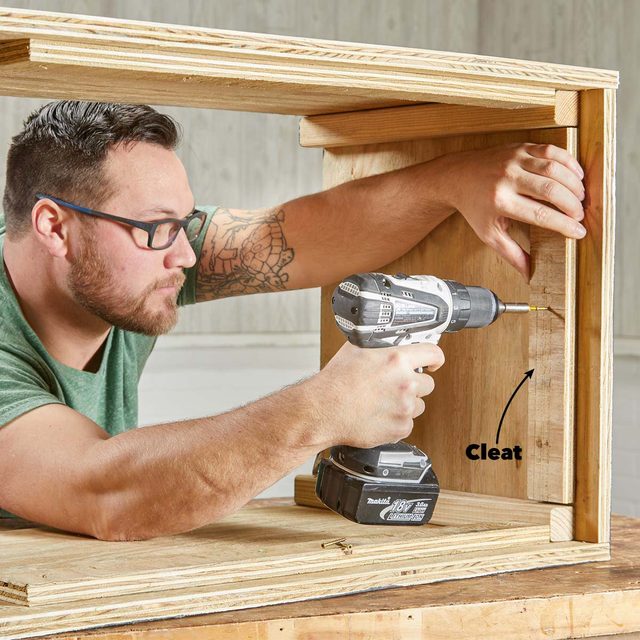
Glue and screw the bottom cleats (D and E) around the inside of the box (see Figures A and B). Apply glue to the underside of the cleats, drop the bottom (F) into place and fasten it with screws. Glue and screw the feet (G) to the bottom.
Step 3
Cut a Drip Groove
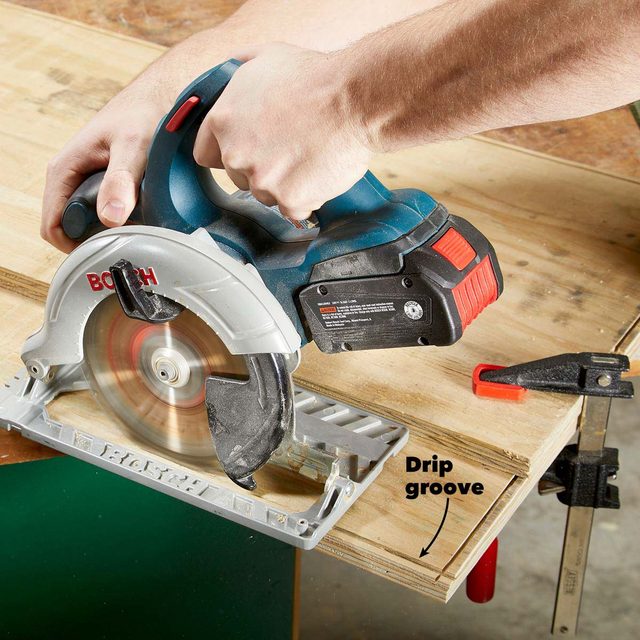
Cut a kerf all the way around the lid’s (H) underside so that rainwater will drip off the lid instead of clinging to the lid and running into the box. Apply exterior latex to the outer faces and visible edges of the lid and box.
Step 4
Install the Frame
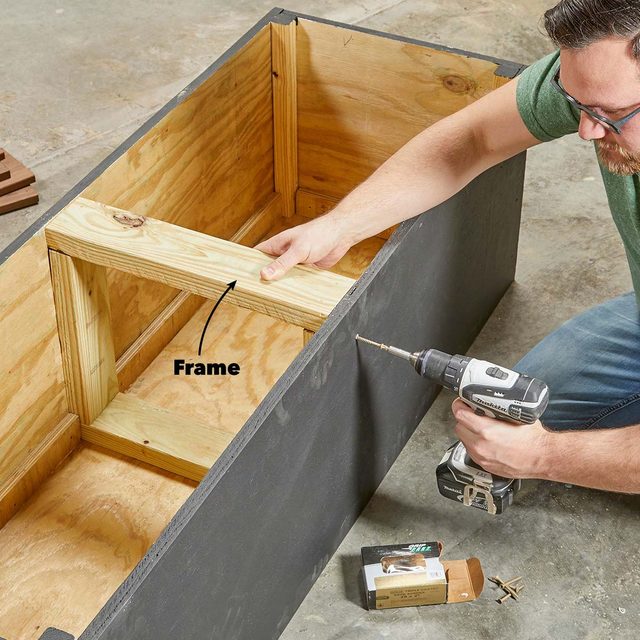
Fasten the center frame (J and K) inside the box using glue and screws. The frame gives the box rigidity and helps flatten out any warping in the plywood.
Step 5
Attach the First Slat
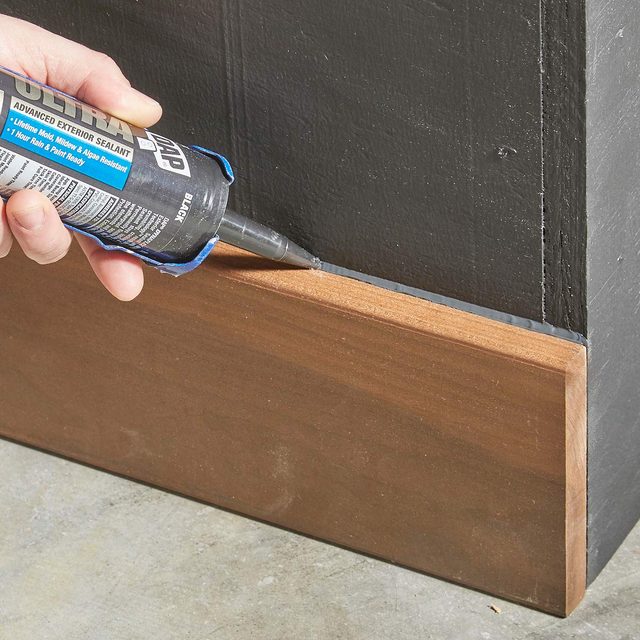
Attach the bottom end slat (L) flush with the box’s bottom edge using exterior construction adhesive and driving screws from inside the box. Apply a bead of exterior caulk along the top edge of the slat so water can’t seep behind the slat.
Step 6
Attach Remaining Slats
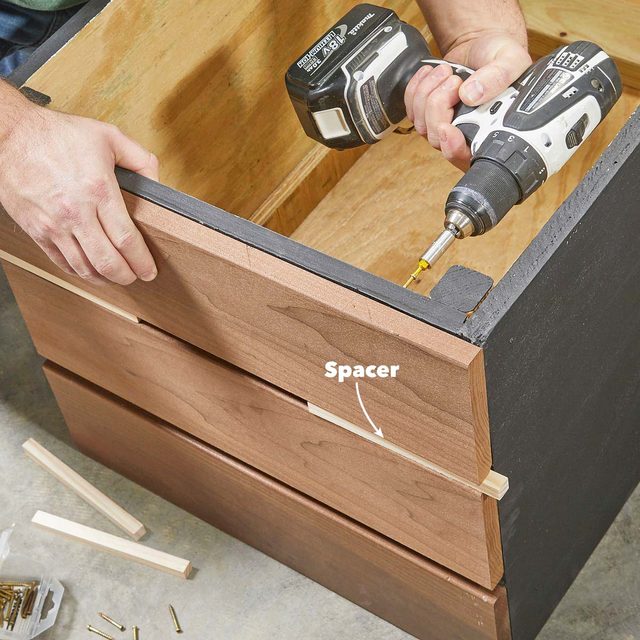
Fasten the remaining end slats, using spacers and caulking the top edges as you go. Attach the side slats (M) using the same method. These short (1-1/4-in.) screws don’t have a lot of pulling power, so maximize it by predrilling and countersinking clearance holes through the plywood before driving the screws.
Step 7
Fasten the Lid Battens
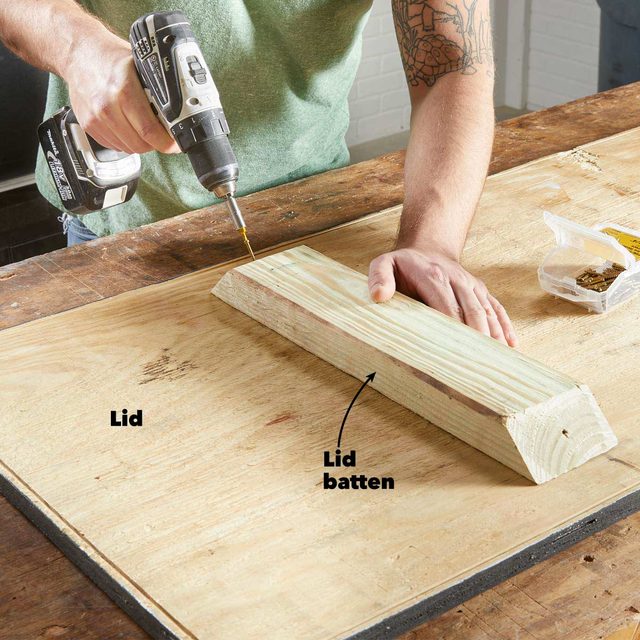
Tack the lid battens (N) to the underside of the lid using glue and screws. Flip the lid right side up and secure the battens with longer screws. The battens help keep the lid flat.
Step 8
Assemble the Lid
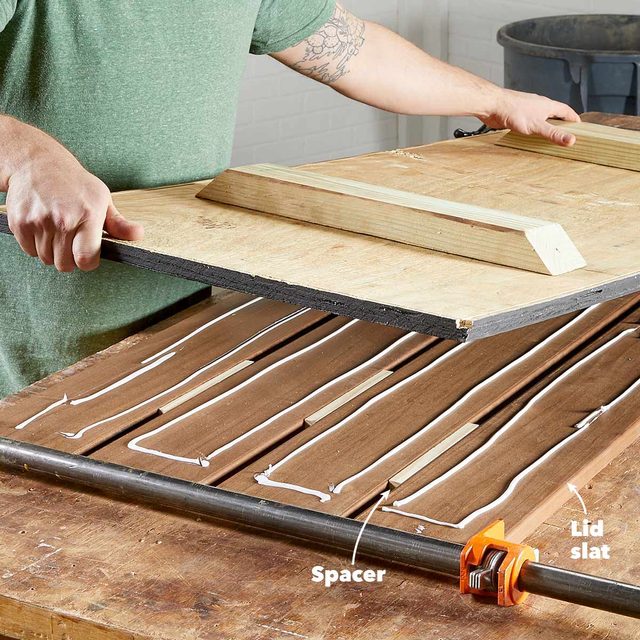
Clamp the lid slats (P) together, placing 1/2-in. spacers between each pair of slats. Apply construction adhesive to the slats, and then center the lid on the slats. Drive screws through the lid into the slats. Again, predrill the screw holes for maximum pulling power.
Step 9
Install the Hinges
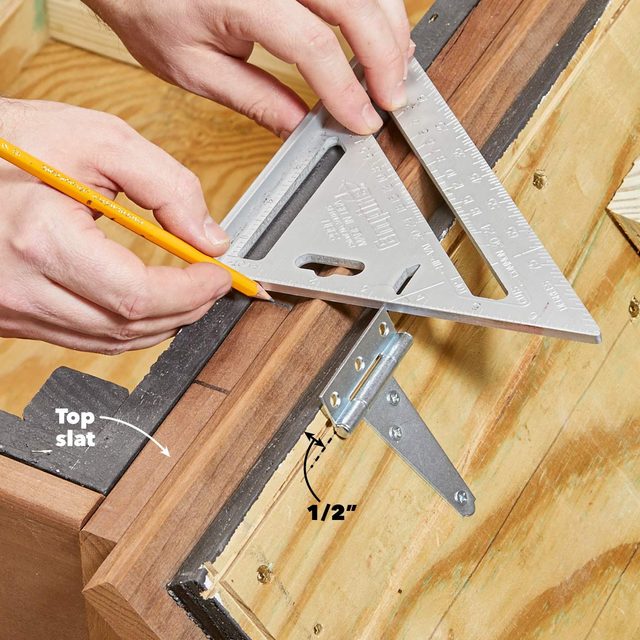
Attach the hinges to the lid, centering the hinge barrels 1/2 in. from the lid’s edge. Then prop the lid in position near the box edge. Mark the hinge mortise locations on the top slat. The mortise depths are equal to the hinge barrel’s diameter.
Step 10
Cut Hinge Mortises
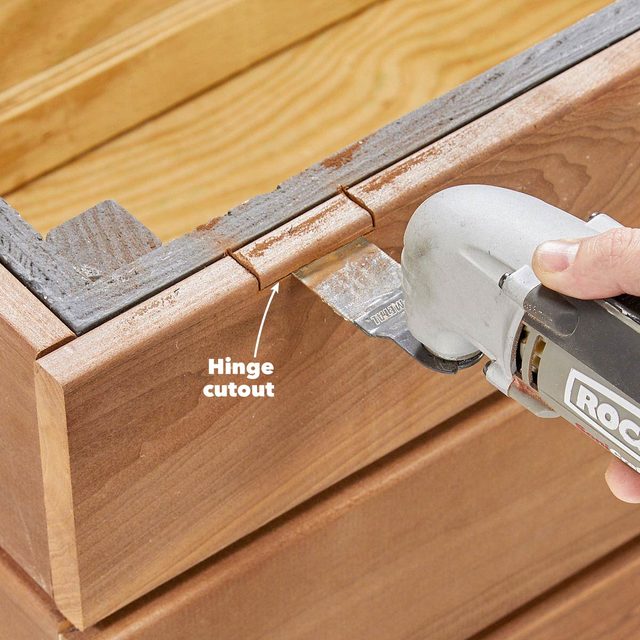
There are many ways to cut hinge mortises. I used an oscillating multitool with a square, flush-cutting blade. It’s well suited to the task, acting as both chisel and saw. Once all the mortises are cut, attach the lid.
Step 11
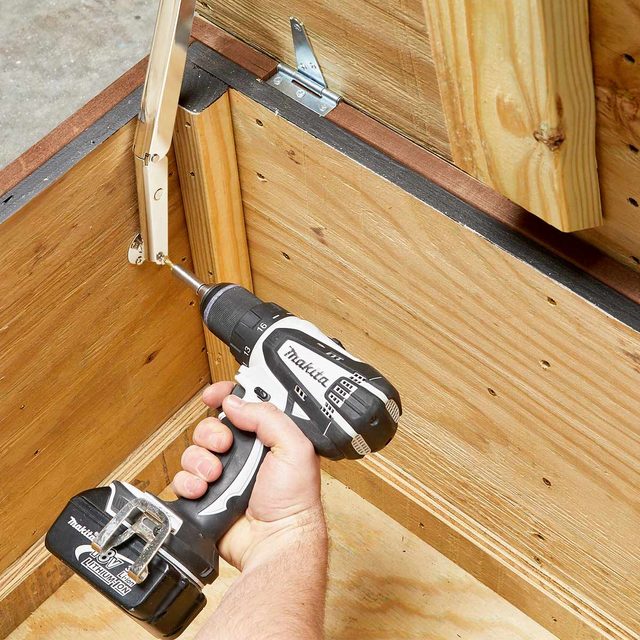
Install Lid Stays
I chose these pneumatic props to hold the lid open and add a little assistance in lifting the heavy lid. Substitute less expensive lid supports if you like. Apply the exterior finish of your choice. We used an exterior penetrating oil stain. If you’re looking for something with a bit more storage than this bench, try your hand at building an outdoor storage locker.