Multiple Days
Intermediate
$101–250
Introduction
Need a great-looking bookshelf with classic lines by tomorrow? Using clever shortcuts and standard materials, you can build a bookshelf like this in a day.
Many of us love the idea of spending weeks on a complicated woodworking project, but few of us have the time. By taking some shortcuts, you can simplify the whole process of learning how to make a bookshelf and still produce handsome results.
This little bookcase showcases some of our favorite shortcuts: some save time, some minimize mistakes and others are low-effort paths to high style. It all adds up to a project you can build in a day, though finishing will add a few hours afterward. You’ll find all the materials in stock at most home centers.
Also, don’t forget to find out how to stabilize a bookcase on carpeting.
Tools Required
- Air compressor
- Air hose
- Brad nail gun
- Circular saw
- Cordless drill
- Countersink drill bit
- Drill/driver - cordless
- Dust mask
- Forstner drill bits
- Framing square
- Hearing protection
- Level
- Miter saw
- Orbital sander
- Router
- Safety glasses
- Table saw
- Tape measure
Materials Required
- See Materials List in "Additional Information"
- Wood glue
Project step-by-step (12)
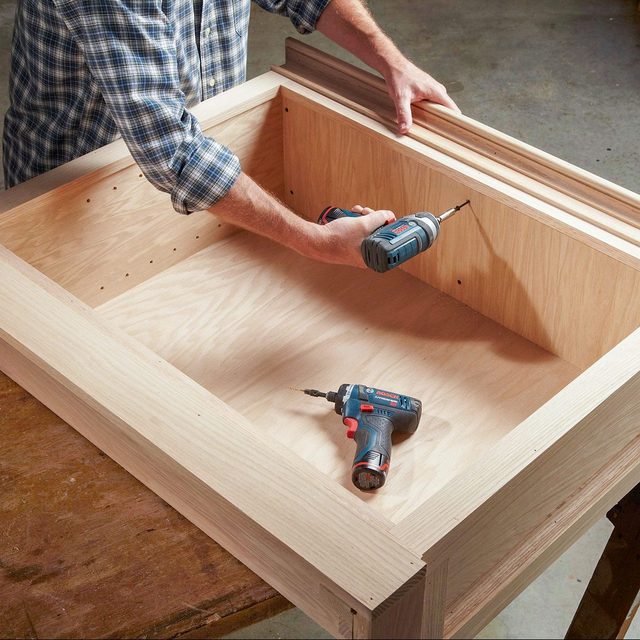
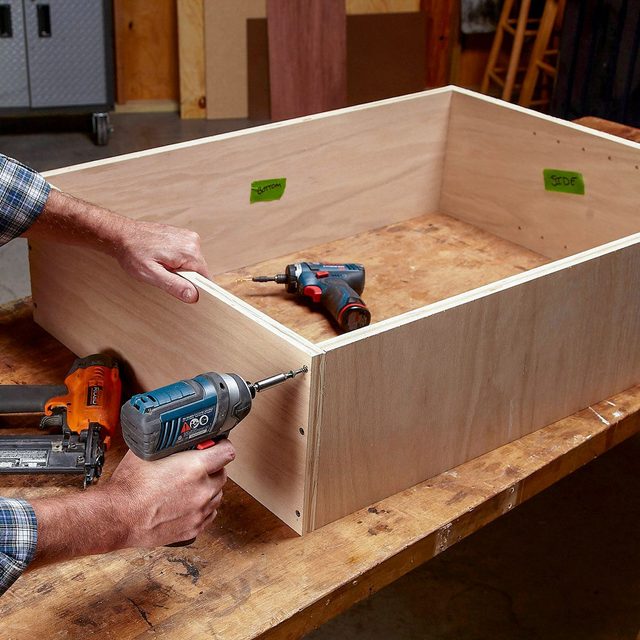
Nail the box first, then screw
- Cut the 3/4-in. plywood box parts as shown in the cutting diagram.
- Note: The grain on the box lid (B) runs the “wrong” way, but it’s well below eye level, and only your pets will see it.
- To avoid splitting the plywood, drill pilot holes before you screw the box together.
- Tack the corners together with a brad nailer, then add screws.
- Pro tip: There’s no need for glue; three screws at each joint will make the box plenty strong, and you won’t have to deal with glue squeeze-out.
Keep it simple with adjustable shelves
- Use a scrap of pegboard as a perfect template to position the support holes.
- Mark the pegboard holes you want to use and label the end of the template that goes against the bottom shelf.
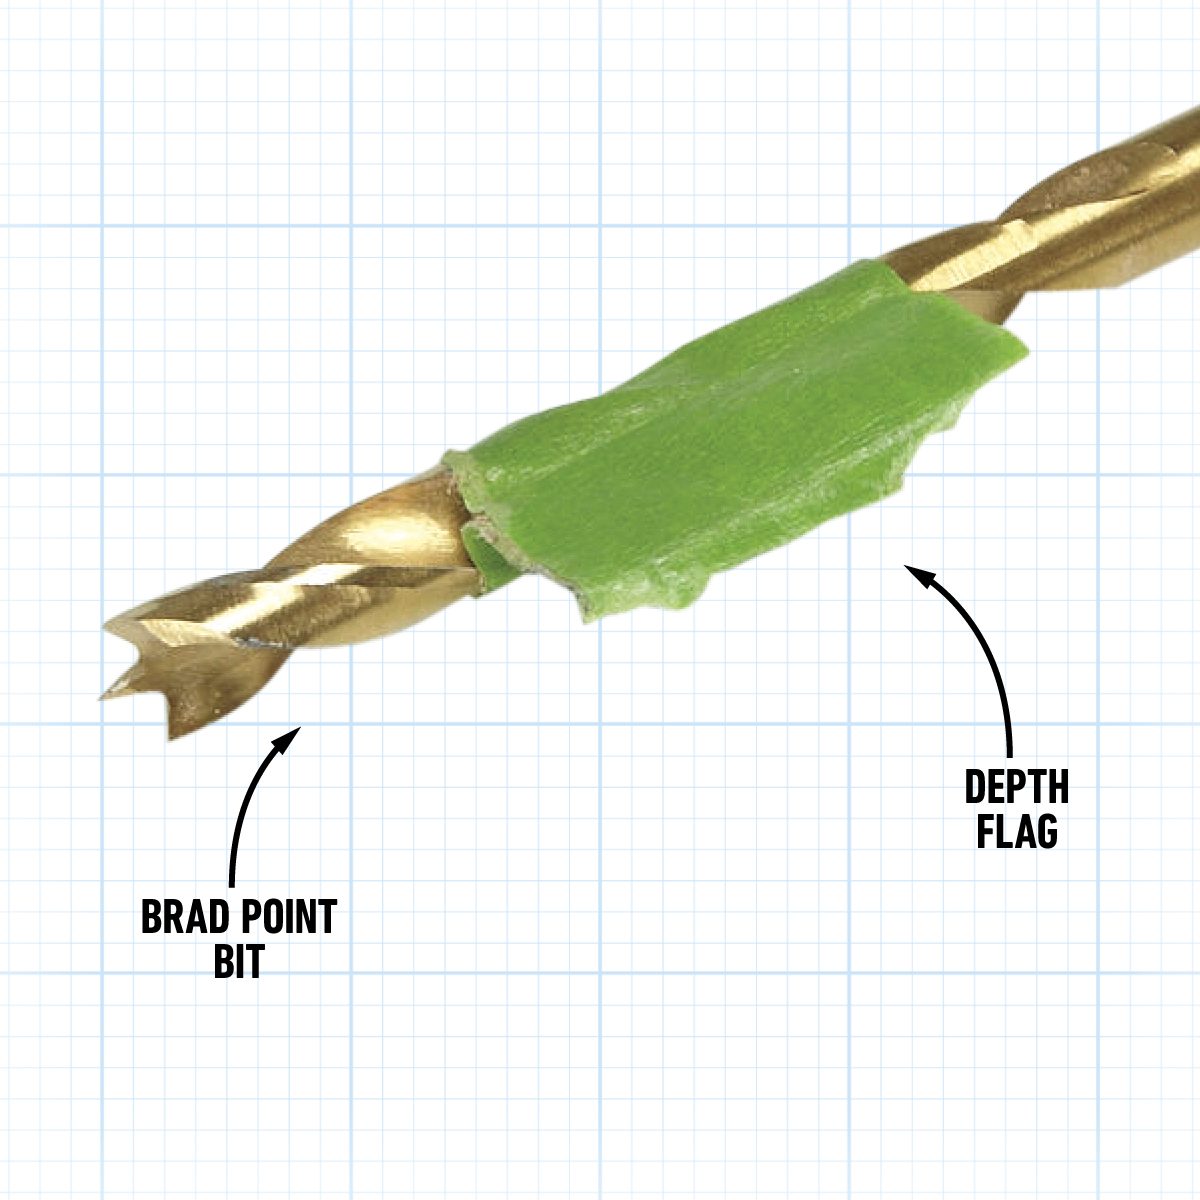
- Drill the shelf holes with a brad point bit.
- Pro tip: Wrap the bit with a masking tape “flag” to mark the depth of the hole.
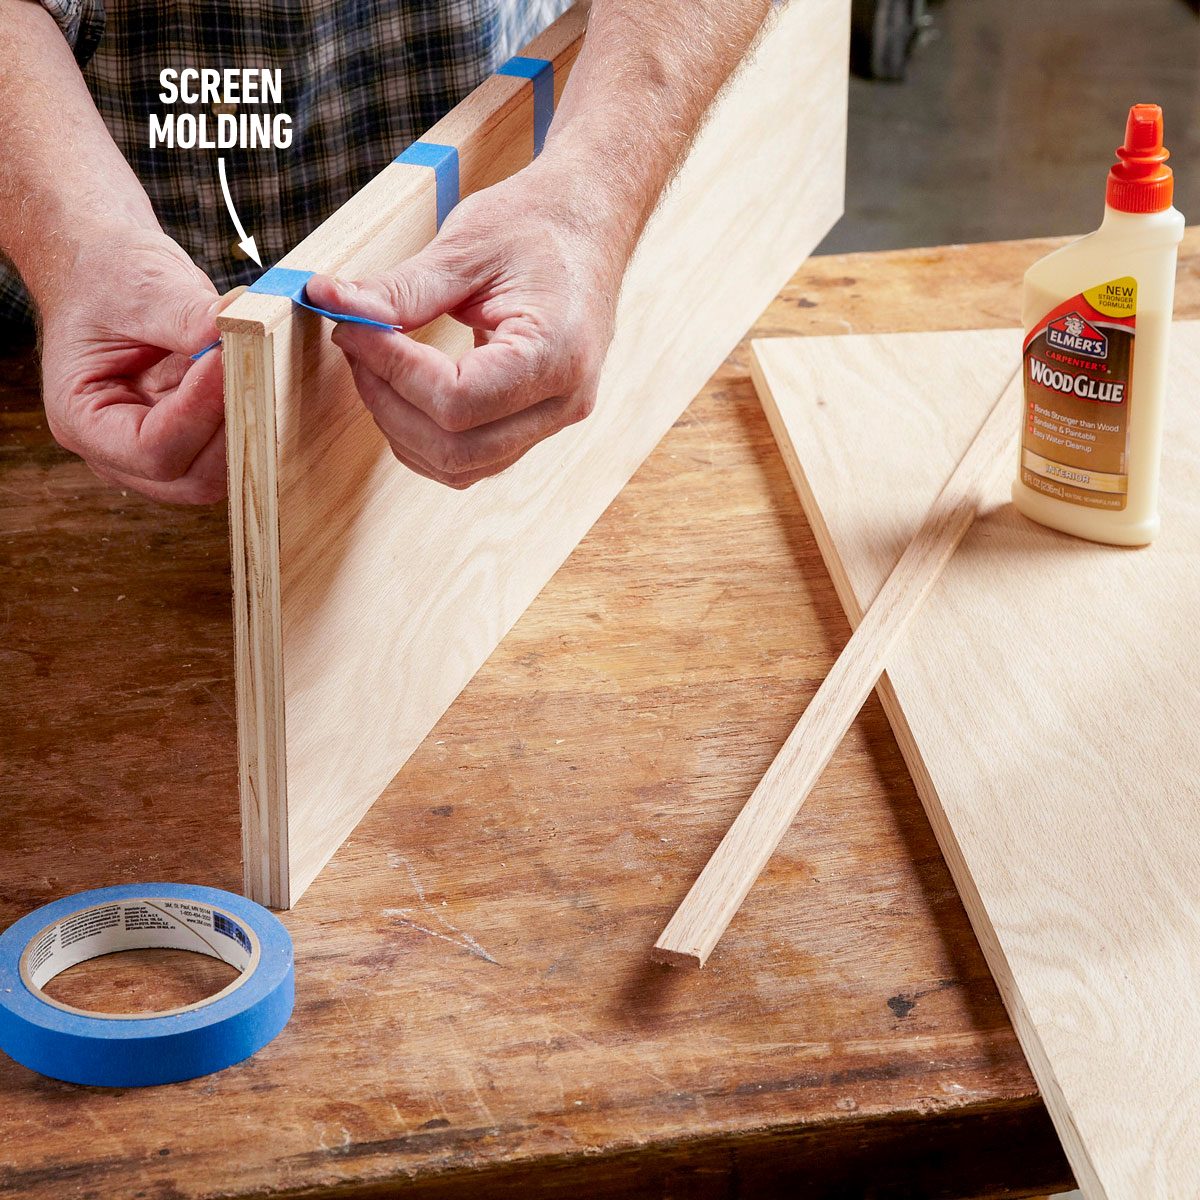
Add shelf edging
- Spread a light bead of glue over the front edges of the shelves.
- Set the screen molding in place and “clamp” it with masking tape.
- Note: Pull the tape tight as you apply it.
Assemble corner stiles, then cut to length
- Start with corner stile parts (E and F) that are about an inch longer than their final length.
- Trim the ends to length.

Attach rails and stiles
- Just glue and tack the spacers into place with a brad nailer.
- Glue and nail on the rails and stiles.
- Pro tip: Use only enough nails to hold the parts in place while the glue sets.

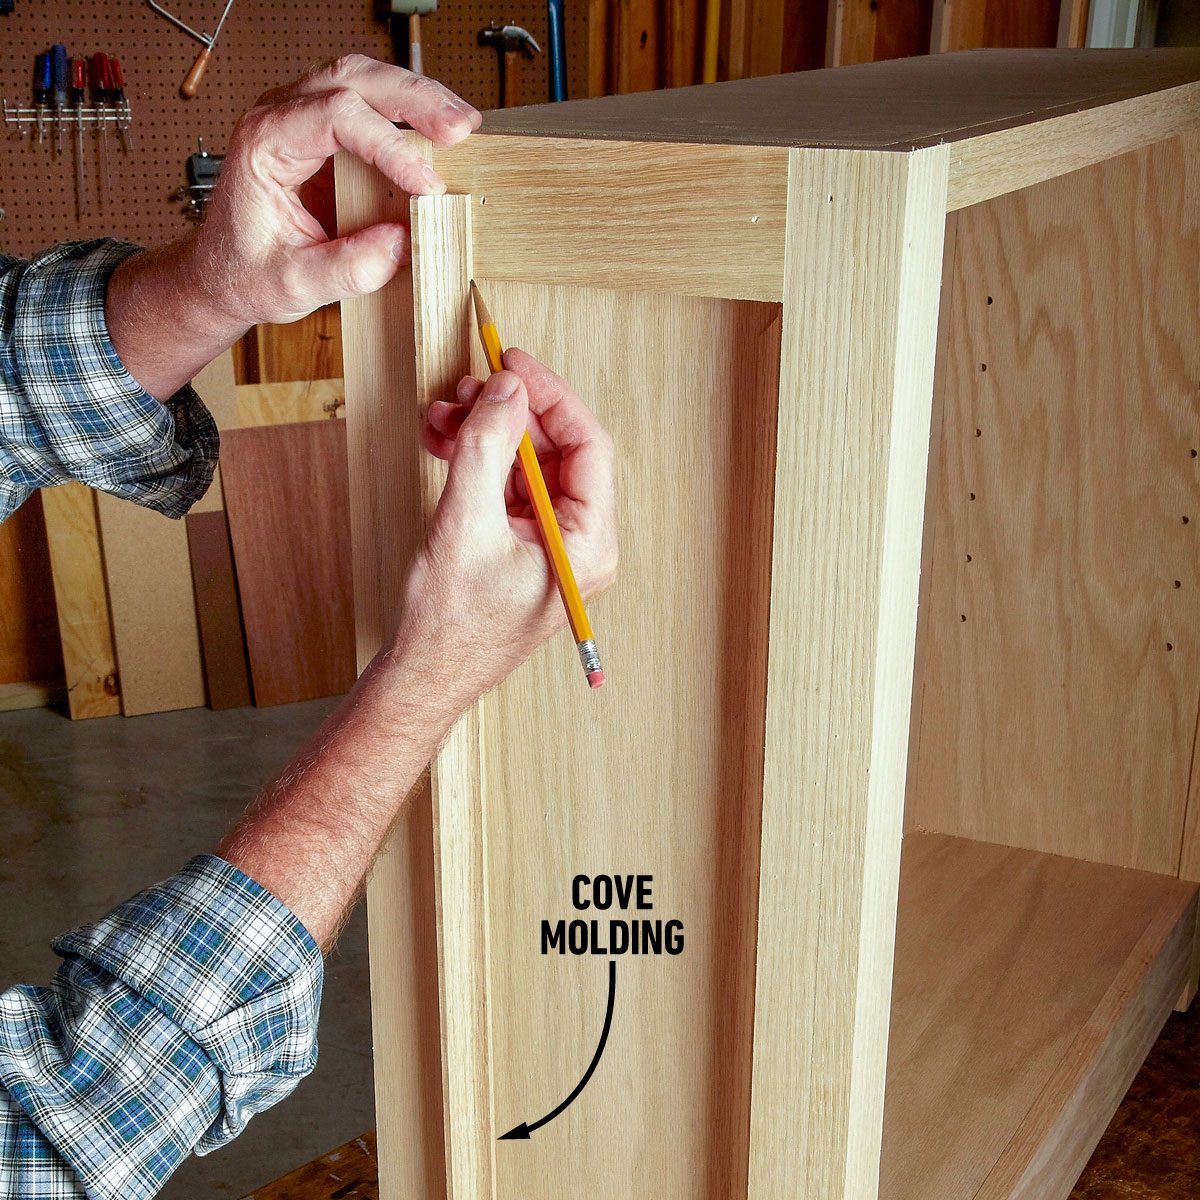
Add cove molding
- Miter one end of each piece and hold it in place to mark it.
- Pro tip: Cut the piece a hair long and test the fit. If it’s too long, take it back to the miter saw and shave off a smidgen.
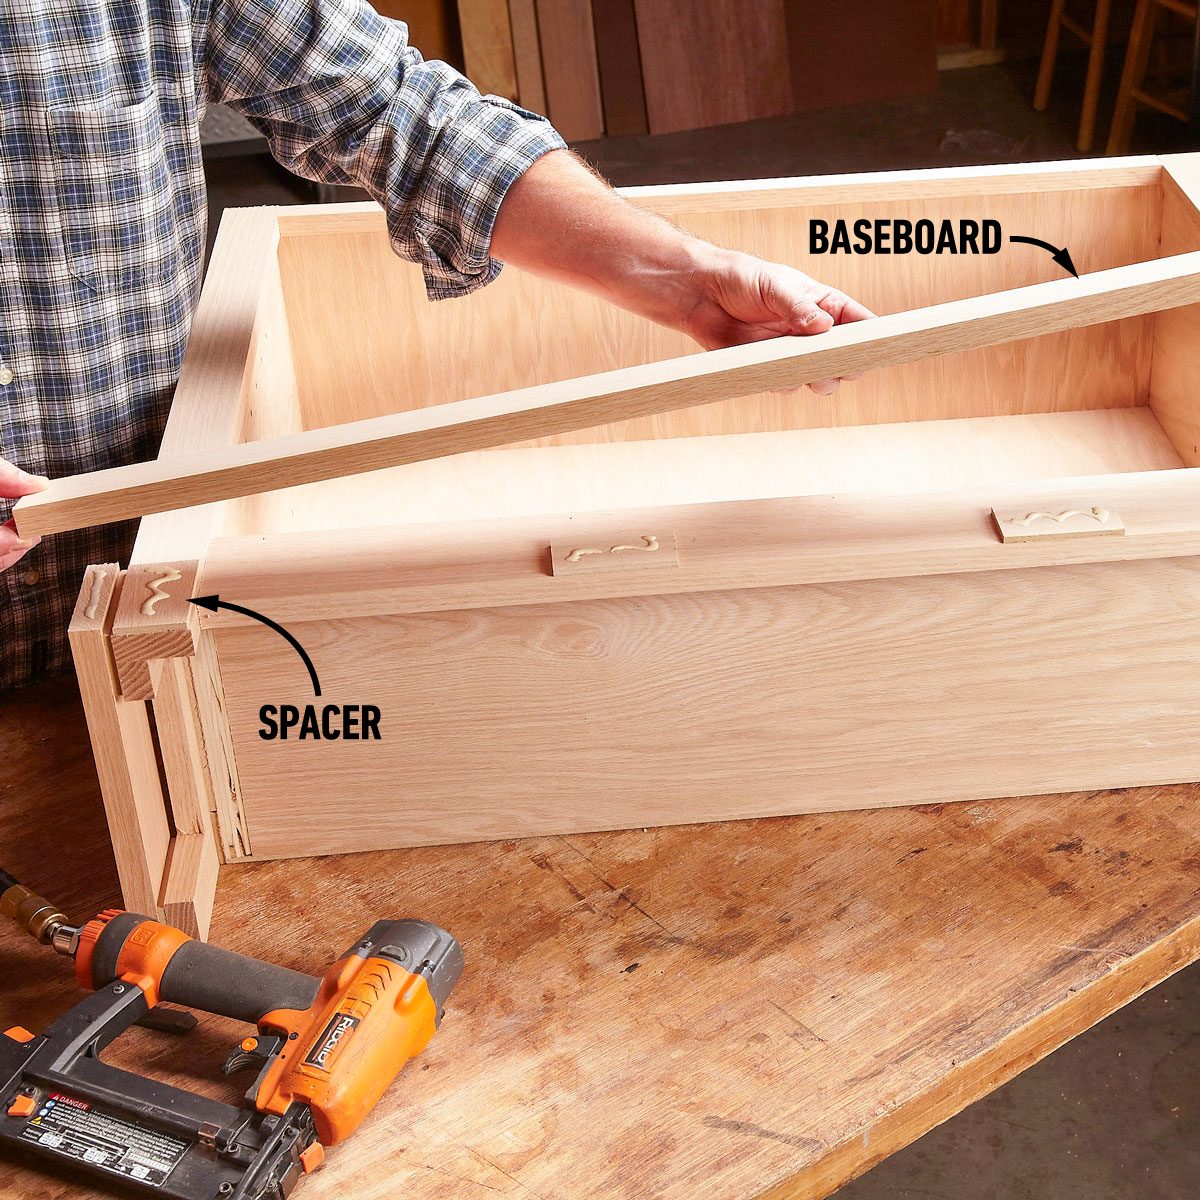
Use basic boards for the base
- Glue and tack on spacers.
- Add the baseboards.
- Sand the joints flush and add the cove molding.
- Note: The base of the shelf unit is just boards topped off with cove molding.
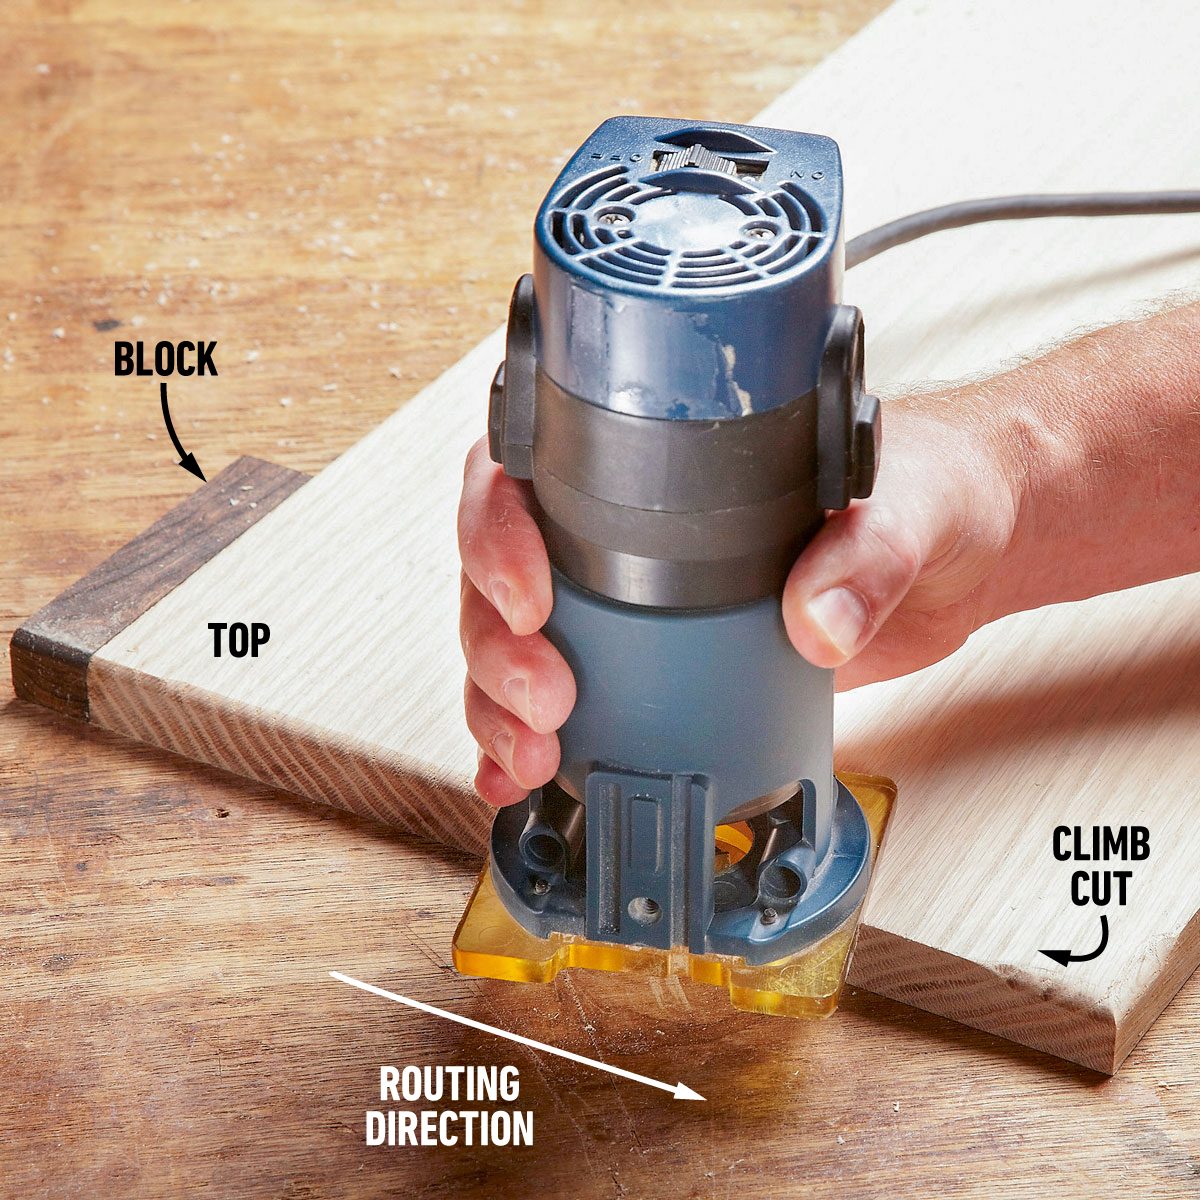
Shape the top
- Screw blocks to the back corners to prevent gouging as you begin and end routing.
- Pro tip: To prevent splintering at the front corner, make a reverse-direction “climb cut.”
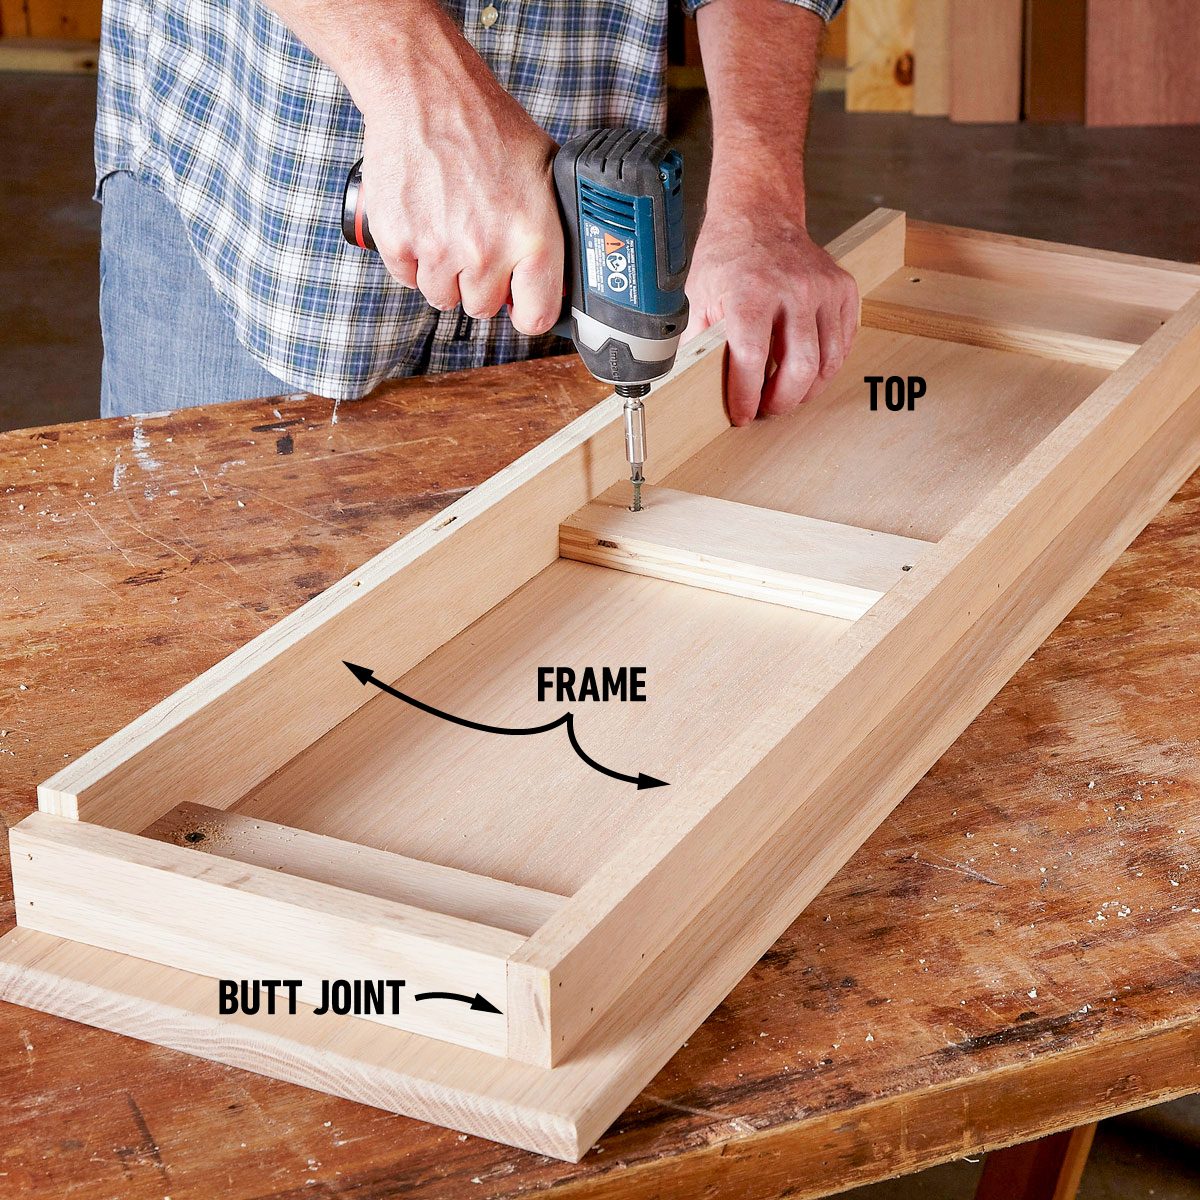
Assemble the frame
- Assemble the frame with glue and nails.
- Center the assembly and screw it to the underside of the top.
- Note: The square-cut butt joints at the corners of the frame make cutting and joining the parts a lot easier.
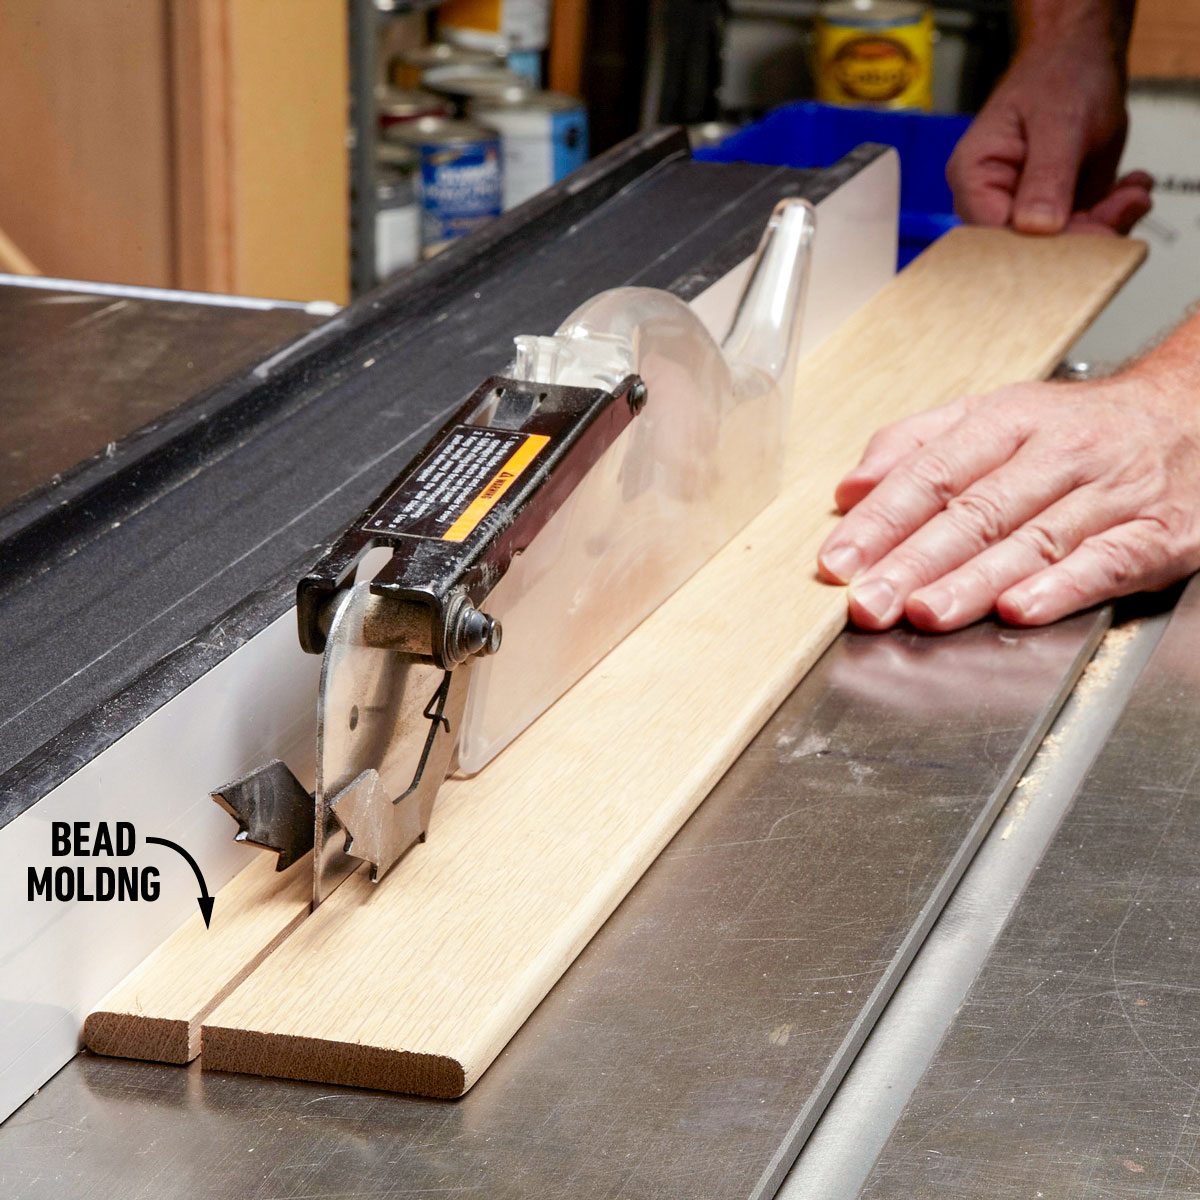
Make bead molding
- Round over both edges of a 1/2-in.-thick board.
- Sand the edges and then cut the completed moldings off the board.
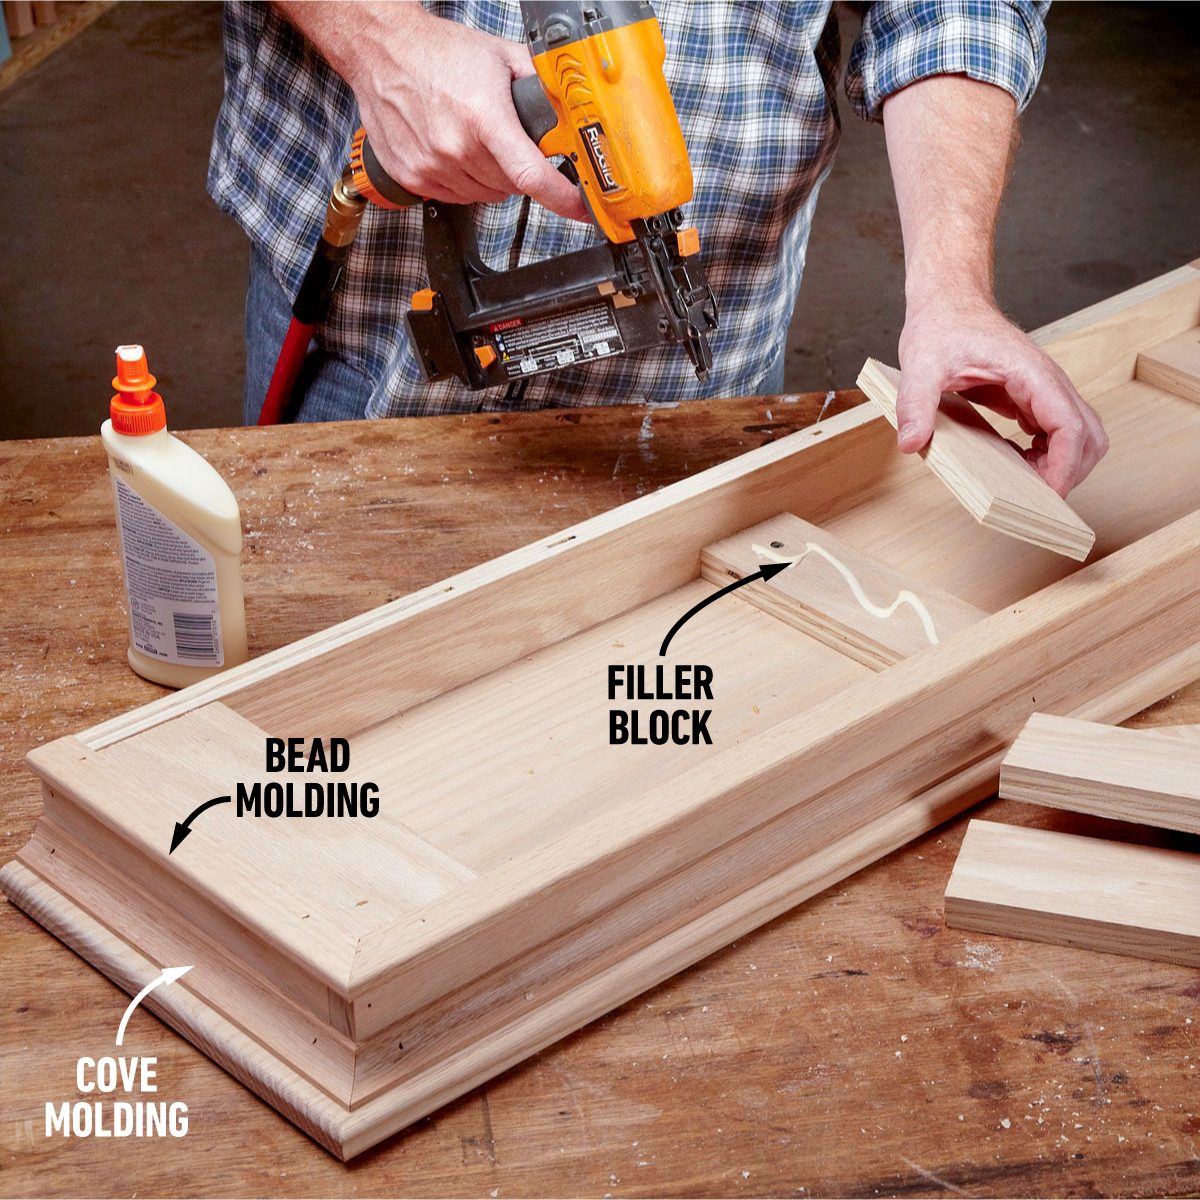
Attach the moldings
- Trim the frame with cove molding and homemade bead molding.
- Glue in two layers of plywood filler blocks.
- Note: The blocks allow the top to be screwed to the shelf box.
Screw on the top
- Mount the top with screws only—no glue.
- Note: That way, you can remove it for easier sanding and finishing.
- Center the top and drive screws through the box lid and into the filler blocks. If you’re in need of a bookcase, then this wooden ladder shelf is a great option.