Make this handy storage rack that lets you get at the plywood sheets you need!
A full day
Beginner
$51–100
Introduction
This storage rack protects your full and partial sheets of plywood and keeps them within easy reach. It also works great for storing storm windows, paneling and other large flat items.
Plywood storage rack
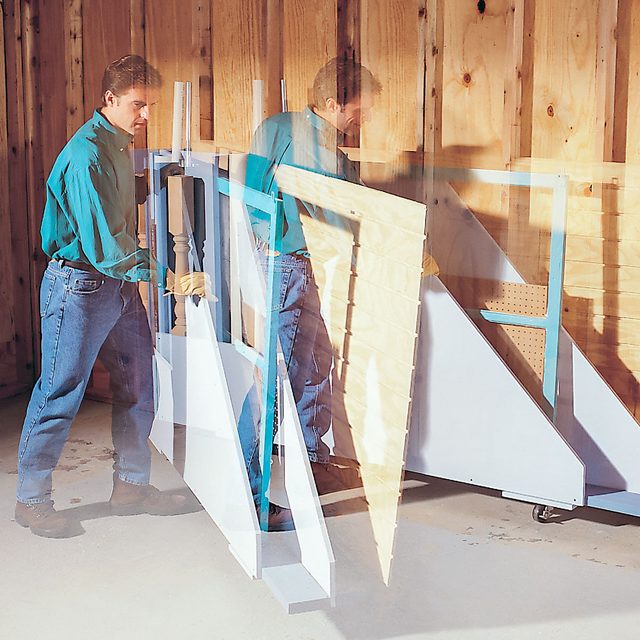
Plywood takes up relatively little space, and it’s easy to store — simply lean it against a wall. The trick is getting at it when you need it. Nine times out of 10, the job you’re planning calls for the half sheet that’s buried behind 12 others. If you’ve experienced that frustration, you’ll love this plywood storage rack.
Casters and a set of hinges are the secret for easy access. They allow you to swing the storage rack out from the wall and slide out the storm window, paneling or other item you want. Dividers strengthen the rack while letting you separate large plywood sheets from smaller ones.
Each slot has room for about six sheets of 3/4-in. plywood. Although you can modify our design and make the slots larger, keep in mind that anything that sits around for a year or two is a donation candidate.
Rack construction goes surprisingly fast. Plan an afternoon for the project, plus an hour or two to run to the home center for materials. The least expensive wood will do, but for a few dollars more you can get an AC grade of plywood that’s been sanded on one side and is usually flatter and nicer to work with.
When loaded, this rack is heavy, so make sure to buy casters rated for at least 200 lbs. each. One of the casters should have a brake for extra stability.
If you purchase all your materials new, it’ll cost a little over 100 bucks. But chances are you’ll have some of these materials lying around. This is a great chance to use up that extra 3/4-in. plywood!
Figure A: Plywood rack details
This illustration shows all of the parts of the plywood rack.
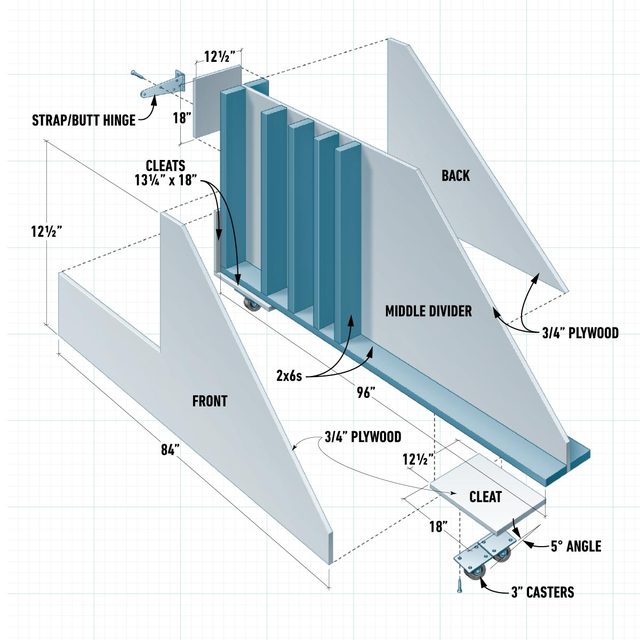
Figure B: Plywood cutting diagram
These illustrations help you use your plywood efficiently.

Tools Required
- Circular saw
- Drill/driver - cordless
- Tape measure
Materials Required
- 1 lb. of 2-in. drywall screws
- 1 lb. of 3-in. drywall screws
- Five 8-ft. construction-grade 2x6s
- One 3-in. caster with a brake
- Thirty-four 1/4-in. x 1-1/2 in. lag screws
- Three 3-in. casters
- Two 4x8 ft sheets of 3/4-in AC plywood
- Two combination 4-in. butt/ 6-in. strap hinges
Project step-by-step (8)
Step 1
Cut the plywood
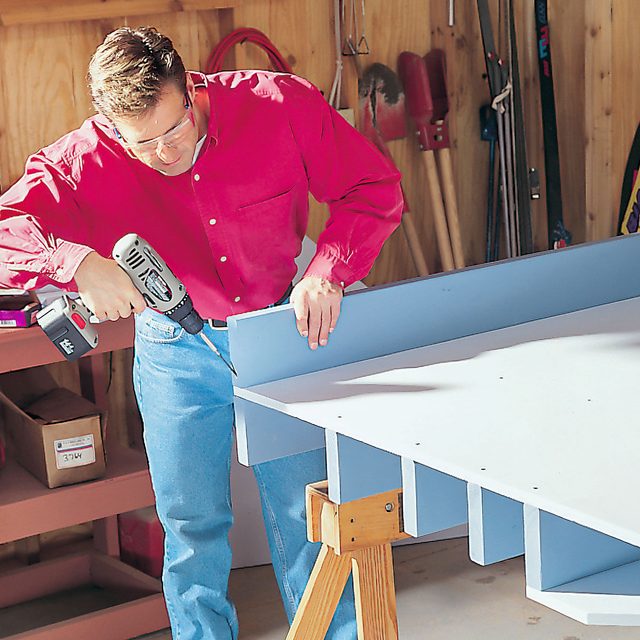
Cut the plywood to the dimensions shown in Fig. B. The cuts don’t have to be precise; you don’t need a saw guide. Wear goggles and hearing protection.

Step 2
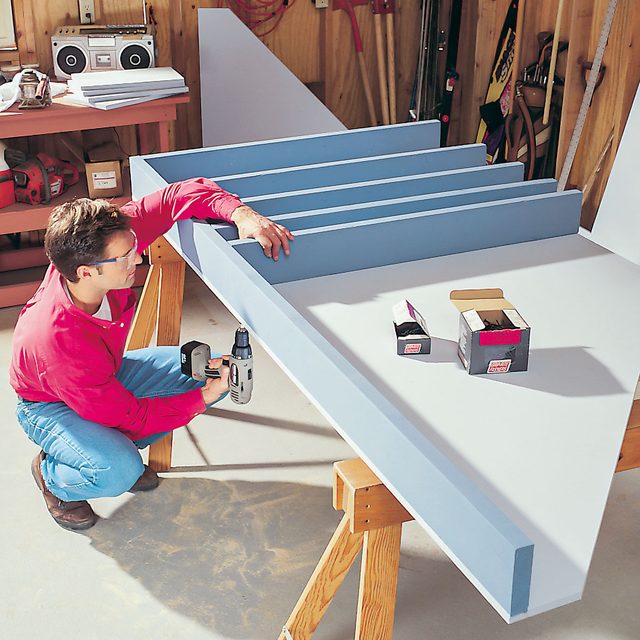
Install the 2×6 and dividers
Cut the 2x6s to length and position them on the center plywood divider. Tack them to the plywood with 2-in. drywall screws driven from underneath. Then screw the 2×6 dividers to the bottom 2×6 with 3-in. drywall screws.
Step 3
Install the front piece
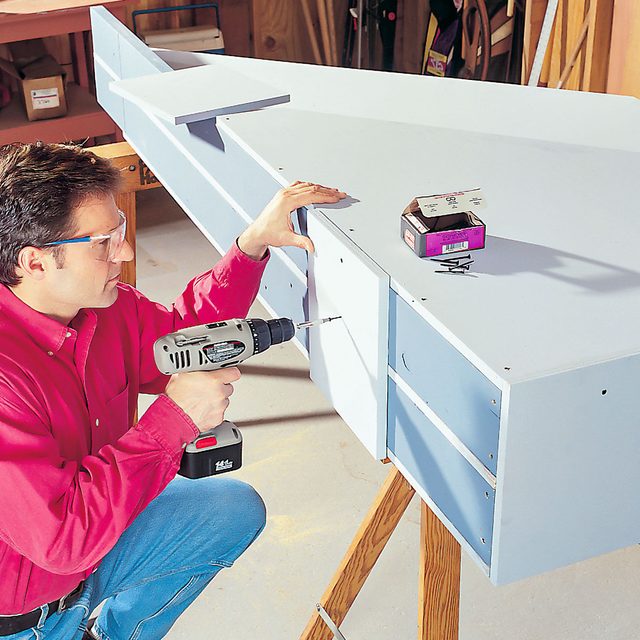
Lay the front plywood piece over the 2x6s and anchor it with 2-in. screws driven every 12 inches.
Step 4
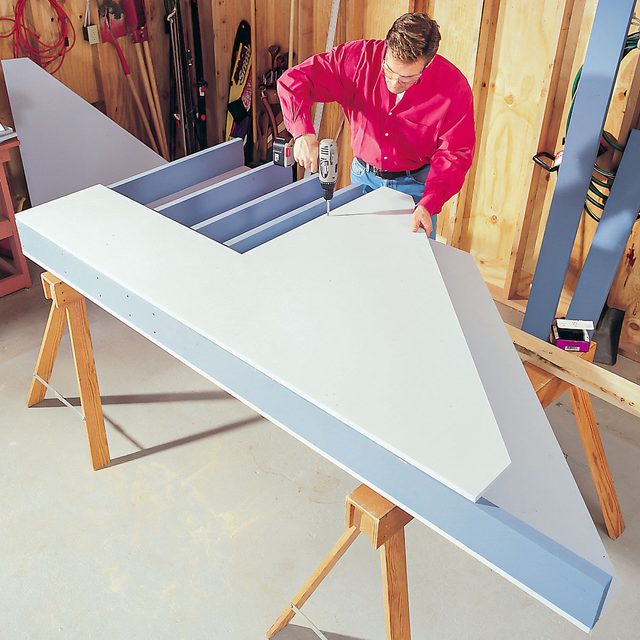
Assemble the back
Flip the project over and assemble the back section. Position back 2x6s for the bottom and side and fasten them with two 3-in. screws where they meet. Then drive screws at an angle (toe-screw) through the ends of the 2x6s into the assembly below. Attach the plywood back piece to the 2x6s with the 2-in. screws.
Step 5
Fasten four cleats
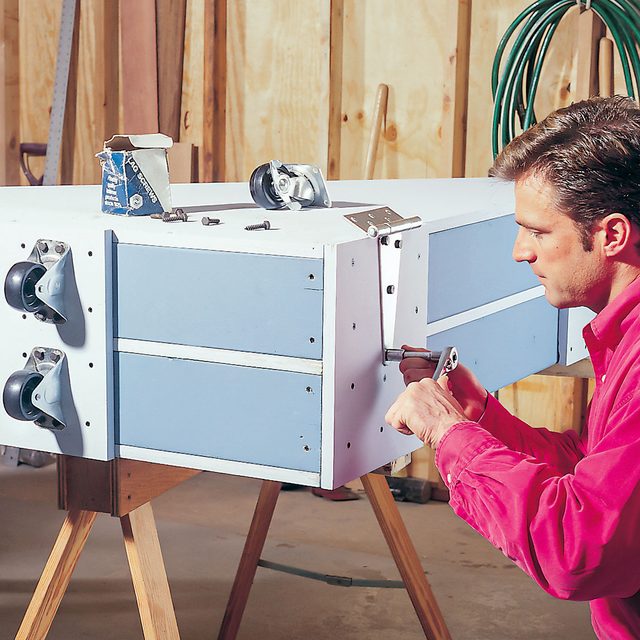
Fasten four plywood cleats to the bottom and sides with 2-in. screws to hold the rack together. Use 12 screws per cleat.
Step 6
Attach the casters
Attach the four casters and the strap leaf of the hinges with 1/4- by 1-1/2-in. lag screws. Place the caster with a brake on the outer front edge of the rack to hold the rack stationary when sliding items in and out.
Step 7
Fasten the rack to the wall
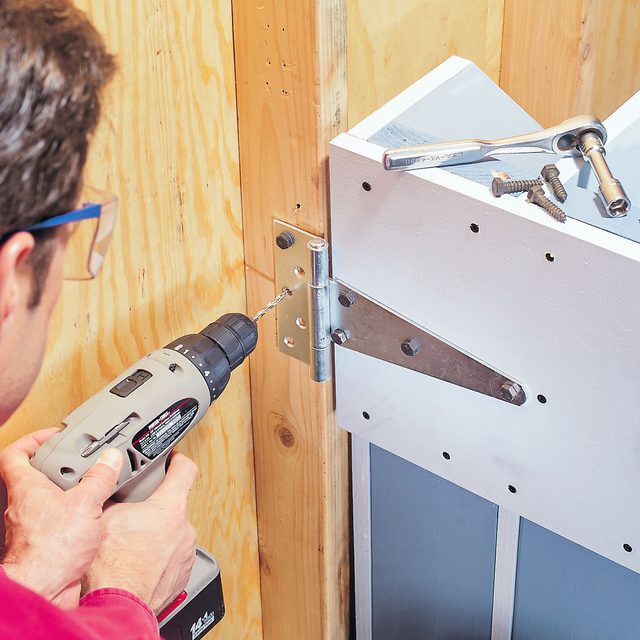
Pre-drill pilot holes and fasten the rack to the wall stud with 1-1/2-in. lag screws.
Step 8
Load up the rack!
Swing the rack out from the wall and load it up with plywood, drywall and other big, flat stuff.