

Techniques to avoid having to feather out butt joints.
Introduction
No matter how well you plan your drywall installation, sometimes you just can't avoid having to tape a butt joint or two. Don't worry. Here are some tips to make the job easy—and the results perfect.
Tools Required
- Circular saw
- Combination square
- Drill/driver - cordless
- Extension cord
- Hammer
- Hawk
- Hearing protection
- Mud pan
- Safety glasses
- Screw gun
- T-square
- Table saw
- Tape measure
- Taping knife
- Utility knife
Materials Required
- 2x4 blocks
- Drywall
- Drywall nails
- Drywall screws
- Joint compound
Project step-by-step (6)
Step 1
Normal drywall joints
Fig. A: Tapered joint
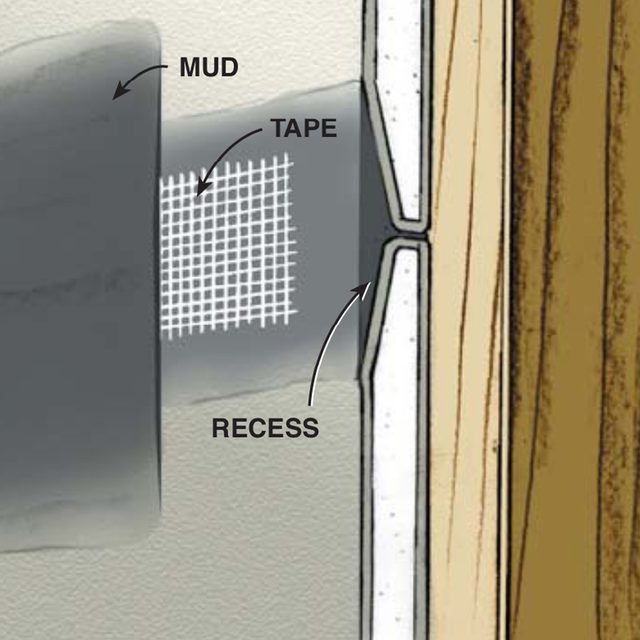
Where two tapered edges of drywall meet, they create a shallow recess that makes taping easy. Just drag your knife over the joint and—after the third coat of mud—you’ll have a perfectly flat surface. Here are a few tips for improving your taping drywall skills and increasing your speed.
Step 2
Fig. B: Butt joint
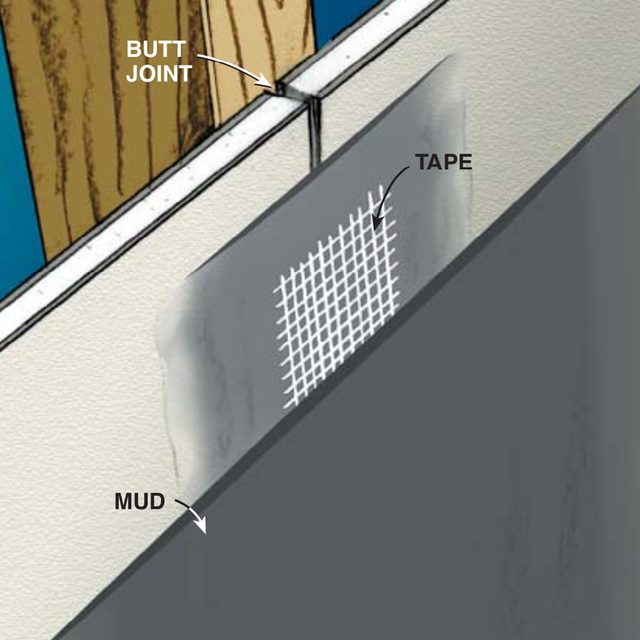
Butt joints have no recess, so you have to build up a layer of mud that’s thin enough and wide enough to blend into the surrounding flat surface.
When it comes to finishing drywall, the hardest part of the job is usually the butt joints—the joints formed where two non-tapered ends of drywall meet. Unlike tapered joints (Fig. A), which provide a recess for the reinforcing tape and “mud” (joint compound), butt joints require a buildup of mud. To make that buildup blend into the surrounding flat surface, you have to feather out the mud about 18 in. on both sides of the joint (Fig. B). But there are ways to avoid this slow, fussy process.
Step 3
Better ways
Fig. C: Recessed butt joint
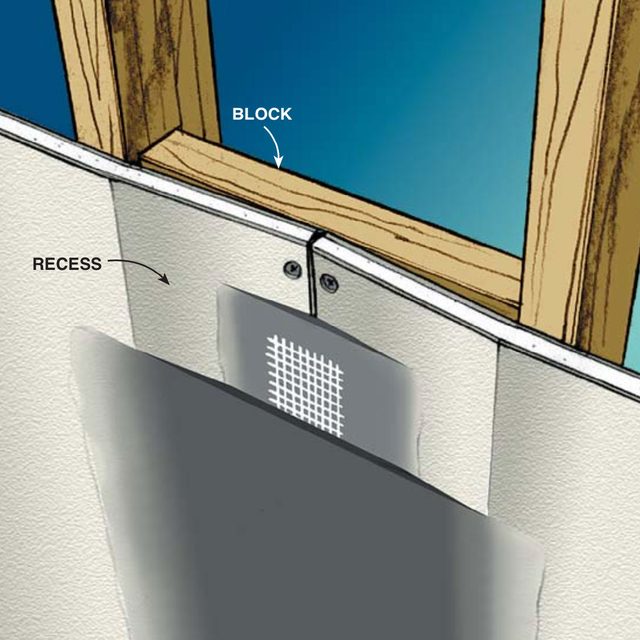
Using blocks between studs or joists, you can create a recess at butt joints, making them as easy to tape as tapered joints.
Step 4
Screw or nail blocks, or a butt board, between studs or joists
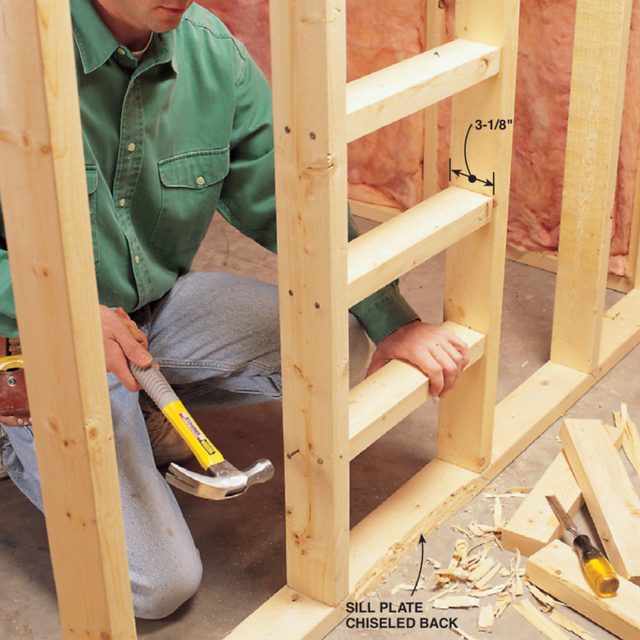
To make these blocks, we cut 2x4s to a width of 3-1/8 in to create recessed butt joints on both sides of the wall. In areas where you won’t be hanging drywall on the other side (ceilings and exterior walls, for example), you can use 2×2 blocks. On walls, you’ll need four blocks for each butt joint. On ceilings, install five blocks. Chisel away part of the sill plate so the lower edge of the drywall can bend inward.
Step 5
Screw on the drywall
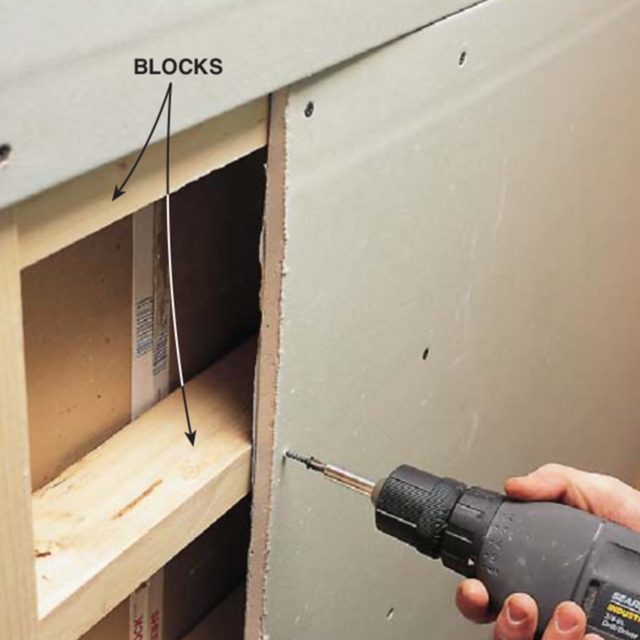
Screw drywall to the blocks at butt joints. The drywall will bend inward slightly, creating a recess for the tape and mud.
Step 6
Tape the joint
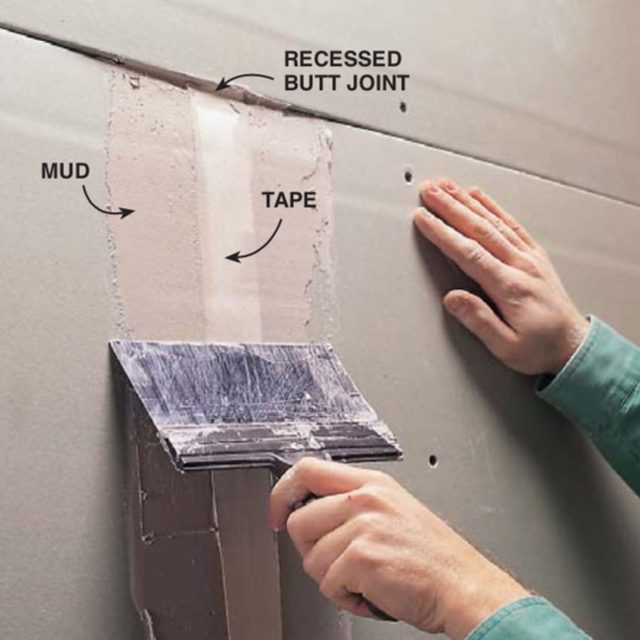
Tape recessed butt joints beginning with an 8-in. wide knife for the tape coat. For the following coats, use a 12-in. knife, or better yet, a 14-in. knife.
The best way to handle butt joints is to avoid them altogether by using sheets of drywall that will span the entire room. Home centers carry 8-, 12- and sometimes 10-ft. long sheets. If 12-ft. sheets aren’t long enough, try a specialty drywall supplier, where you’ll find 14-ft. and, perhaps, 16-ft. sheets.
If you can’t get sheets that are as long as the room, or if there’s no way to wrestle long sheets into the room, you can make it a lot easier to finish butt joints by creating a recess at each joint (Fig. C).
To make recessed butt joints, put blocks between the studs or joists. The blocks are set back about 3/16 in. from the face of the framing, so when you screw the drywall to the blocks, the butt ends are drawn inward, creating a hollow recess that’s as easy to finish as a tapered joint. This may sound like a lot of unnecessary work, but if you’re a bush-league drywall finisher like me, you’ll get better results and probably save time in the long run. Next, check out drywall installation mistakes you’ve probably made before.