Looking to enhance your deck or patio? This low-maintenance DIY patio table is a great place to begin.
A day
Beginner
$500
Introduction
The simple, sleek, and low maintenance design of this DIY patio table will be the perfect addition to your deck or patio.
An outdoor table should be tough. After all, it stays out in the weather and needs to withstand summer BBQ spills, toy car races, rocks from the yard and all the things your family will place on it. This is a simple design that uses rugged, low-maintenance PVC, plus rot- and weather-resistant cedar.
Project Overview

Cutting List
| KEY | QTY. | PART | DIMENSIONS |
| A | 4 | Legs | 4×4 x 29″ |
| B | 2 | End apron | 2×4 x 26-3/4″ |
| C | 2 | Side apron | 2×4 x 55″ |
| D | 4 | Corner brace | 2×4 x approx.6-7/8″(cut to fit) |
| E | 4 | Stretcher | 2×4 x 28-1/4″ |
| F | 6 | Table top | 1×5-1/2″ x 64″ |
Tools Required
- Basic hand tools
- Drill/driver
- Miter saw / circular saw
- Pocket hole jig
Materials Required
- 1 - box of composite decking screws w/ plugs
- 1 – cedar 4x4x10’
- 1 –box 2-1/2” exterior washer head screws
- 2 - 20’ solid (no groove) PVC deck board
- 3 – cedar 2x4x16’
- 4 – Adjustable feet
- 8 - 3/8” stainless hanger bolts
- 8 - 3/8” stainless nuts
- 8 - 3/8” stainless washers
Project step-by-step (12)
Step 1
Cut the table base parts
It’s best to use a miter saw to cut all your parts, but a circular saw will be just fine if you’re accurate with your cuts.
I set up a stop block on my miter saw to cut the legs, side and end aprons, and stretchers out of the deck lumber. With a stop block, I can make sure each part is cut to the same length. Next, get to know how to pour concrete apron.
Step 2
Choose the best face
Identify the most attractive sides of the cedar pieces for your patio furniture. Look for imperfections as well as the tone of the wood so it matches the other sides. Mark the ‘bad’ side of the board, then drill two pocket holes on each end of the aprons (B & C) on this side.
While you’re at it, drill pocket holes into the ends of the stretchers (E). One side gets one in the center, and the other gets two near the edges.
Step 3
Patio table legs
Arrange the aprons and legs with their good sides facing out on a large flat work surface. Position each apron 1/2-inch from the outside edge of the legs, then fasten them together using exterior washer head screws through the pocket holes. Fasten all four legs in this way to create the frame of the table.
Step 4
Space out the stretchers
Flip the table to stand on its feet. Then space out the four stretchers (E) evenly, about 10-3/8-inch on center. Fasten them between the side aprons using exterior washer head screws. Be sure the tops are flush with the side apron (C).
Step 5
Fasten corner braces
Using a few longer cedar 2×4 offcuts, cut a 45-degree angle on the ends, then cut the four corner braces (D) using a miter saw. The measurement from the long points of the cuts should be approximately 6-7/8-inch. With the corner braces sitting tight against each apron, the brace should be just touching the corner of the leg, but a small gap here will work fine.
Fasten each of the braces in place with a pair of screws into each apron. Next, drill two, 5/16-inch pilot holes through the center of the brace and into the leg for the hanger bolts. Bore out the holes in corner brace with a larger 7/16-inch drill bit.
Step 6
Remove pocket screws
Fasten the aprons near the legs together with a piece of scrap 2×4, then remove the corner brace followed by the pocket screws securing the aprons to the leg. The leg is now detached from the table base.
Re-attach the corner brace, slide the legs in place and tighten them on. Upon removing the pocket screws, the legs can be removed for transport or storage of the furniture during winter.
Step 7
Drive in the hanger bolts
With the corner brace reattached, slide a washer on the hanger bolt followed by two nuts. Keep the nuts toward the end of the bolt. Using two wrenches, tighten them together. When tightened together. they won’t turn on the bolt. This lets you tighten the hanger bolt and drive it all the way into the table leg.
Once the hanger bolt is in place, loosen the bolts against each other. Remove one and tighten the other to secure the table leg.
Step 8
Bore a hole for feet
Flip the table upside down. On the bottoms of the legs, draw two lines connecting opposite corners to form an ‘X’. This is the center of the leg. Then, with a 1-1/2-inch Forstner bit, bore a hole in the bottom of each table leg about 3/4-inch deep.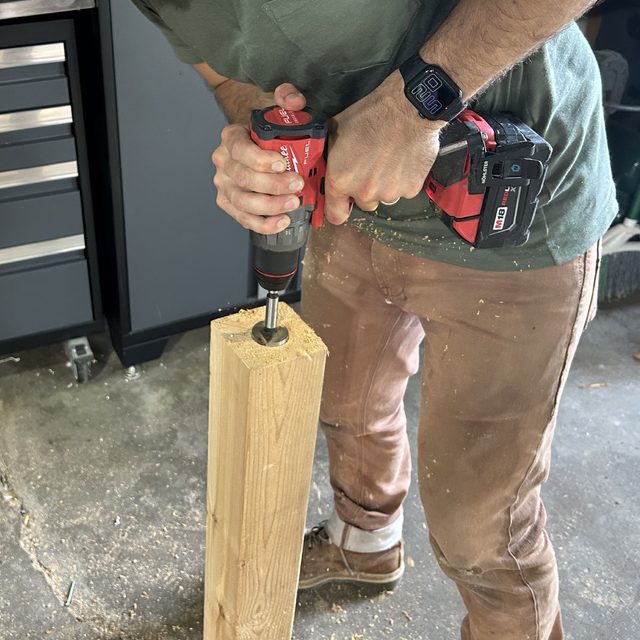
Step 9
Drill deep for adjustable feet
The feet I’m installing are adjustable up to 1-1/2-inch. They’re fastened with a T-nut into the 1-1/2-inch hole we drilled in the previous step.
To make room for the adjustment bolt, drill a 1/2-inch hole two inches deep. Then place the adjustable foot’s bolt into the hole and give it a light tap with a hammer to seat the T-nut.
Step 10
Layout the outdoor tabletop
Flip the table upright and cut all the PVC deck boards two inches longer than the table base. Lay the boards on top of the base with a gap around 1/16-inch between each. Make sure the overhang is consistent on the sides and the ends.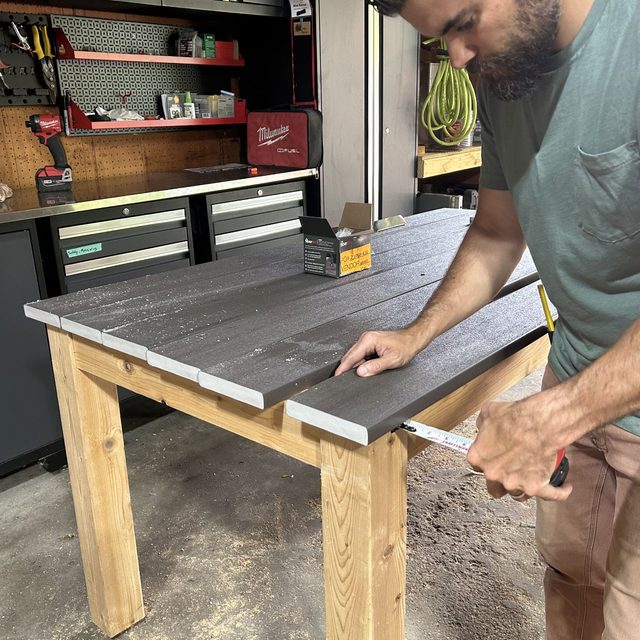
Step 11
Fasten the top
Use special composite deck fasteners made for PVC deck boards. I ordered these screws along with the composite decking at my local lumberyard. The screws came with a special drill bit that set the screw into the boards just right, along with matching plugs.
I used a speed square lined up to the framing in the table base to help drive the screws in the same place and in a straight line over the width of the table. If you’re building this table to be taken apart, don’t drive screws into the tops of the table legs.
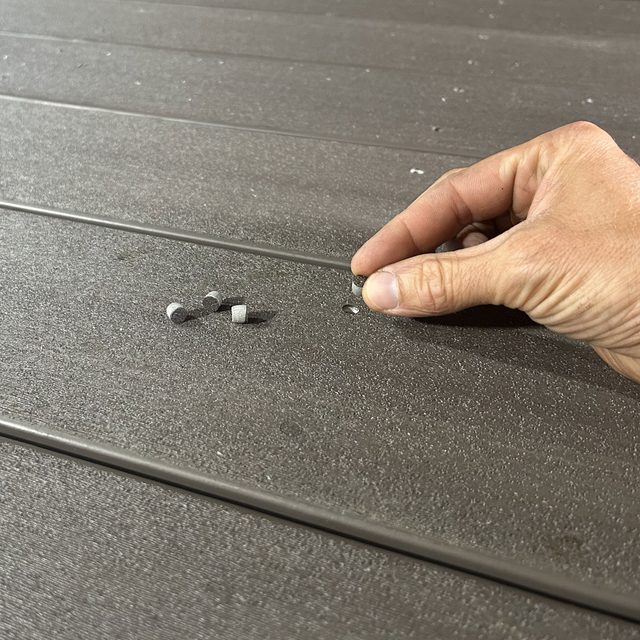
Step 12
Hide the screw holes with plugs
The plugs for the decking material comes with grain on the surface that matches the grain of the composite decking perfectly. Orient the plugs so the grain direction is continuous. Give them a few taps with a hammer to drive them flush with the tabletop. You’re done!