With a few tools and some concrete, you can easily construct this sturdy, long-lasting old fashioned clothesline for your home.
A day
Beginner
Around $100
Introduction
With a few tools and some concrete, you can easily construct this sturdy, long-lasting old fashioned clothesline for your home.
There’s nothing like the fresh-air aroma of line-dried clothes. And besides all that freshness, you’ll lower your energy costs!
You can build this sturdy, long-lasting clothesline yourself with a few tools and a bit of labor digging post holes. Make your clothesline any size you want.
Cutting List
| KEY | QTY. | PART | DIMENSIONS |
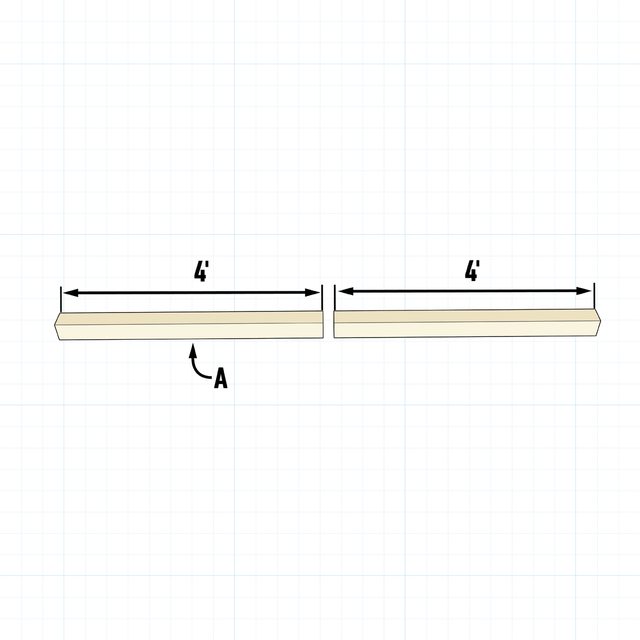
| A | 2 | Crosspiece | 4×4 x 48″ |
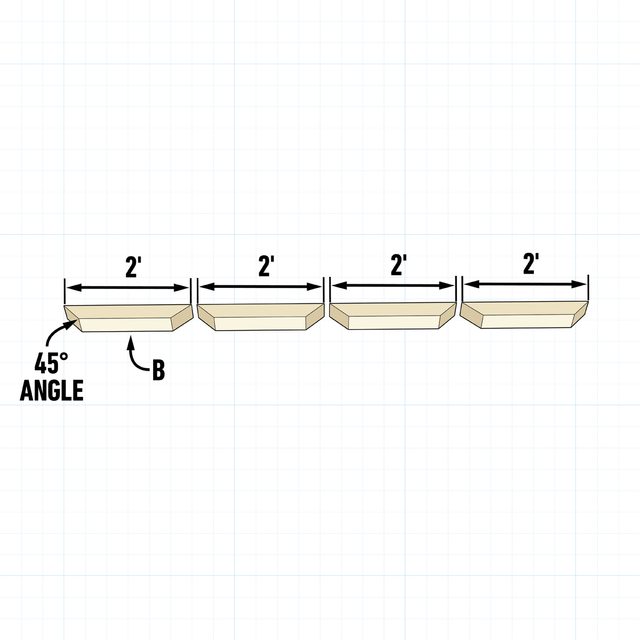
| B | 4 | Brace | 4×4 x 24″ |
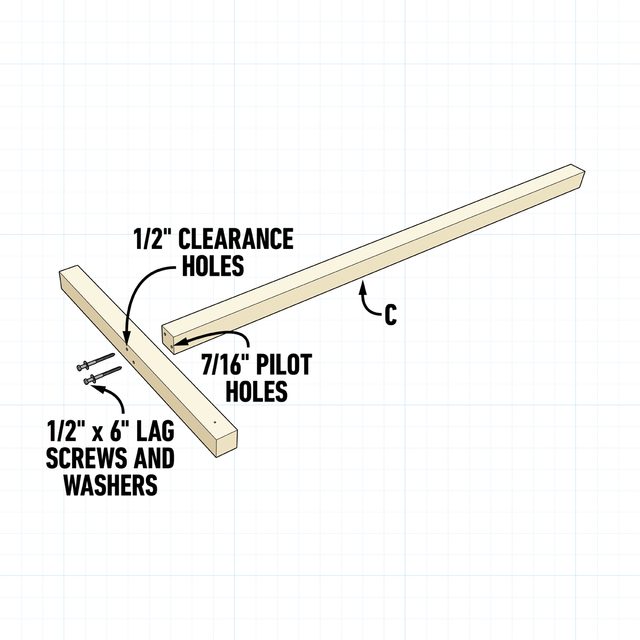
| C | 2 | Post | 4×4 x 96″ |
Tools Required
- Circular saw
- Concrete mixing tray
- Construction adhesive
- Drill/driver
- Level
- Post hole digger
- Shovel
- Socket set
- Speed or framing square
Materials Required
- 12 – 4” construction screws
- 2 – 50# bags of crushed rock
- 4 – 1/2” x 6” lag screws and washers
- 4 – 4x4 x 8’ Treated lumber
- 4 – 80# bags of concrete mix
- 8 – 5/16” x 3” eye screws
- Clothesline wire
Project step-by-step (6)
Step 1
Make the crosspieces
Cut the two crosspieces (A) from one 4×4 post. A circular saw won’t cut all the way through a 4×4 in one pass, so mark your line all the way around the post. Make the first cut, then roll the post and make another cut. Continue until the cut is complete.
Step 2
Cut the braces
Lay out the braces (B) on another 4×4 post. Cut the ends of each brace at a 45-degree angle. Again, mark all the way around the post. Make the first cut, flip the post and finish the cut from the other side.
Step 3
Attach the crosspieces
Mark the area where you’re centering the post (C) on the underside of each crosspiece. Drill two 1/2-inch clearance holes through the crosspiece in the marked area.
Insert the lag screws through the clearance holes and position the crosspiece on the post. Give each lag screw a little tap with a hammer to mark the hole location in the top of the post. Drill a 7/16-inch pilot hole at each mark. Squeeze a little construction adhesive to the post top, then drive the lag screws into the post.
Step 4
Add the braces
Drill two clearance holes at the end of each brace. Add construction adhesive to the angled faces. Position the braces and drive the screws. Use a speed square where the post meets the crosspiece during this process to keep the assembly square as you go.

Step 5
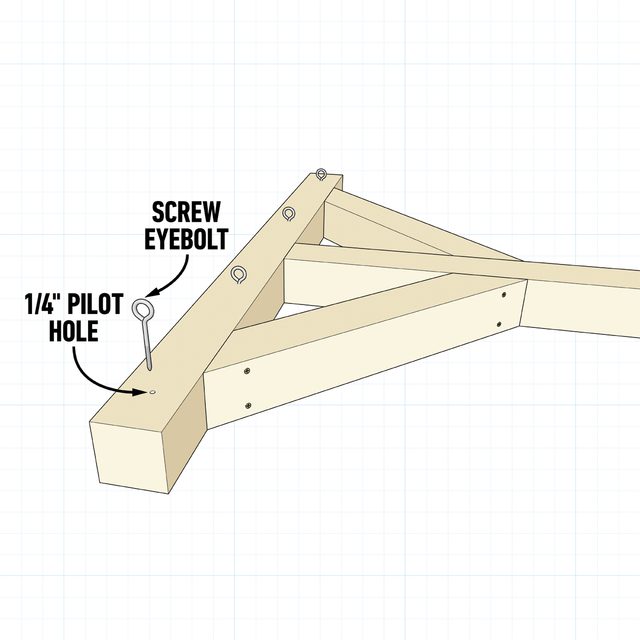
Add the eye screws
Drill four evenly spaced pilot holes down the center face of each crosspiece. Drive in the eye screws. You can turn them part way in by hand. When they start getting hard to turn, slip a screwdriver through the eye and finish driving them in.
Step 6
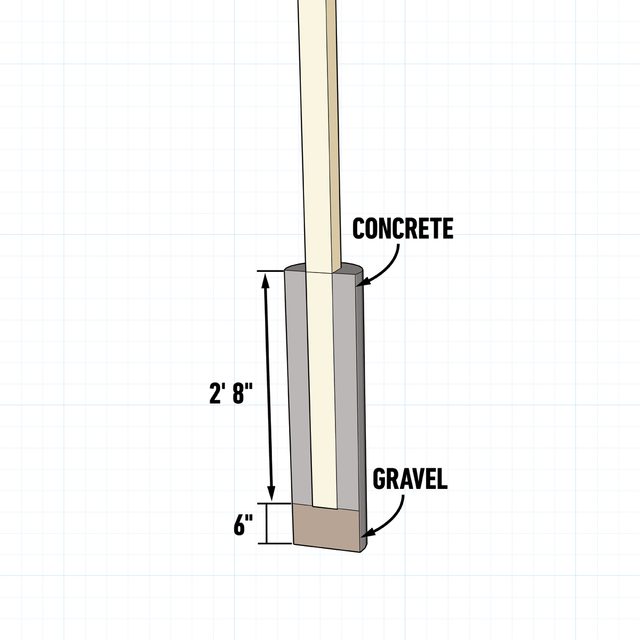
Set the wooden clothesline posts
Dig postholes about 10- to 11-inches in diameter and around three feet deep. Add four to six inches of crushed rock in the bottoms of the holes. This lets moisture drain away from the posts.
Set the posts in the holes and use a level and some scrap 2×4’s to brace the posts plumb. Mix bags of concrete and fill the holes to just above ground level. When the concrete begins to set, use a trowel or shovel to tool it, making it slope away from the post slightly so water runs away from the post.
After the concrete is set, string clothesline wire into the eye screws.