


Don't be caught off-guard! Maintaining your home is much easier than paying for big repairs. Look through this home maintenance checklist to make sure you're staying on top of properly caring for your home.
Year-Round Home Maintenance Checklist
1
/
20
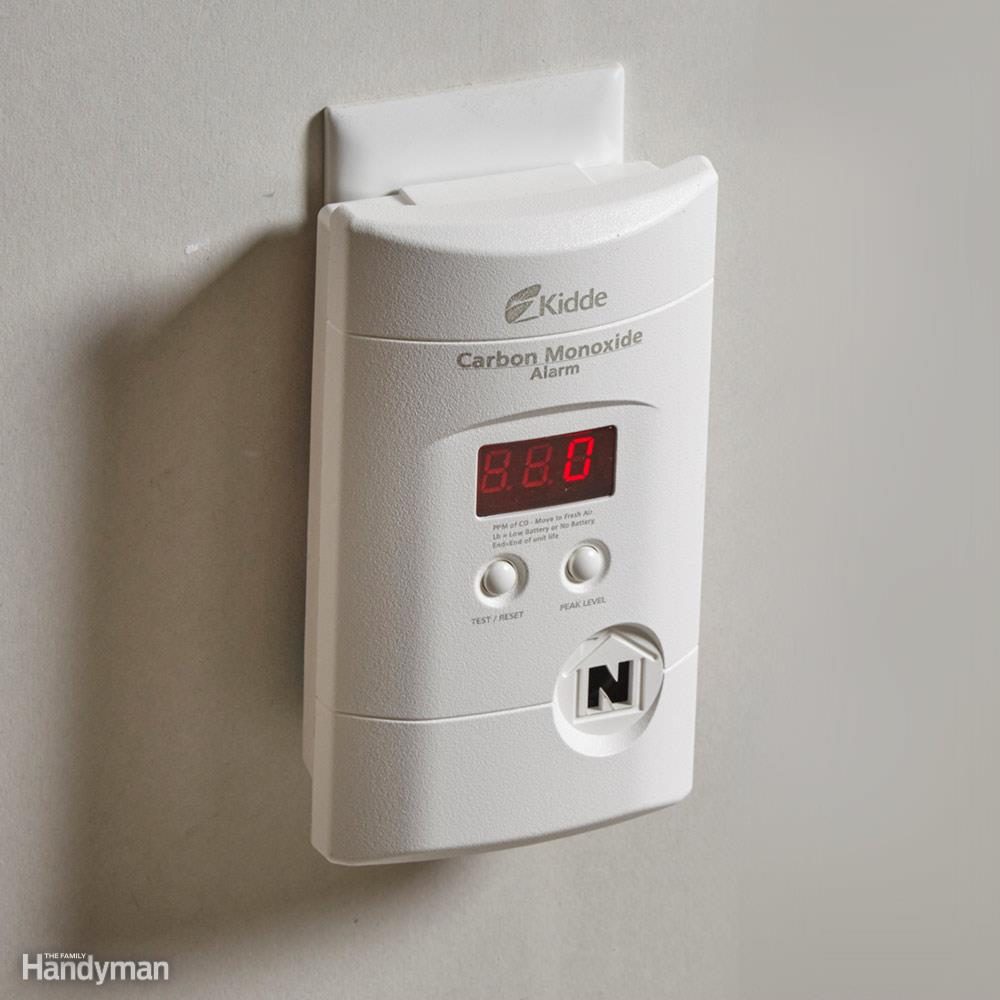
Carbon Monoxide Season
You've got a house full of guests, so the oven and stove are working overtime, the water heater is struggling to keep up with demand, the fireplace is burning and the furnace is fighting the cold. It's the perfect setting for carbon monoxide buildup. So if you don't already have a UL-listed carbon monoxide detector, put it at the top of your shopping list. Detectors are available at home centers and discount stores. Get more information about carbon monoxide detectors and smoke alarms and keep your family and friends safe all year.
2
/
20
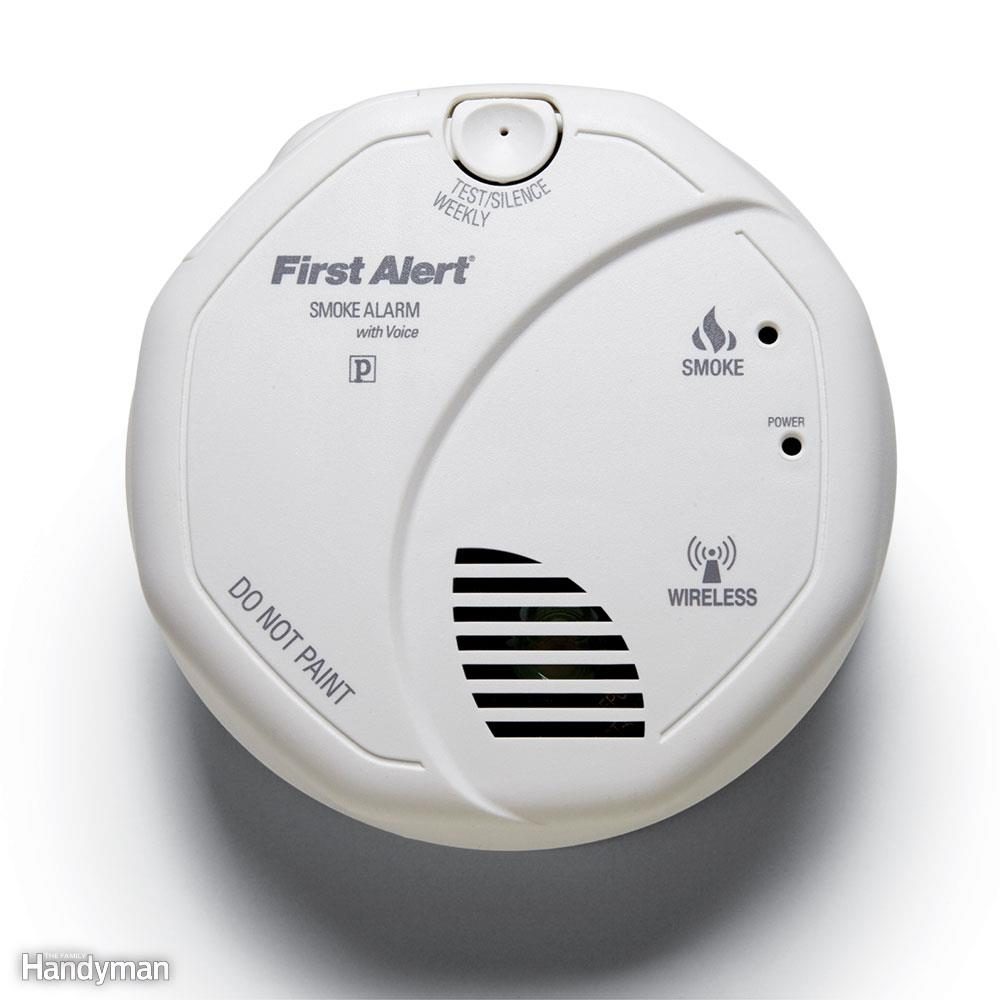
Install Smoke Detectors
Going without smoke detectors on every floor of your house is just plain irresponsible. Not only do they cut your chances of dying in a fire in half, but your homeowner's insurance company may offer a premium discount of about 5 percent if you have them in your home. Also, over 60 percent of house-fire fatalities occur in homes that are missing smoke alarms or have disabled alarms or alarms with dead batteries. Test your smoke alarms twice a year and replace units that are more than 10 years old.
3
/
20
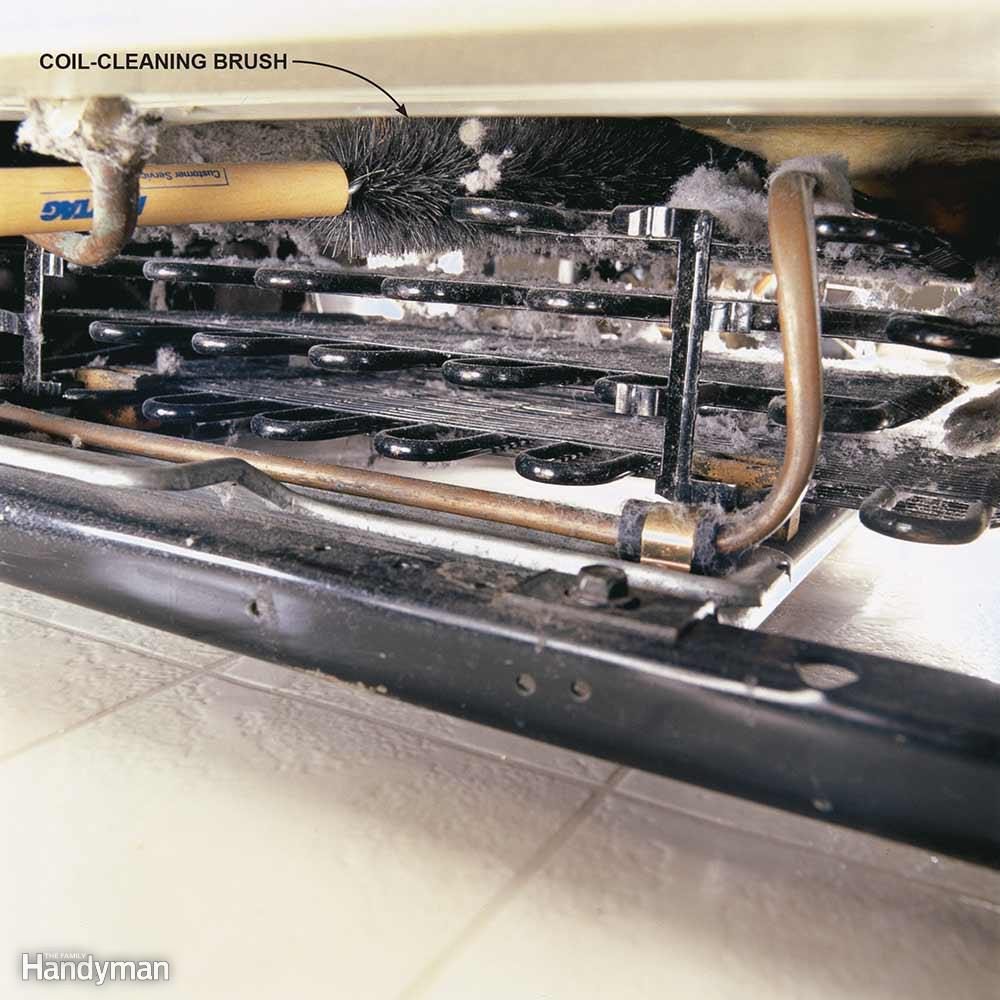
Clean Refrigerator Coils or Pay Unnecessary Repair Bills
Refrigerator condenser coils are located on the back of the fridge or across the bottom. When coils are clogged with dust, pet hair and cobwebs, they can't efficiently release heat. The result is your compressor works harder and longer than it was designed to, using more energy and shortening the life of your fridge. Clean the coils with a coil-cleaning brush and vacuum. A coil-cleaning brush, which is bendable to fit in tight areas, does a thorough job. Look for one online or at appliance stores. For tips on repairing your refrigerator (without a service call), check out our guide
4
/
20
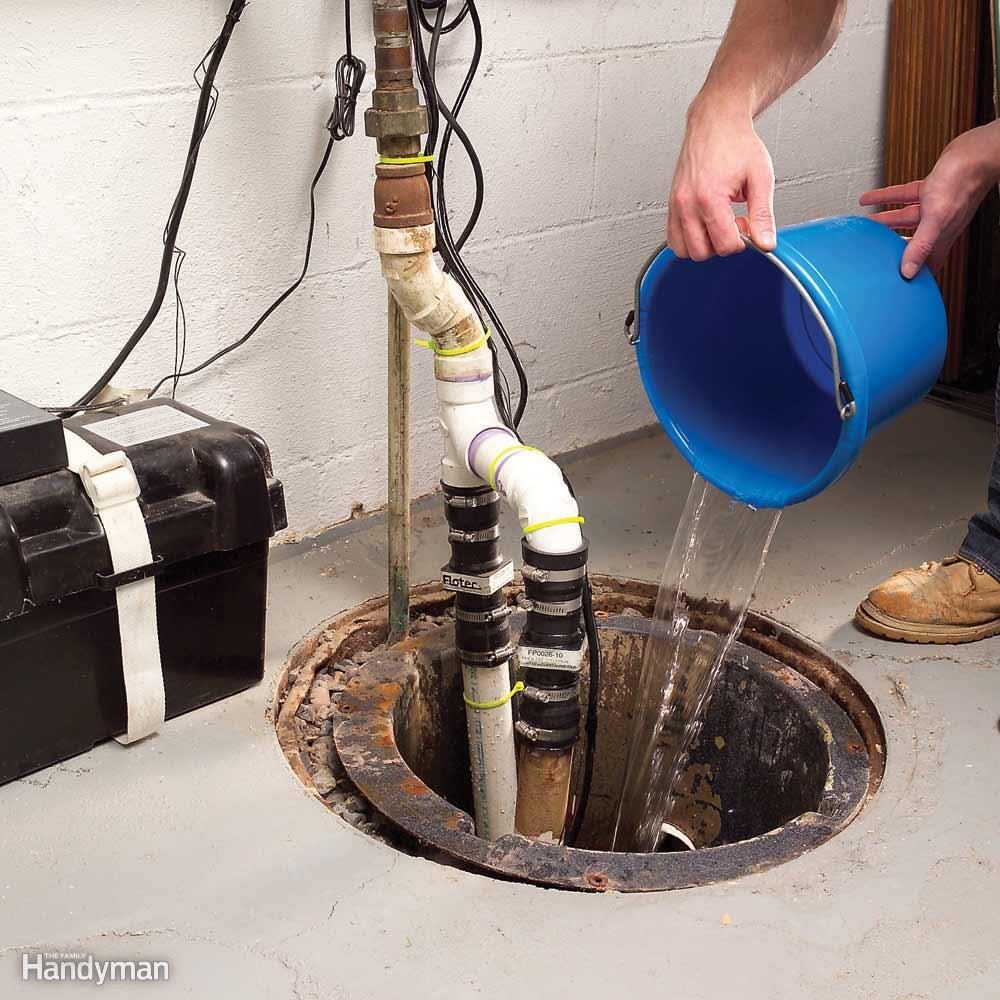
Test Your Sump Pump
Sump pump systems help keep groundwater out of your basement. Before a vacation, test your sump pump by filling the sump pit with water and making sure the pump is actually pumping out the water.
If it doesn't, be sure the sump pump is plugged in (a surprisingly common oversight) and check the breaker as well. Also make sure the outlet pipe isn't frozen or clogged and that it directs water away from your home. Clean the hole in the discharge line and check that the motor is running smoothly. Also consider adding a backup battery to your sump pump so that it functions during power outages, which seem to go hand-in-hand with heavy rainstorms.
5
/
20
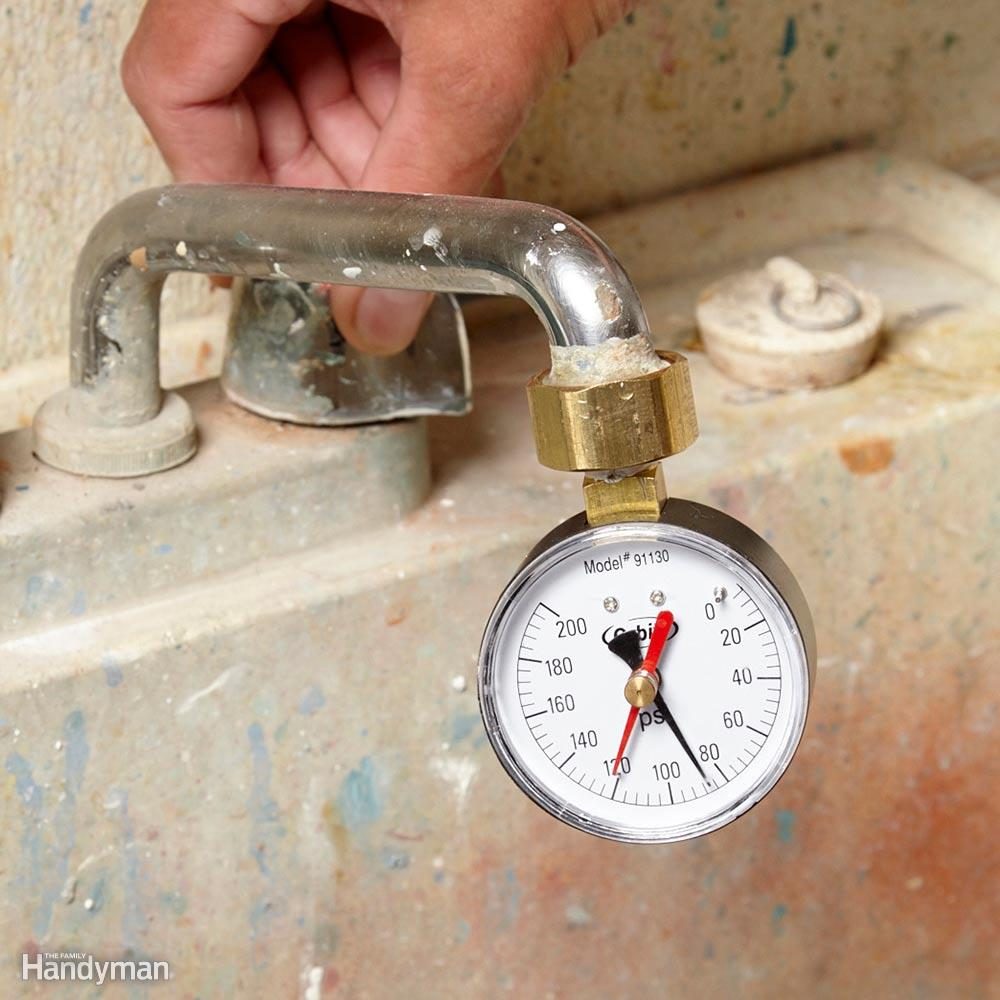
Check for High Water Pressure or Wreck Fixtures and Appliances
A technician was assisting a water softener installer who was replacing a fairly new softener because the first one had ruptured and filled the pipes with little zeolite beads.
The installer didn't seem too worried about why the first one failed, but the assistant did a little investigating. A water pressure test gave a reading of more than 110 lbs. psi. The culprit was the 20-year-old pressure-reducing valve. After a new valve was installed, the pressure went down to about 75 lbs. Pressure-reducing valves are usually found near the main water shutoff valve, but not all homes have them. It depends on your municipality.
High water pressure can harm pipes, connections, and appliances. It also creates water hammer and waste massive amounts of water. Checking for high water pressure is an often overlooked maintenance item, and one that's easy enough to perform. A new pressure-reducing valve and a simple pressure gauge like this one that hooks up to a spigot or laundry tub faucet are both available at home centers.
Plus: Appliance Care and Maintenance Tips to Make Appliances Last
6
/
20
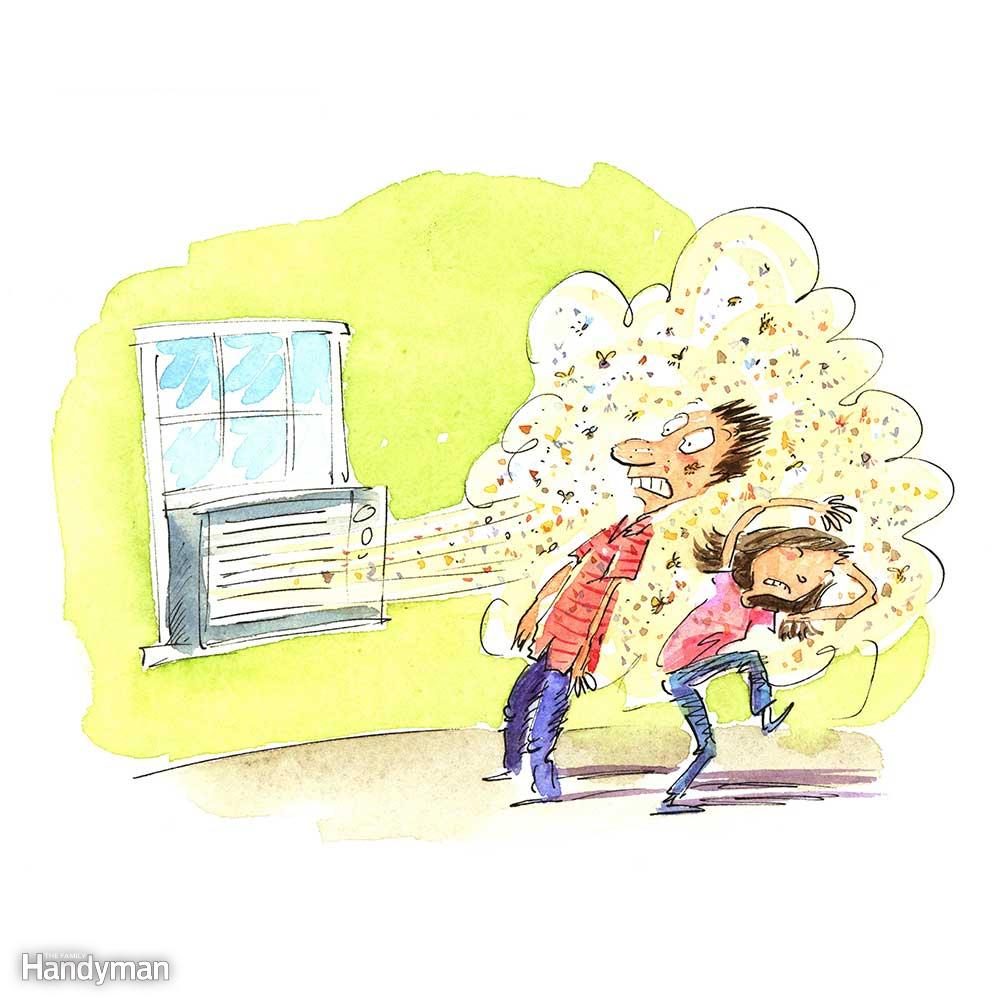
Clean Window Air Conditioners in Spring
A window air conditioner can hold some nasty surprises after winter storage. Aside from harmless stuff like dust and dead bugs, it might contain health threats like mold or mouse droppings. So before you lug it to a window, vacuum all the surfaces, especially the fins on the exterior face of the unit (that's good for efficiency and performance, too). Also pull off the cover panel, and vacuum and clean the foam filter. Finally, plug it in and fire it up. Better to blow dust around the garage than your bedroom.
7
/
20

Stiffen Wobbly Deck Railings
Deck posts and railings screwed to a single rim joist feel wobbly because the rim joist flexes whenever you lean against the railing. Adding blocking will stiffen the rim joist and make the railing feel much more solid for an easy wood deck repair.
First, tighten any loose bolts and screws. If the post doesn't have bolts, add them—carriage bolts work best.
Cut pressure-treated 2-by blocking (the same width as the floor joists) to fit tightly between the rim joist and the next joist. Place the blocking directly behind the post and toe-screw it into both the rim joist and the neighboring joist. Fasten additional blocking every 4 ft. along the rim joist.
8
/
20
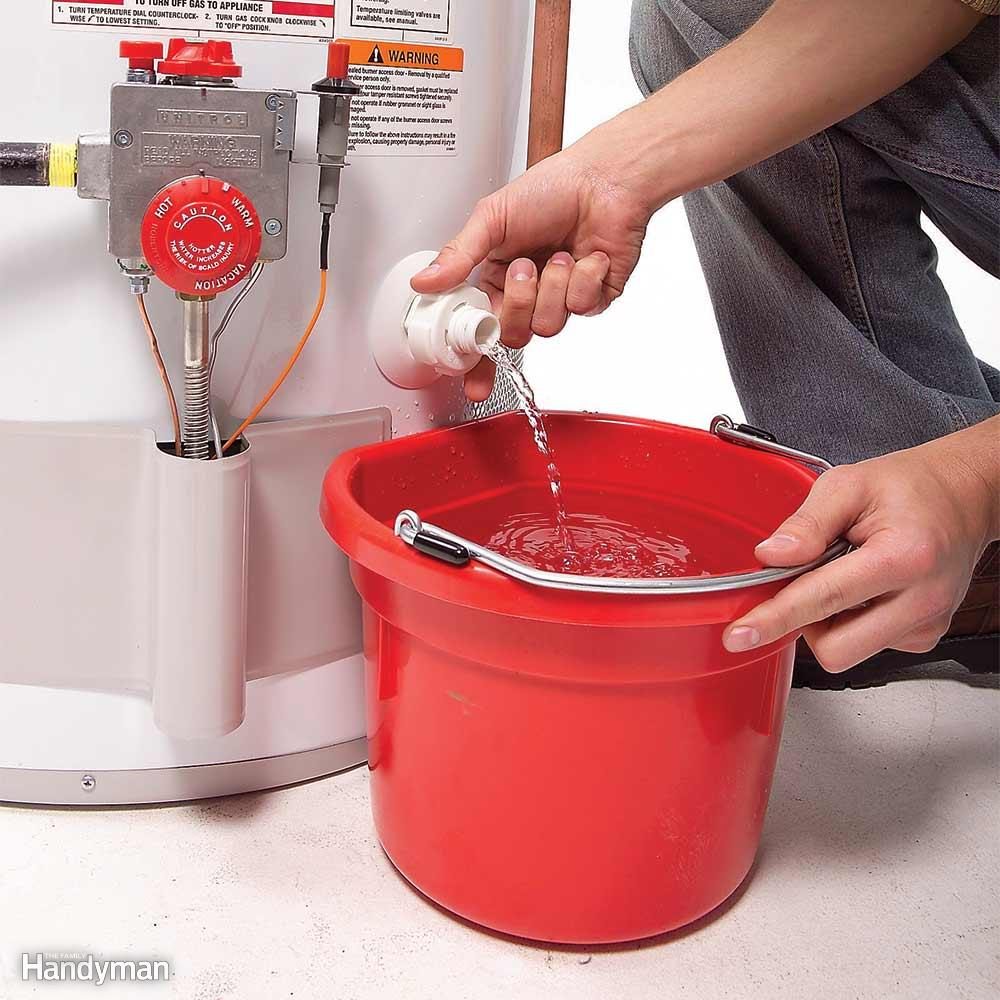
Drain Sediment From Your Water Heater or Expect a Shortened Life Span
A distraught homeowner called a plumber because her water heater wasn't heating, and furthermore, it was leaking. Right away, the plumber asked if the homeowner had been draining some of the water from it every year. The puzzled homeowner said, 'No. Why?' It turns out that sediment will collect at the bottom of the tank. This creates hot spots on gas-powered heaters that can damage the tank and cause premature failure. On an electric water heater, sediment buildup can cause the lower heating element to fail. So, occasionally draining a water heater will lower energy bills and extend its life. We recommend draining water heaters at least once a year.
9
/
20
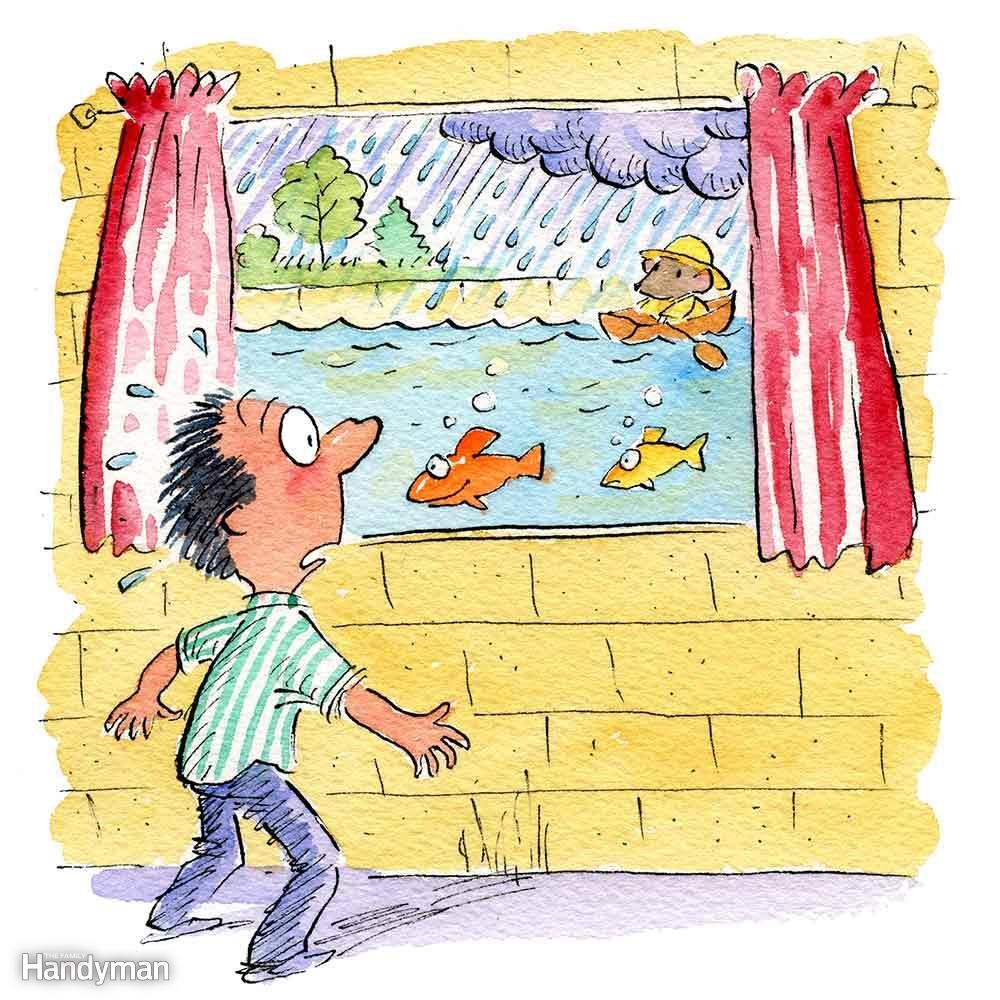
Keep Window Wells Clean or Risk a Broken Window and Wet Basement
If you've never had a problem with water in a window well, you may never think to clean it out. Here's what happened to one homeowner who neglected his window wells. After an average rainfall, not even a heavy downpour, a clogged gutter dumped a lot of water next to his house and into his window well. The leaves in the well acted like a pool liner, preventing drainage, and the water level rose higher and higher until the pressure broke the basement windows. Gallons and gallons of water poured into the basement, ruining everything in sight. Unfortunately, he had no insurance coverage for that type of flood. Don't let this happen to you. Keep window wells clean with a cover, available at home centers.
10
/
20
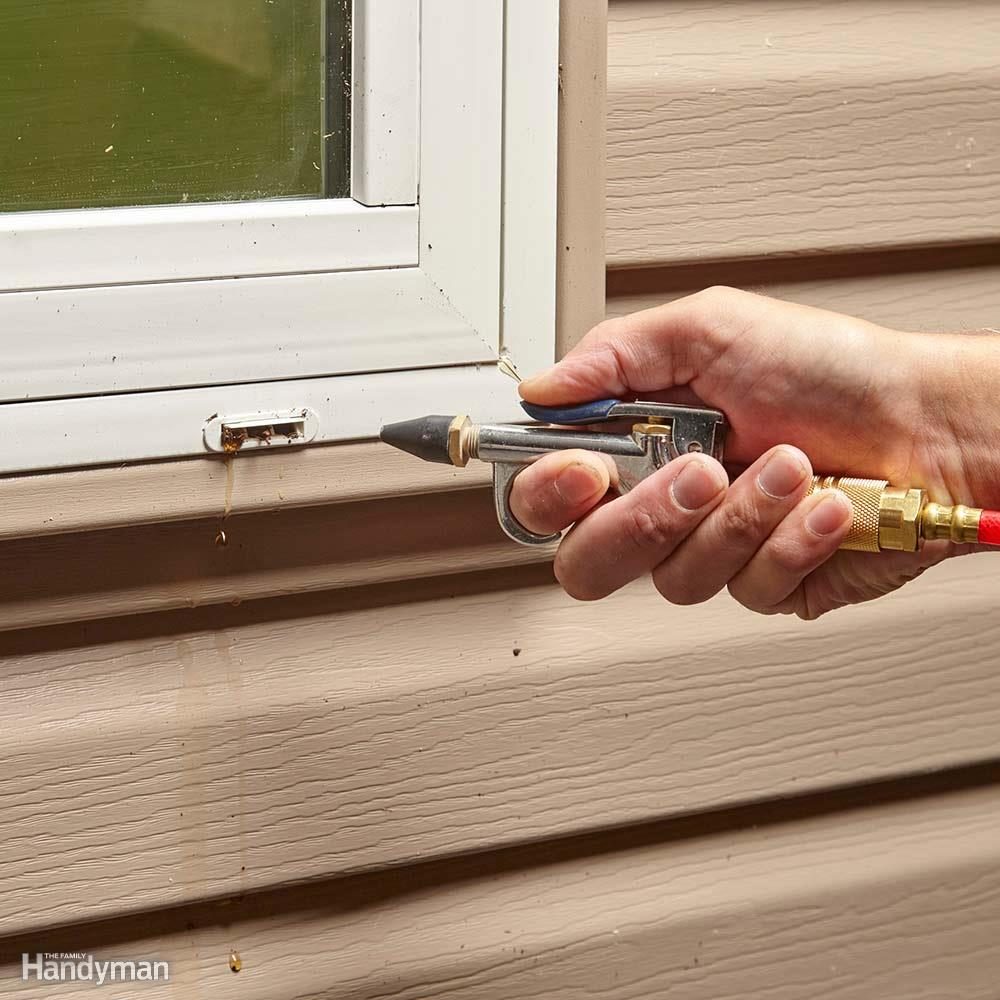
Clean Window Weep Holes or Invite Rainwater Into Your House
Many sliding windows and vinyl replacement windows have weep holes on the exterior bottom of the frame. These holes are designed to drain away rainwater that can collect in the frame's bottom channel. Weep holes can get plugged with bugs and debris, and if that happens, water could fill up the channel and spill over into your house.
To see if your weep system is working, simply pour a glass of water into the track or spray the outside of the window with a garden hose. If you don't see a steady stream of clean water exiting the weep hole, poke a wire hanger into the hole, or spray it out with compressed air, and wet it down again. If the little flapper (designed to keep out driving wind) is stuck shut, it can be removed with a putty knife and replaced.
11
/
20
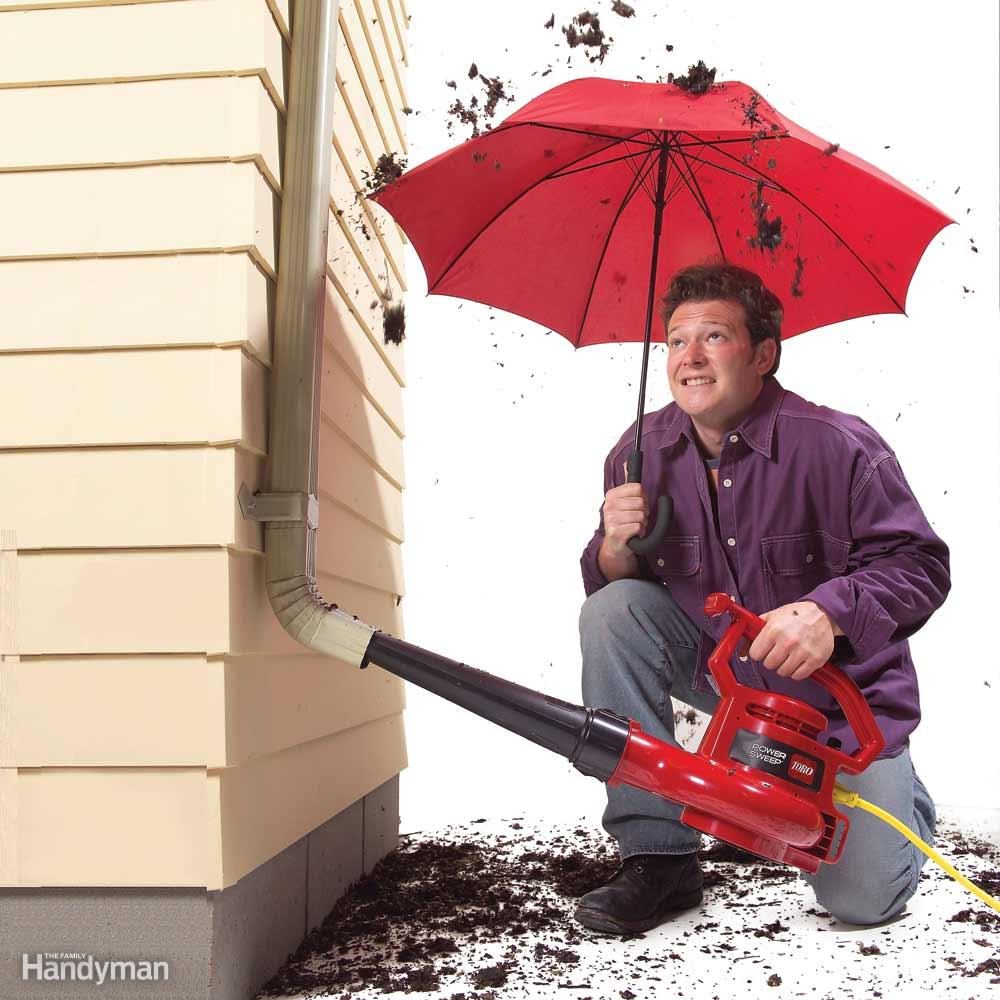
Downspout Blowout
Here's a way to unplug a downspout without climbing a ladder: Wait a day or two after rain to let all the water seep past the clog and out of the downspout. Then blast out the clog with your leaf blower. Be prepared for a mucky shower of gutter sludge. If you have an electric leaf blower, don't use this trick unless you're sure that all the water has drained out of the downspout, and always use a GFCI-protected outlet.
12
/
20
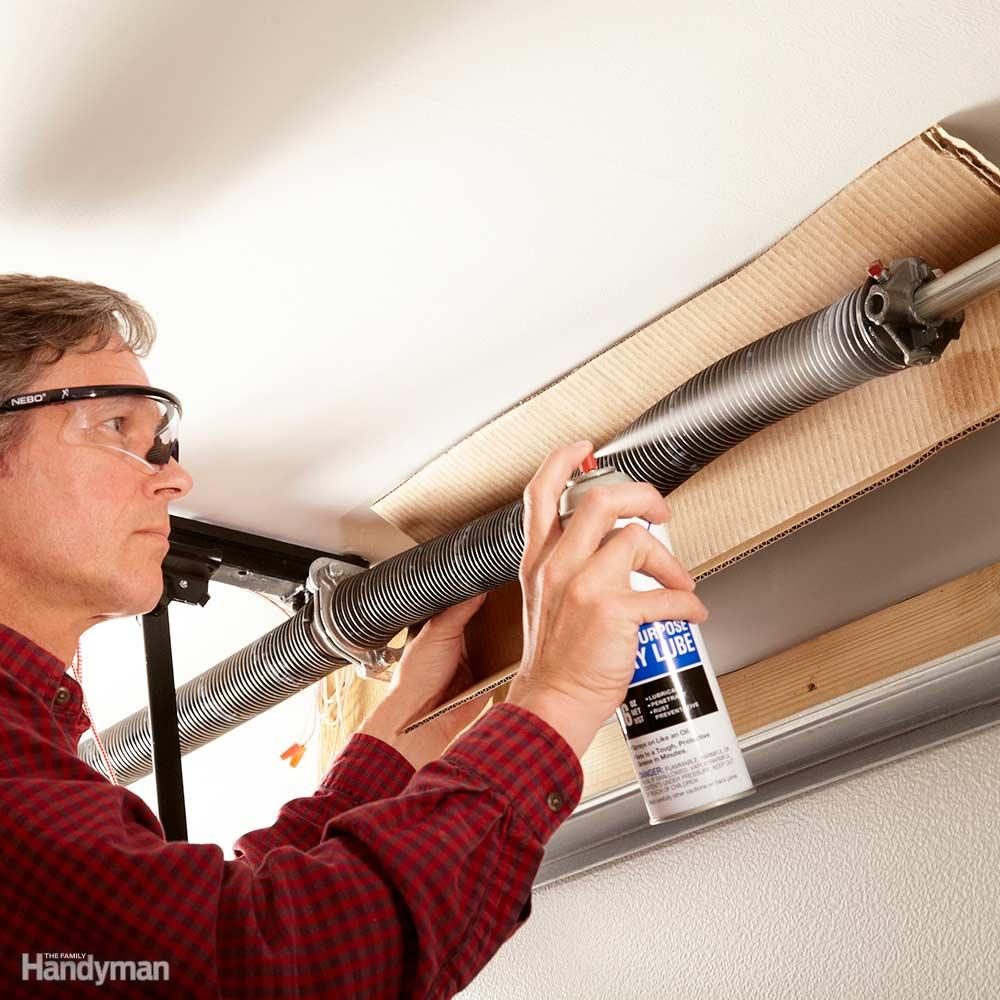
Lube Garage Door Springs or Replace Them Sooner Rather Than Later
Coat the overhead torsion springs mounted above roller tracks with a garage door lubricant. All springs will eventually break because of metal fatigue and/or corrosion, but lubing them at least once a year will make them last longer. Spraying can be messy; it's smart to protect the wall behind the spring with a piece of cardboard. Garage door lubricant is available at home centers. Lube the rollers, hinges and track while you're at it. Learn more garage door maintenance tips.
13
/
20
Keep 'em Out!
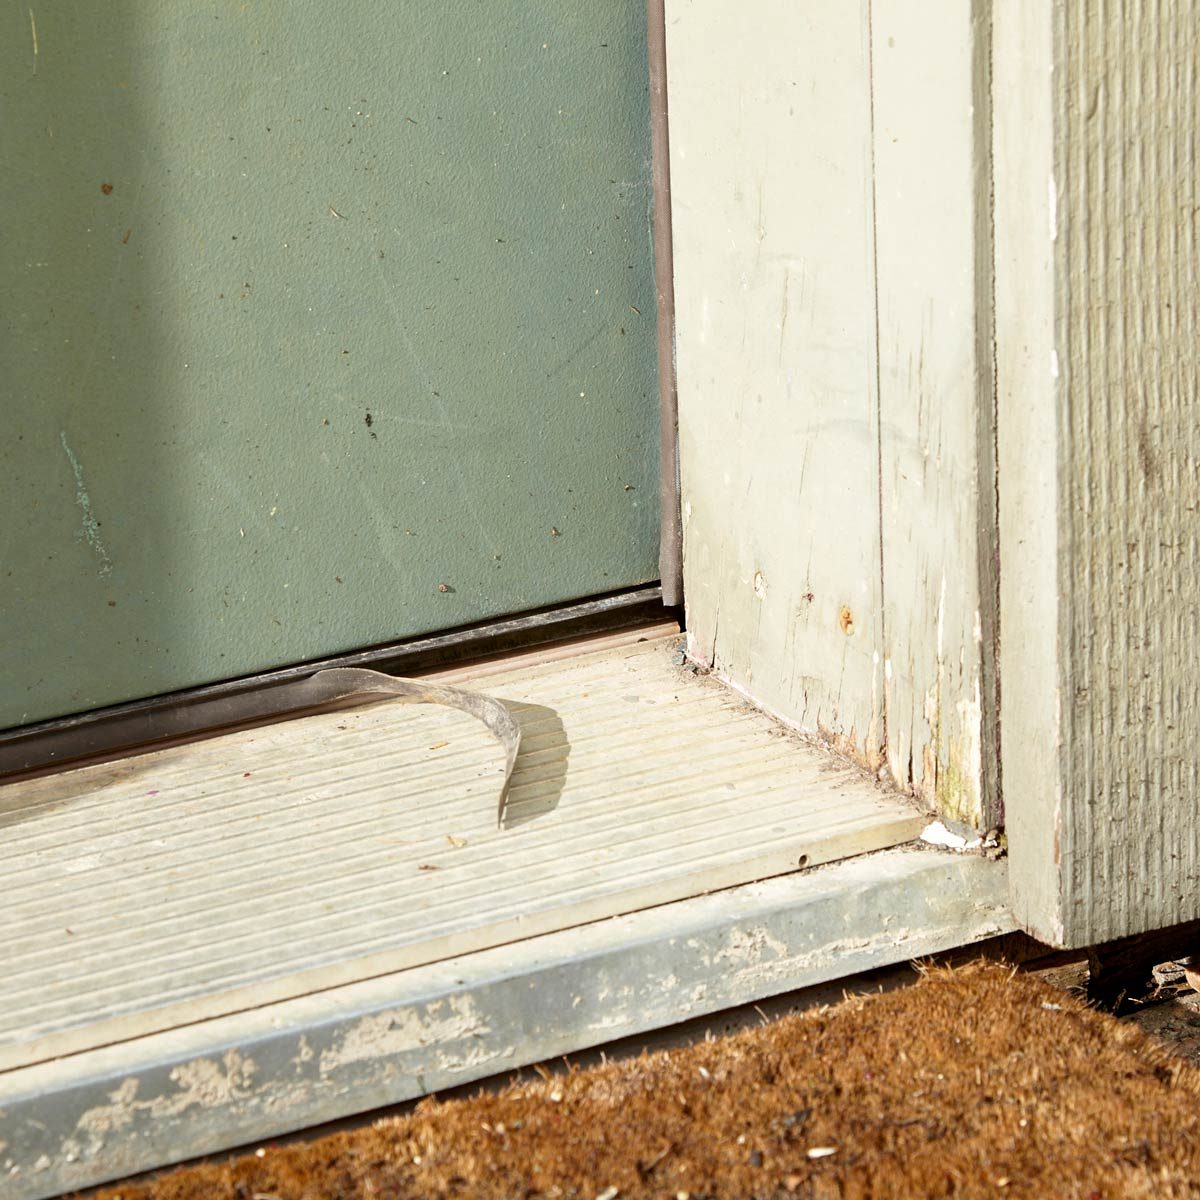
When the temperature starts dropping, mice are looking for a warm, dry place with food and good nesting conditions. In other words, they want to live inside your house. They enter through the smallest imaginable holes and cracks. Young ones can worm their way through a 1/4-in. opening. Take a very close look around the outside of your house, and then caulk, plug or do whatever it takes to close every entry point you can find.
Worn weather stripping under doors can be a perfect, easy entry point for mice looking for a warm place to winter. Replacing it is usually as simple as taking the door off the hinges and slipping a new weather strip into the slots. Take the old weather stripping to the home center to find a match.
14
/
20
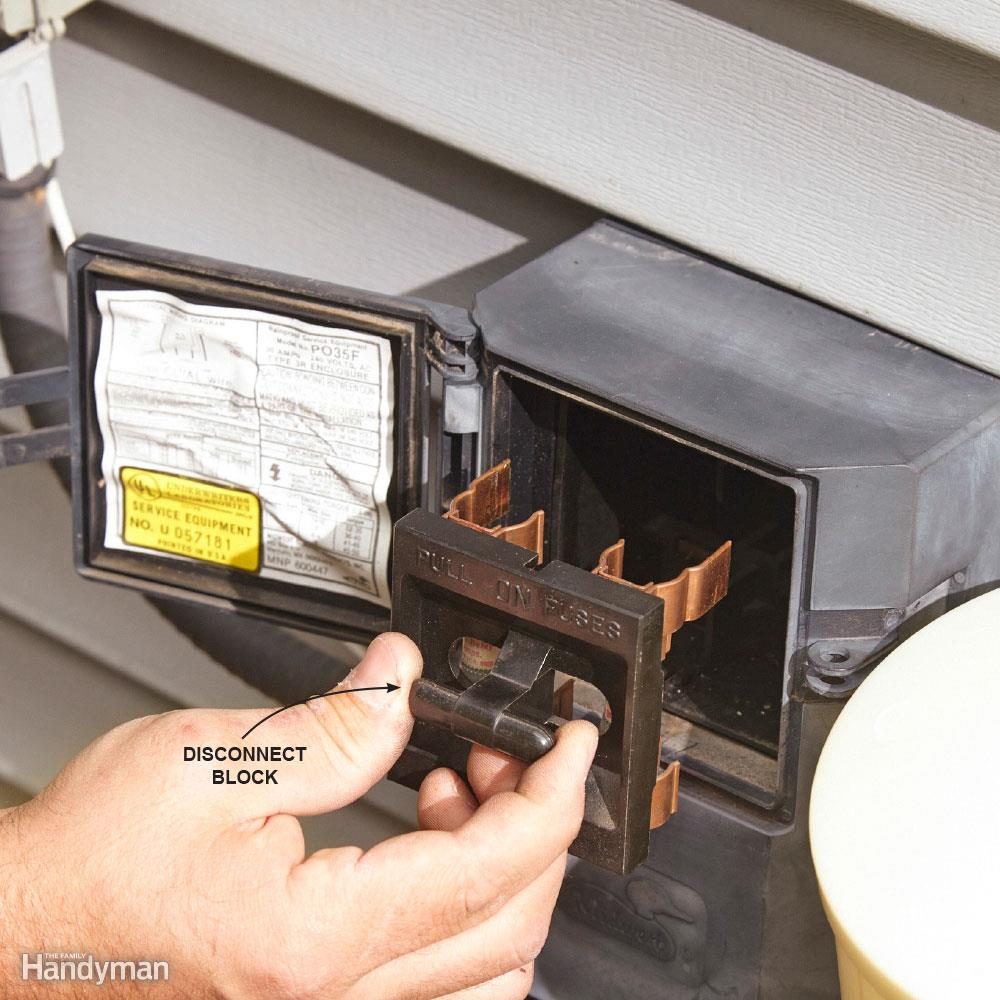
Cut the Power to Your A/C or Waste Energy and Damage Your Compressor
Cut the power to your central air conditioner before the weather turns frigid. Your compressor could be damaged if your A/C accidentally gets turned on in low temperatures. Also, some A/C compressors have a crankcase heater to keep the oil warm. Running this heater in the winter is a waste of money, and the warmth could attract mice.
Flip off the breaker if the A/C compressor has a dedicated circuit, or rotate the disconnect block upside down into the 'off' position. The disconnect block is located in the small panel outside near the compressor. Reenergize the unit 24 hours before startup. That will give the oil time to reach operating temperature. Plus: Check out these common air conditioning mistakes you might be making.
15
/
20
Three Easy Winterization Steps for Your Lawn Tractor
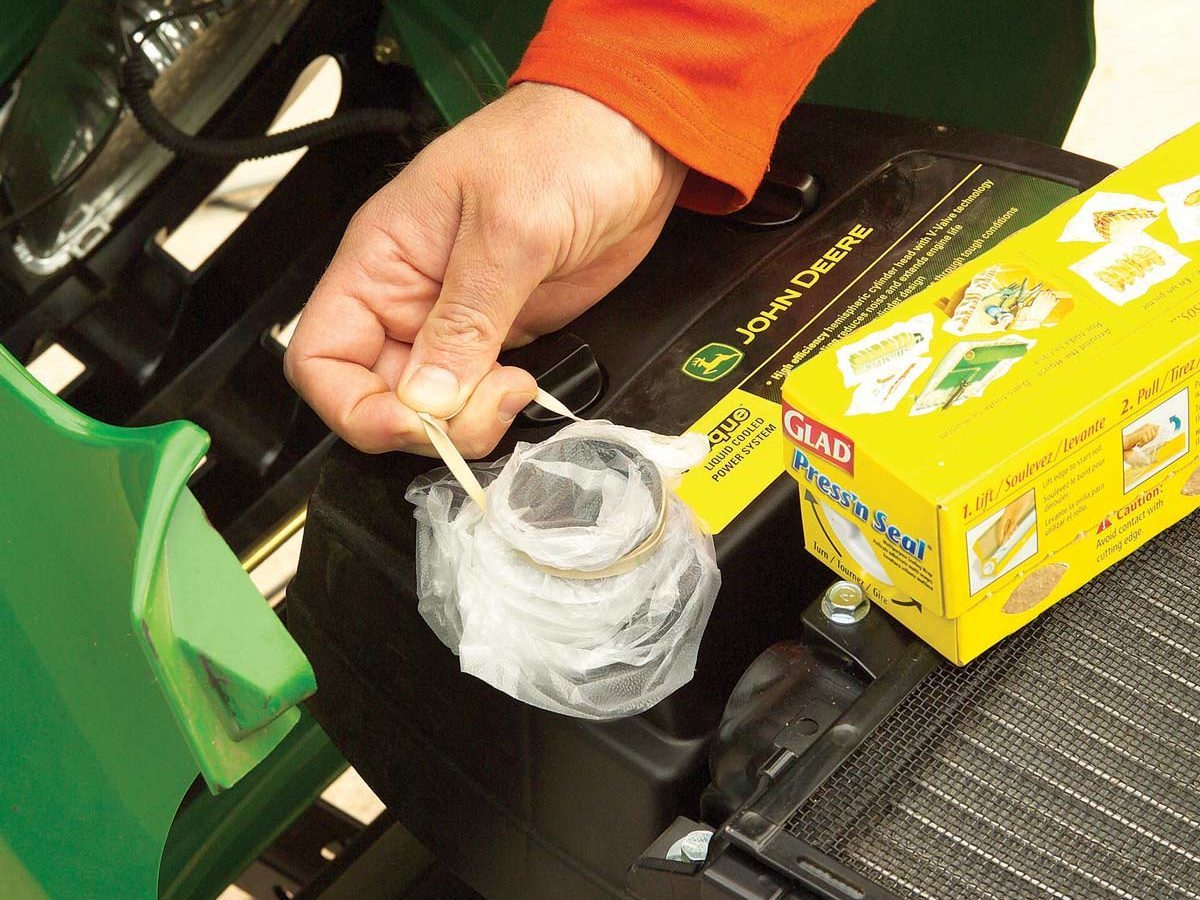
Before your tractor hibernates for the winter, take a few minutes to prevent springtime headaches.
- Moisture inside an unused engine leads to corrosion. 'Fogging' the engine — spraying an oily mist into each cylinder — prevents this. All you have to do is remove the spark plugs and blast in some aerosol fogging spray (sold at auto parts stores). Then reinstall the spark plugs.
- Storing a battery that isn't fully charged can lead to permanent damage, especially in cold weather. Connect the battery to a battery charger and charge it until you get a reading of 12.7 volts.
- Stored gas will slowly gum up the whole fuel system, and the repairs can be expensive. So add a fuel stabilizer such as STA-BIL or Seafoam to the gas tank before winter. (Adding stabilizer to your gas can year-round is also a good idea.) But remember that stabilizers aren't effective in gas that contains ethanol. If you don't know whether the gas contains ethanol, run the engine until the tank is empty.
16
/
20
Winterizing a Sprinkler System
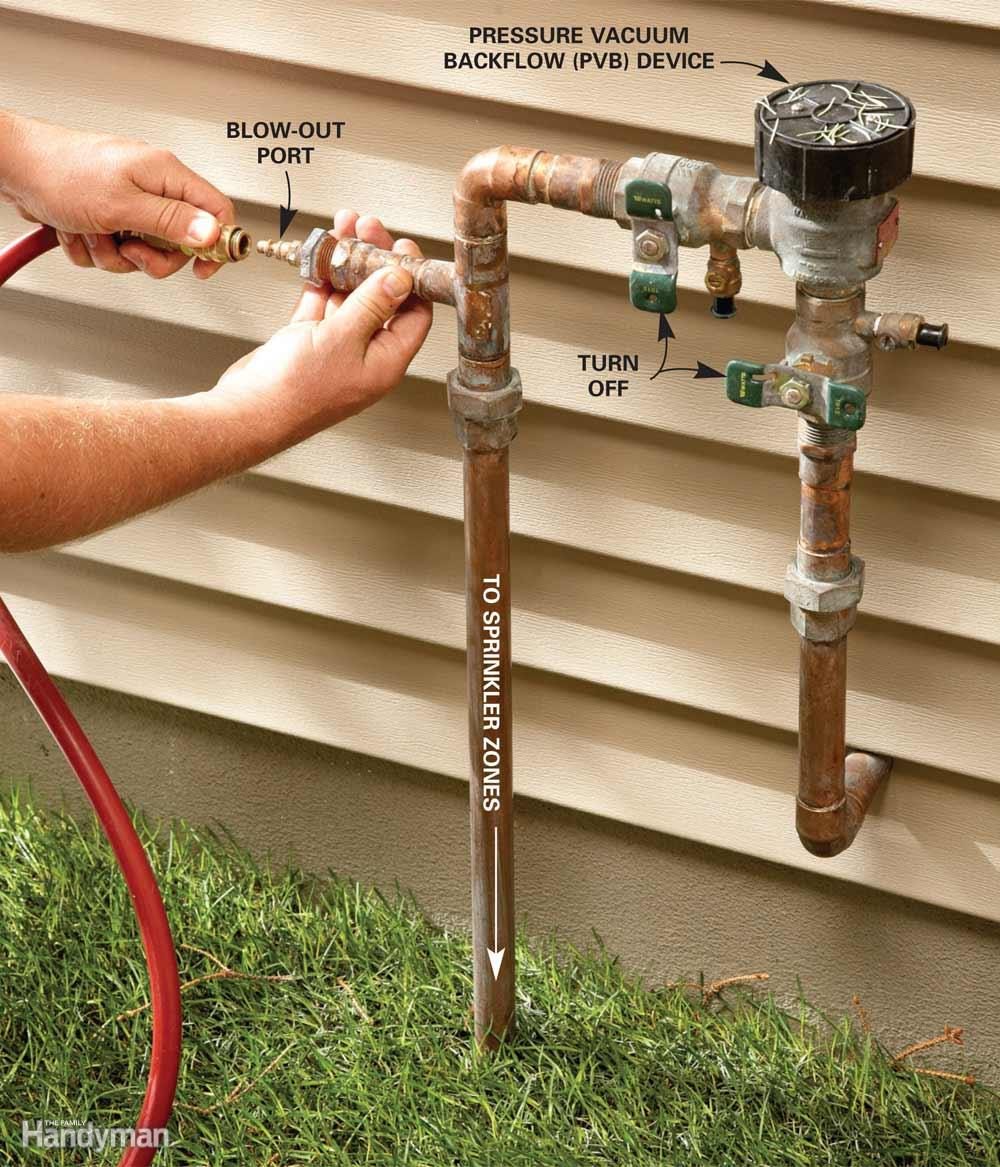
You can pay the irrigation company to blow out your sprinkler system every fall, or you can use your air compressor and do it yourself. You just have to be careful not to leave any water in the line or it might freeze over the winter and burst a pipe. Also be aware that even the largest home compressor isn't powerful enough to blow out the entire system at once, so you'll probably have to blow it out zone by zone.
If you're into number crunching and you have the original irrigation layout showing the gallons per minute (gpm) of each sprinkler head, just divide the total gpm of each zone by 7.5. That'll give you the cubic feet per minute (cfm) your compressor needs to blow out the zone. Otherwise, just rent a 10-cfm compressor and hose from your local tool rental center.
Set the compressor air pressure regulator to a maximum of 80 psi for rigid PVC pipe systems, or 50 psi for flexible black polyethylene pipe. Then turn off the water supply and set the system timer to open just one zone. Next, open the manual drain valve at the end of that zone (if equipped).
Close off both valves on the backflow preventer. Then remove the plug on the blow-out port and screw in a quick-connect hose adapter. Snap on the air hose and connect the other end to the compressor (see photo). Then blow out the line. The heads should pop up and spit out water. Disconnect the hose as soon as they run dry.
Don't overdo the blow-out — without water cooling the plastic gears, they can melt in less than a minute. So move on to the next zone and allow the heads to cool. Then go back and blow out each zone a second time.
17
/
20
Bleeding a Hot Water Radiator
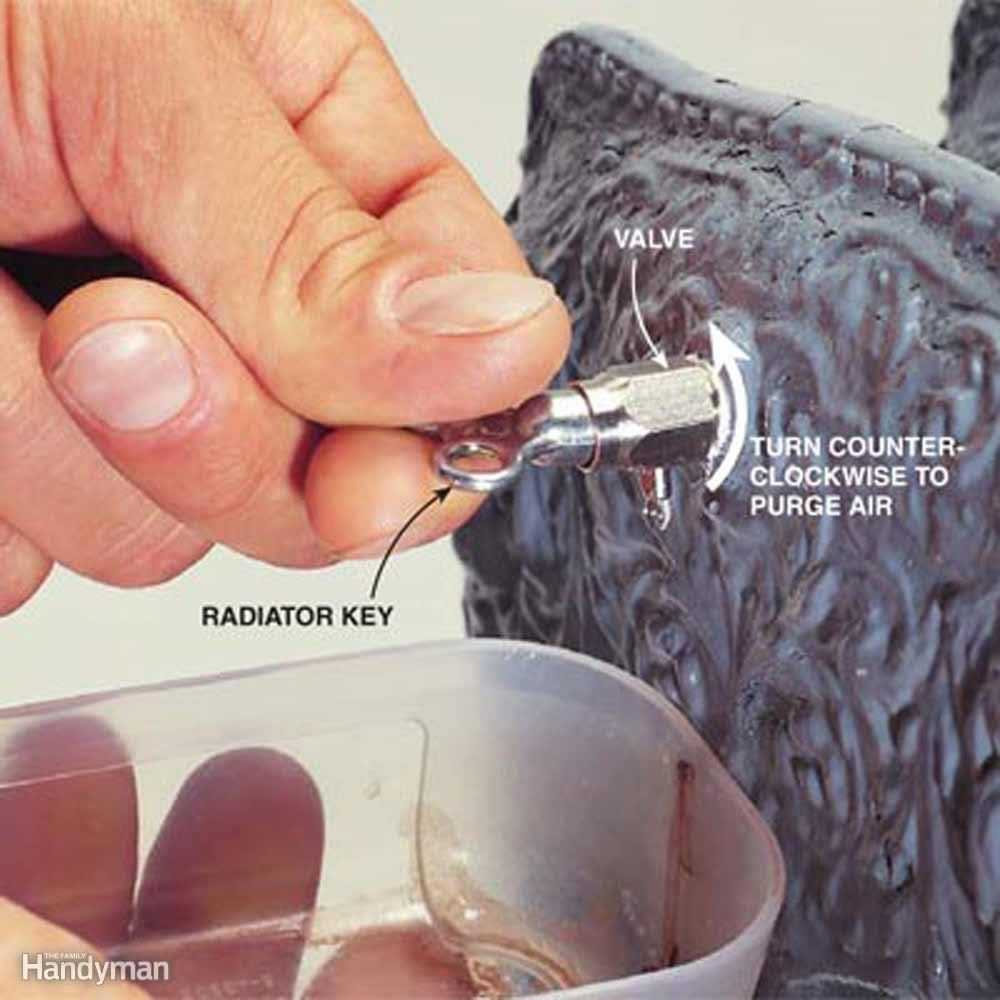
If some fins of your hot water radiator stay cold while others get hot, don't despair. Your radiator has some trapped air, and getting rid of it is simple. At the top of your radiator, look for a small valve like the one shown. Use a radiator key, 1/4-in. 12-point socket, or a flat screwdriver (depending on your valve type) and slowly turn the valve counterclockwise until water starts dripping out. This will release trapped air and let hot water into the cold fins. While you're at it, you should repeat the process with your other radiators.
Bleeding the radiators will lower the pressure in your system, so you might have to slowly add water to increase the pressure. Do this by opening, then closing, the valve on the water pipe above the boiler. In fact, you may need to add water while bleeding the radiator in order to purge the air from the system. This is where a helper will save on trips up and down the stairs. If you're unfamiliar with your system, call a pro.
How much pressure you need depends on how high the water has to rise. The basic rule is 1 lb. of pressure for every 2 ft. of rise. Your gauge may read in pounds, feet or both. A basic two-story house, with the boiler and expansion tank in the basement, needs 12 to 15 lbs., or 25 to 30 ft., of pressure.
18
/
20
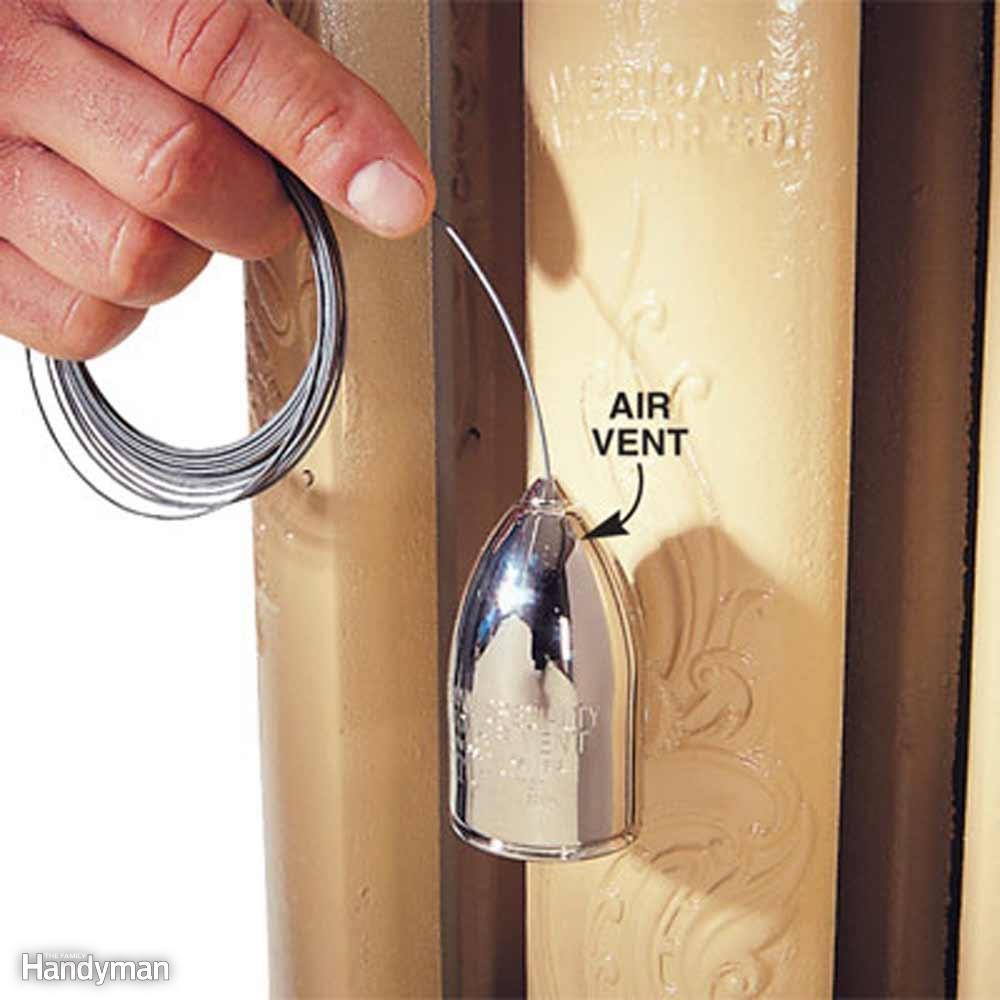
Clear a Steam Radiator Vent
Don't confuse a hot water system with a steam system. Steam radiators have an air vent, like the one shown, about halfway down the side. Unfortunately, many of these air vents get painted over, plugging the air hole. Clear the air hole in the top of the vent with a small wire or sewing needle. If you're still worried about the air vents working, consult a hot water/steam heat specialist. Replacing these vents costs $16 to $20 per radiator.
19
/
20

Clean Your Chimney
How often do you need to have your chimney cleaned? It depends on the moisture content of the wood you burn. If you burn mostly green (wet) logs, have your chimney cleaned or inspected every 50 burns. If you see moisture bubbling out the ends of the logs when they're burning, the wood is wet. This green wood doesn't burn cleanly and sends a lot of unburned particles (smoke) up the chimney, where they build up as creosote and soot. Dry hardwoods, such as oak and birch, burn hotter and cleaner. With them, have your chimney cleaned or inspected every 70 burns. A chimney cleaning costs $225 to $400.
Creosote and soot buildup in the chimney flue is dangerous because it can ignite and cause an uncontrollable chimney fire. A quick way to tell if your chimney needs cleaning is to run the point of your fireplace poker along the inside of your chimney liner (see photo). If you find a 1/8-in. or more layer of buildup (the thickness of a nickel), call a chimney sweep. The chimney sweep we talked with said he sees 40 to 50 chimney fires a year, and more than half of the chimneys he services require extra cleaning because the homeowners wait too long before calling. In extreme cases, the hardened layer of buildup requires cleaning with special tools or chemicals.
If it's been a few years since your last chimney cleaning, now's a good time to schedule one. The cleaning includes an inspection for soot buildup, obstructions, cracks in the chimney liner and signs of water damage. Older chimneys often have gaps between clay liner sections where the mortar has fallen out.
20
/
20
Winterize Your Gas Grill
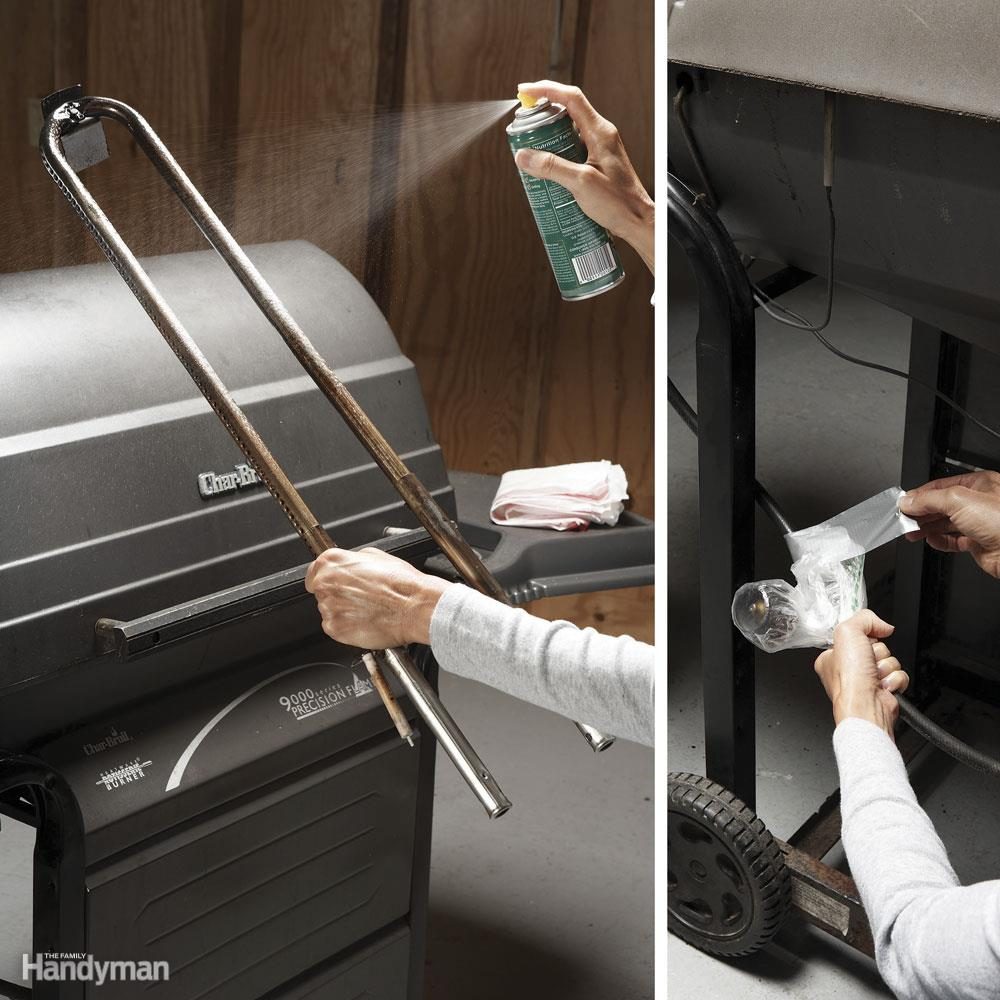
If you're not a winter griller, now's the time to pack away your grill before it's covered with a foot of snow. In addition to giving your grill a thorough cleaning to remove grease and food scraps, take these steps to help prevent any unpleasant surprises when you fire up your grill again next spring.
Shut off the gas at the LP tank, unfasten the burner, slip the gas tubes off the gas lines and lift out the unit. Coat the burners and other metal parts with cooking oil to repel moisture that can build up over the winter and to prevent rust. Then wrap the burner unit in a plastic bag to keep spiders and insects from nesting in the gas tubes during the winter. This is a common problem that can make for balky starts, uneven flames or even a one-alarm fire the next time you light your grill.
If you're storing your grill outside during the winter, just keep the propane tank connected (but shut off) and put a protective cover over the entire grill when you're done cleaning it. If you're storing the grill indoors, don't bring the tank inside, even into the garage or a storage shed. A small gas leak can cause a huge explosion if the tank is stored in an enclosed space. Instead, disconnect the tank and store it outside in an upright position away from dryer and furnace vents and children's play areas. Tape a plastic bag over the grill's gas line opening to prevent insects from nesting.