


A fresh coat of paint can bring new life to old windows. Here's how to paint windows with minimal stress and frustration.

Painting Windows: 10 Tips for a Flawless Finish
1
/
10
Watch the Weather Report
Brandon Walker, a pro with decades of experience painting for ASAP Restoration, told us that environmental conditions can matter as much as your actual paint application.
“Paint has optimal conditions in which it works best,” says Walker. “If there is too much moisture in the air, or if the temperature is not right, then the paint won’t adhere to the window correctly, and then it will chip and flake off within a year or two.”
- Always check the label on the paint for the recommended temperature range.
- The most common issue is painters hoping to squeeze in one more job as Fall turns into Winter.
- If you absolutely need to have your windows painted in cold weather, look for paint with lower cure temperatures.
- Avoid temperature worries by removing the windows and painting them inside. (See the next tip for details!)
2
/
10
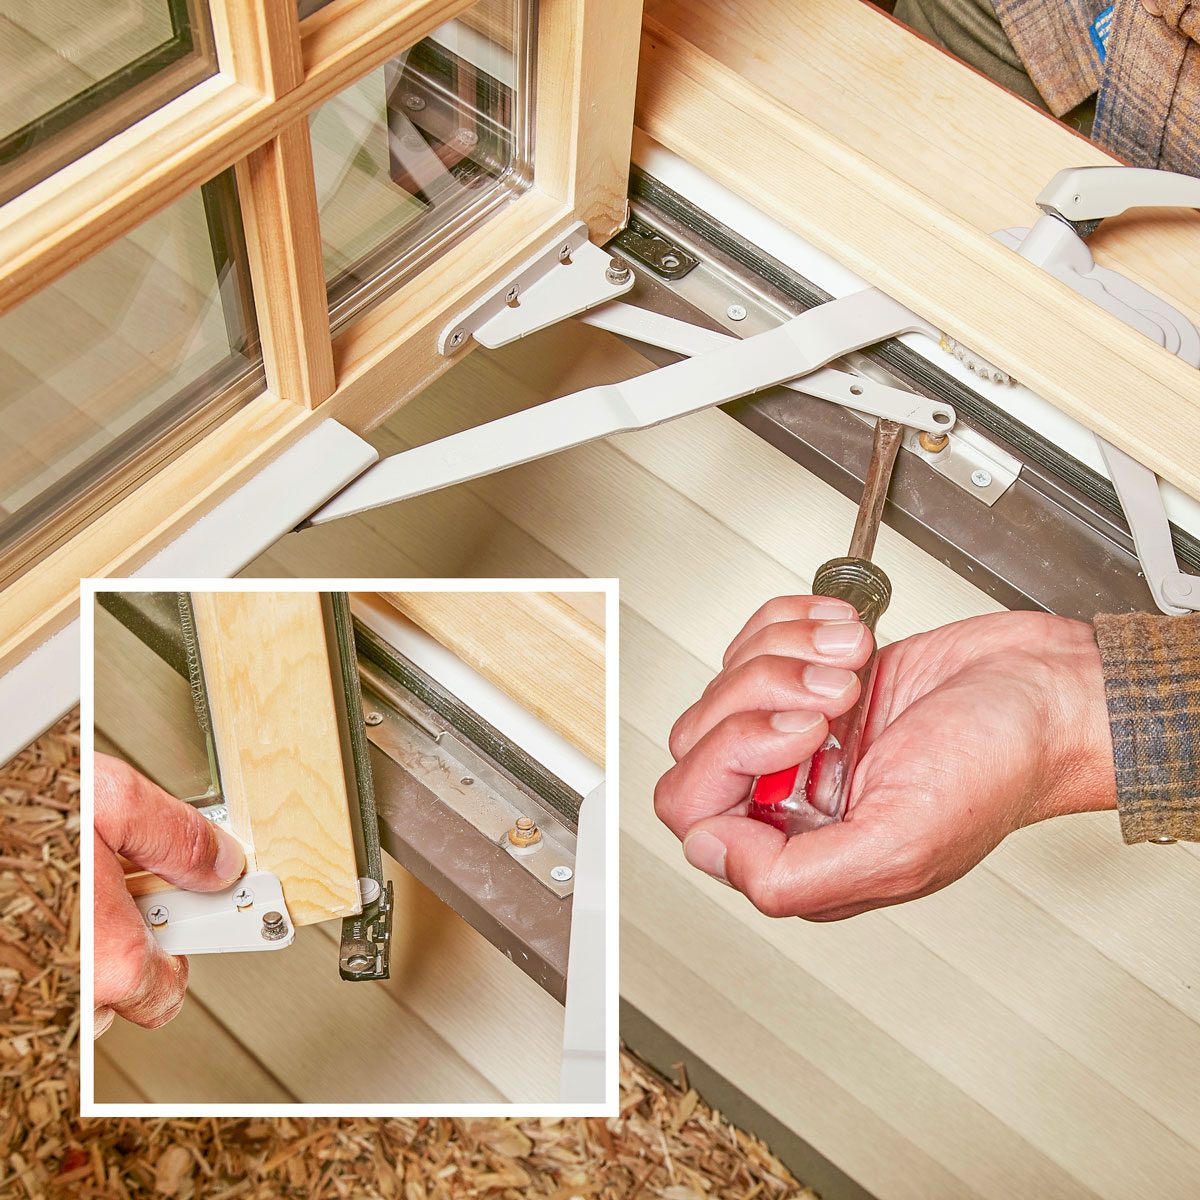
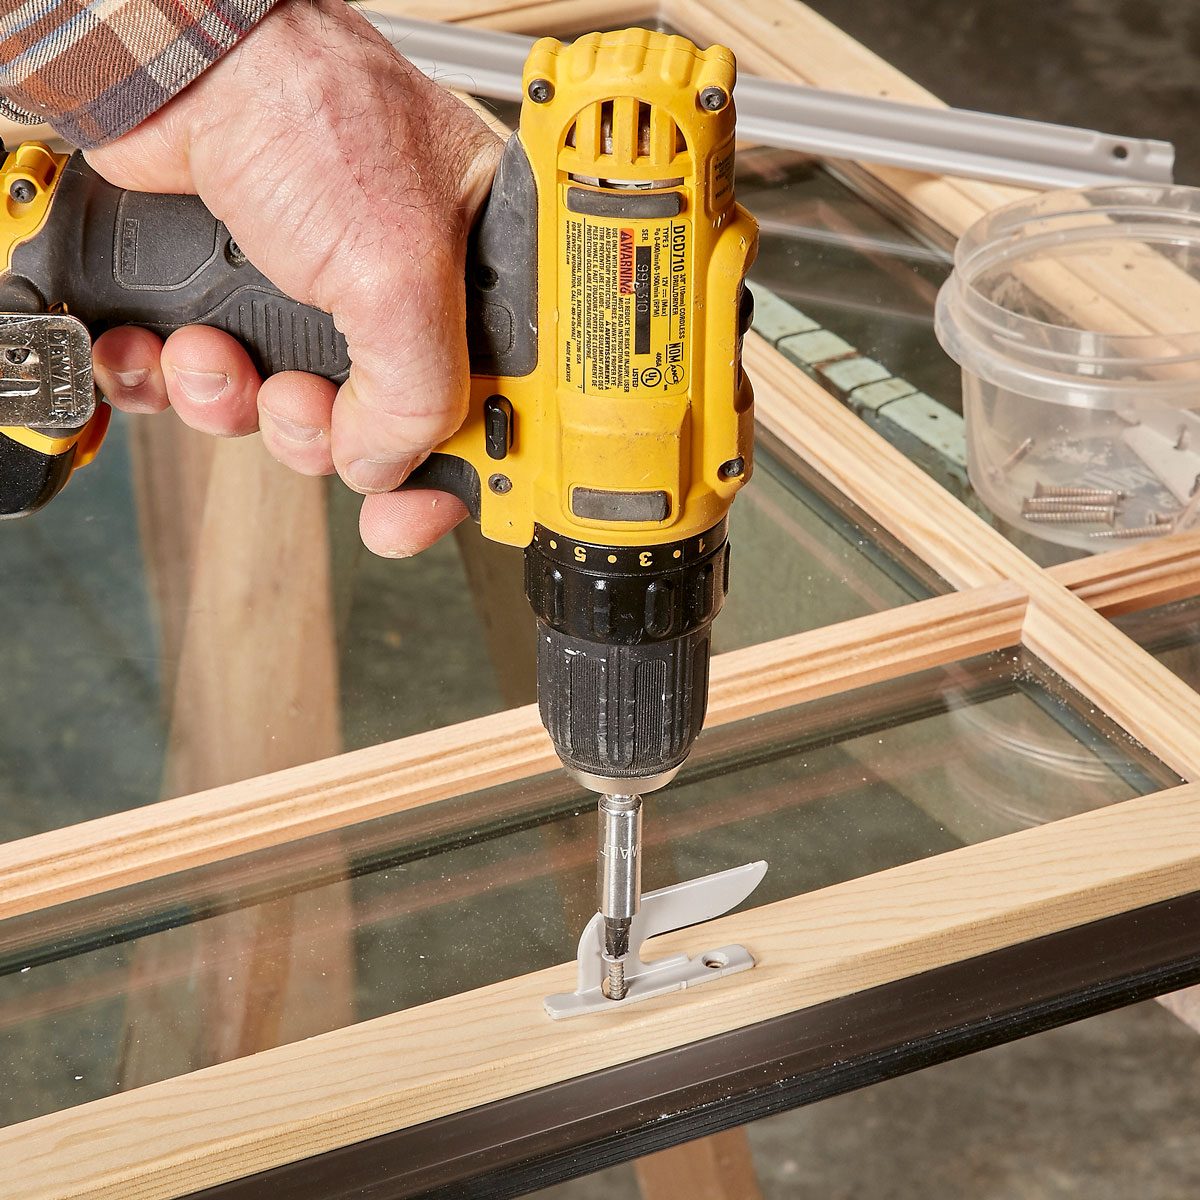
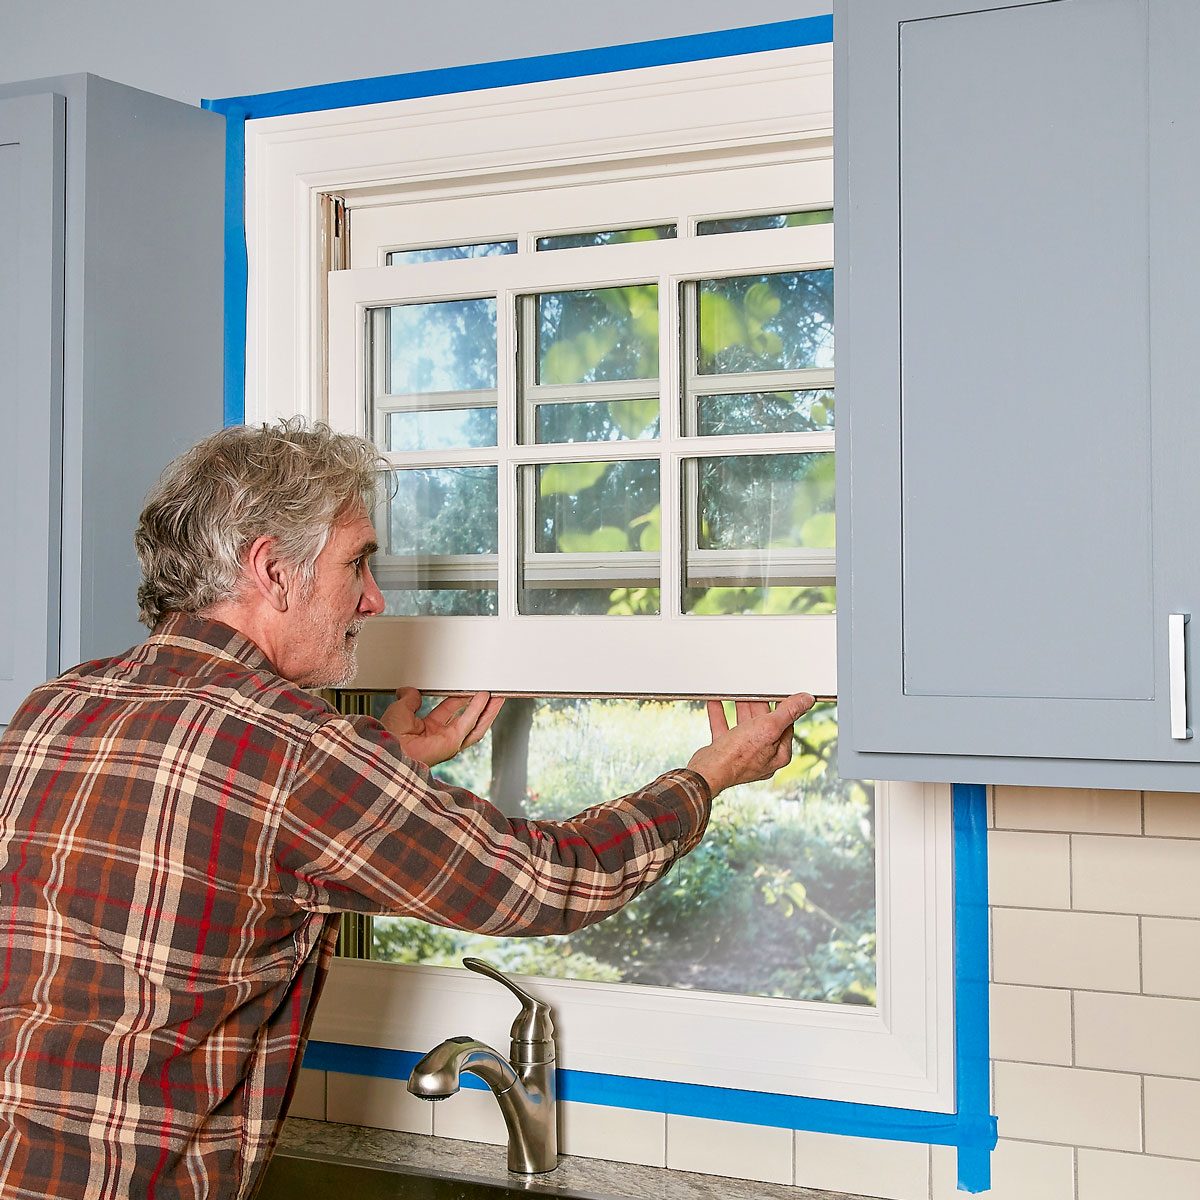
Remove the Sash
It’s quicker and easier to paint the sash if you remove it from the window frame and rest it on sawhorses or a workbench.
- The sashes in most modern double-hung, sliding and casement windows are removable.
- (The photo shows removing a casement sash.)
- Most newer double-hung windows are removable by pivoting them in and twisting to release them.
- Old double-hung windows held in by wooden stops are more difficult to remove. It may not be worth the effort unless you’re a perfectionist.
- Not all windows are removable. If needed, you can paint them in place.
- We’ll have additional tips about painting in place in other steps.
- If you remove the windows, work in small batches so the entire house isn’t opened at once.
- Some DIYers choose to leave the window openings exposed. While the window is down, a sheet of plastic or even cardboard can be held in place with painter’s tape.
- This will lower (though not eliminate) the loss of conditioned air and insect intrusion.
3
/
10
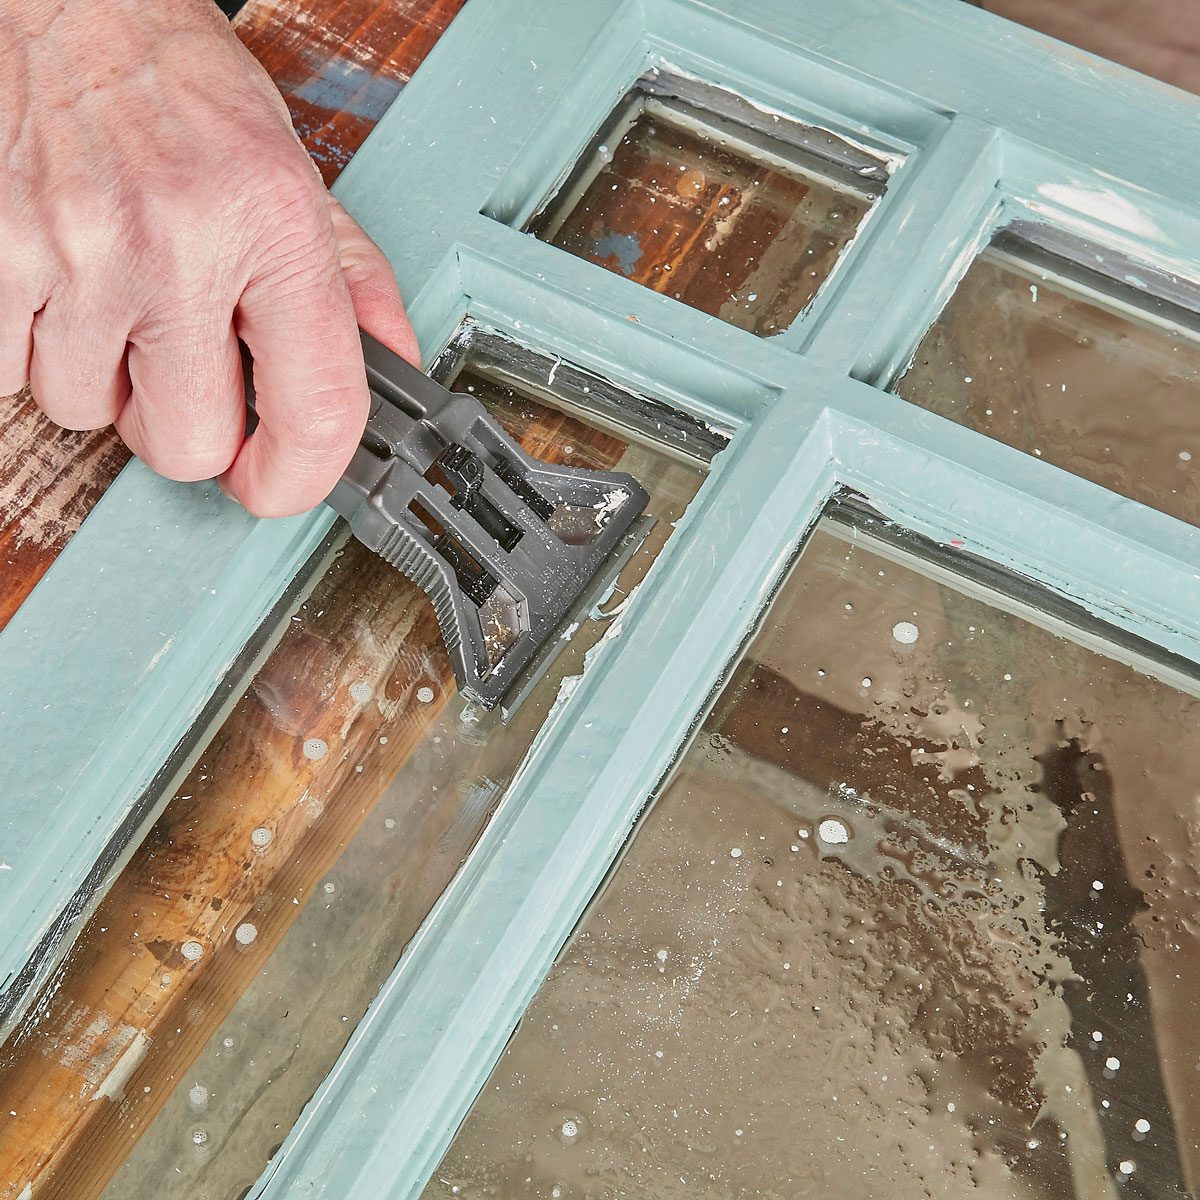
Clean and Scrape before You Paint
The battle for a successful paint job is won or lost in the preparation. More than one DIYer has laid on a beautiful topcoat of paint only to see it blister and peel due to an uneven connection with the layer below.
“Without a clean surface for the paint to adhere to, the chances of flaking, chipping, and peeling go up exponentially,” explains Walker,
- Apply any window solution washing solution you prefer (it can be a commercial product like Windex or a homebrew like vinegar and water).
- Scrape away debris with a new, single-edge razor blade.
- Never scrape dry glass. Applying a cleaning solution first avoids scratches.
- Wipe off with a damp cloth to avoid leaving a residue.
- If the windows are heavily caked with previous paint layers, you may need to sand them smooth.
- See the next tip about sanding, and if your home was built before 1978, pay special attention to safety issues.
4
/
10
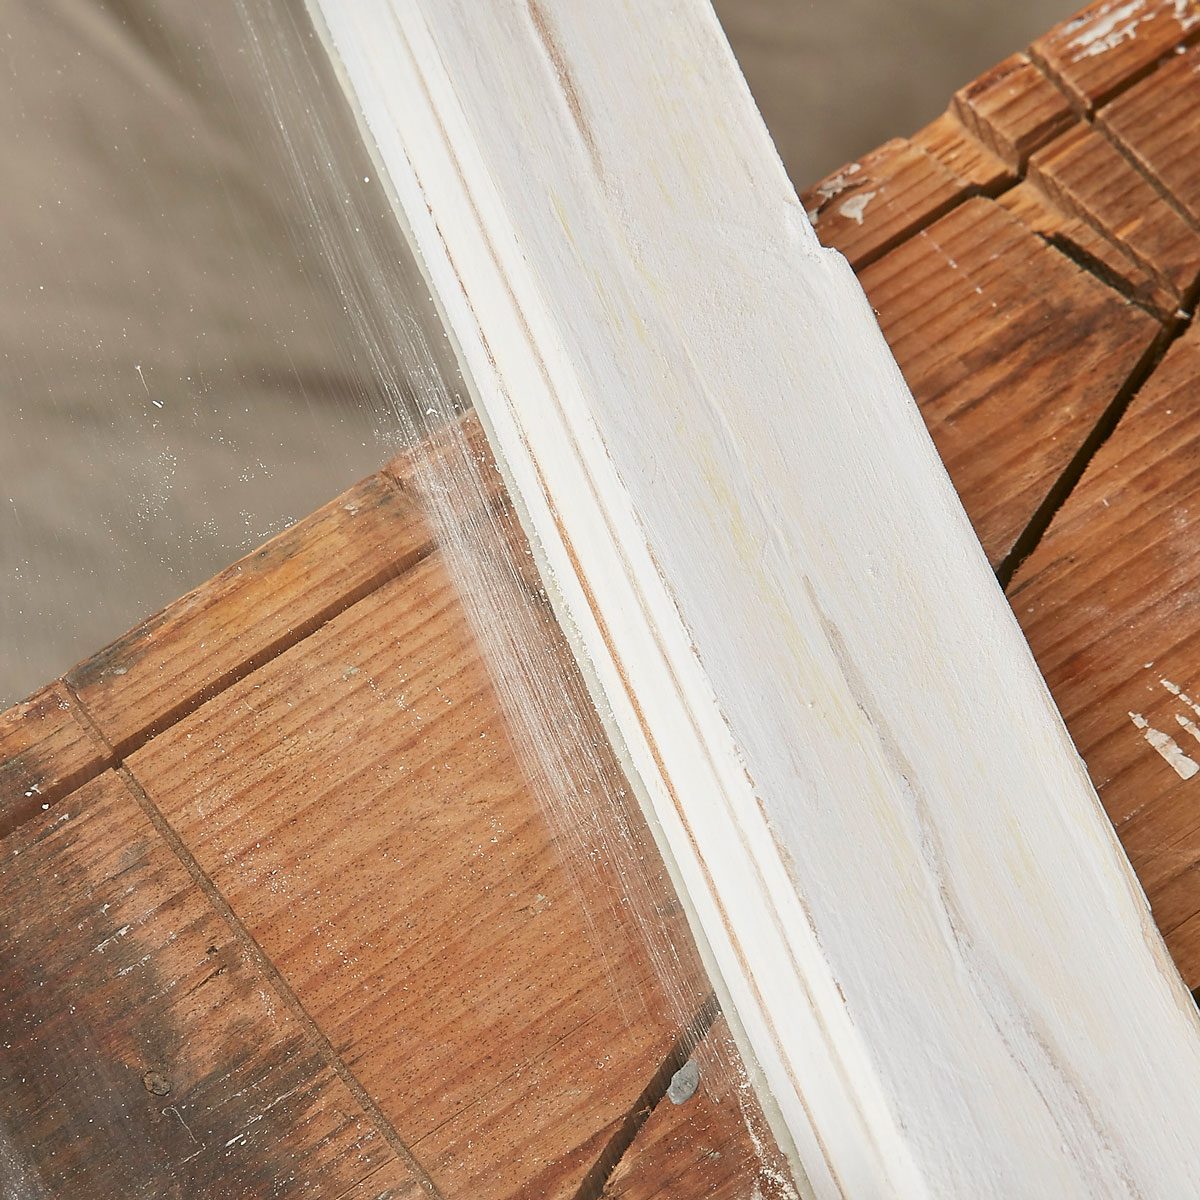
Sand Carefully
There are two major considerations when sanding the paint on your windows: not damaging the glass, and not creating a hazard for you and your family.
- If your home was built in 1978 or earlier, there’s a chance that you have lead paint. Sanding lead paint creates a serious health hazard.
- To learn more, consult this article: 14 Ways to Avoid Lead Paint Poisoning in Older Homes
- For more information, call the National Lead Information Center at 1-800-424-LEAD (in the U.S.) or visit epa.gov/lead.
- Avoid accidentally scratching the glass by protecting the glass with masking tape.
- Note that you don’t need blue painter’s tape to get this level of physical protection.
- You can skip taping entirely if you’re extra careful as you sand alongside the window glass.
- Avoid using a power sander along the edge of the glass, because even masking tape won’t defend against that much force.
5
/
10
Remove the Hardware
This step is skipped all too often. Nothing screams “amateur painter” like caked-over window hardware. “It may take a few more minutes to take off the hardware,” says ASAP’s Walker, “but this extra time now will pay off dividends in the end.”
- Remove latches and handles from double-hung windows.
- Remove the casement window operating hardware from the sash.
- Keep track of the screws and other pieces carefully.
- Worried about getting the parts back in the right spot? Take photos with your phone so you’ll see how to reinstall everything.
6
/
10
Start Painting Windows Early in the Day
Timing can’t be underestimated when learning how to paint windows.
- Plan your paint job to allow time for the paint on the sashes to dry before nightfall so you can reinstall them before night comes.
- If you didn’t remove the sashes, choose the side of your home to work on based on sun exposure.
- Painting west to east will provide more natural illumination and improve cure times.
- In the heat of summer, you may want to work ahead of the sun to avoid overheating.
7
/
10
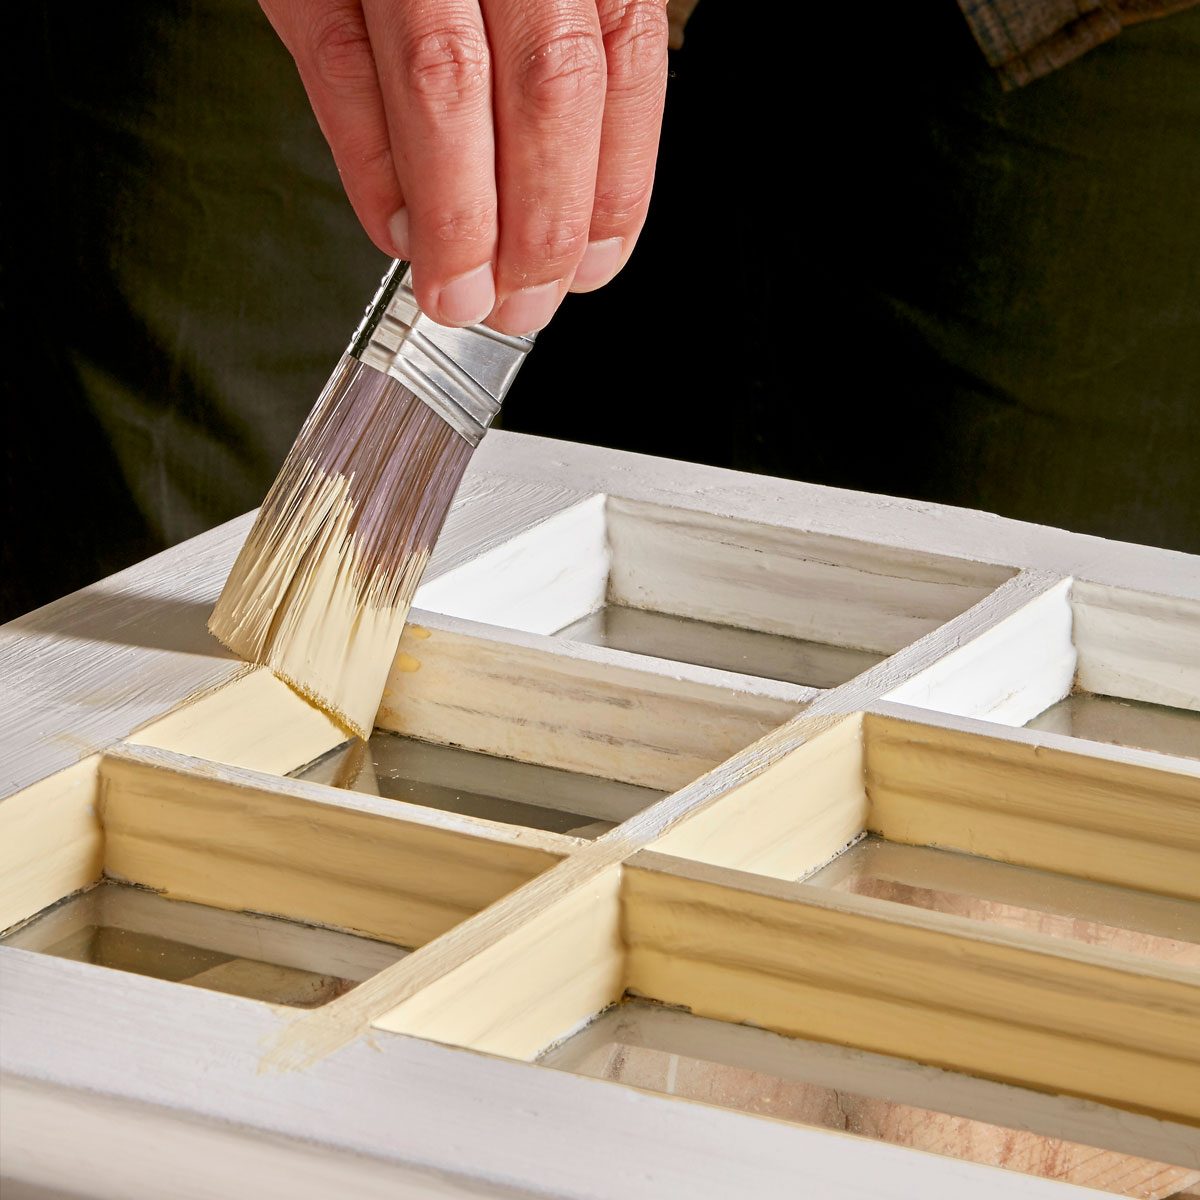
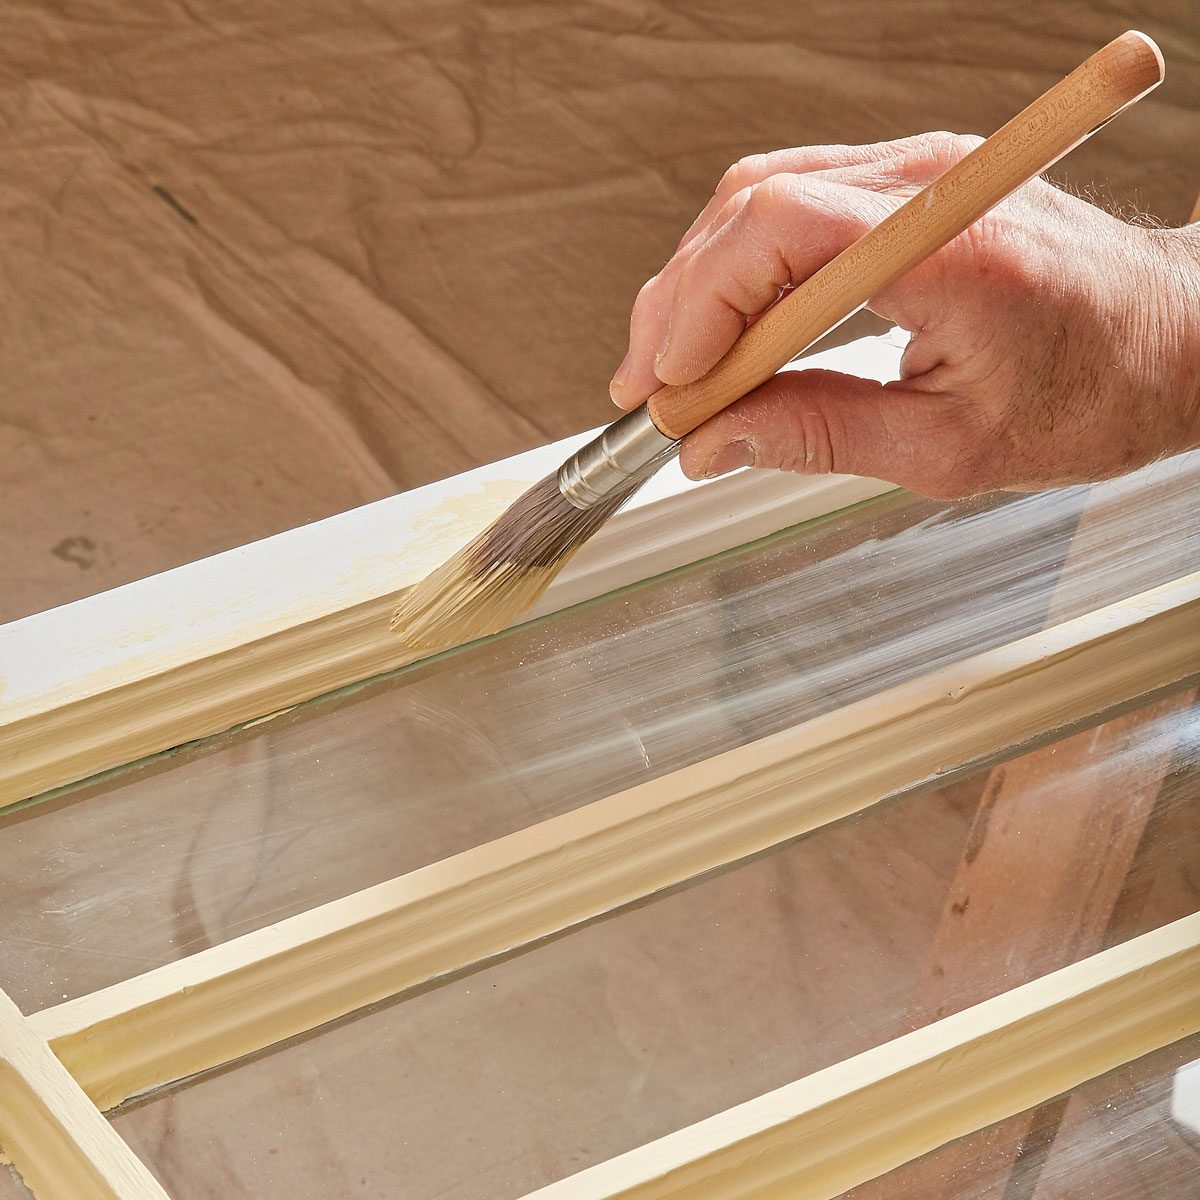
Use an Angled Sash Brush
Pick the right brush to make the job much easier.
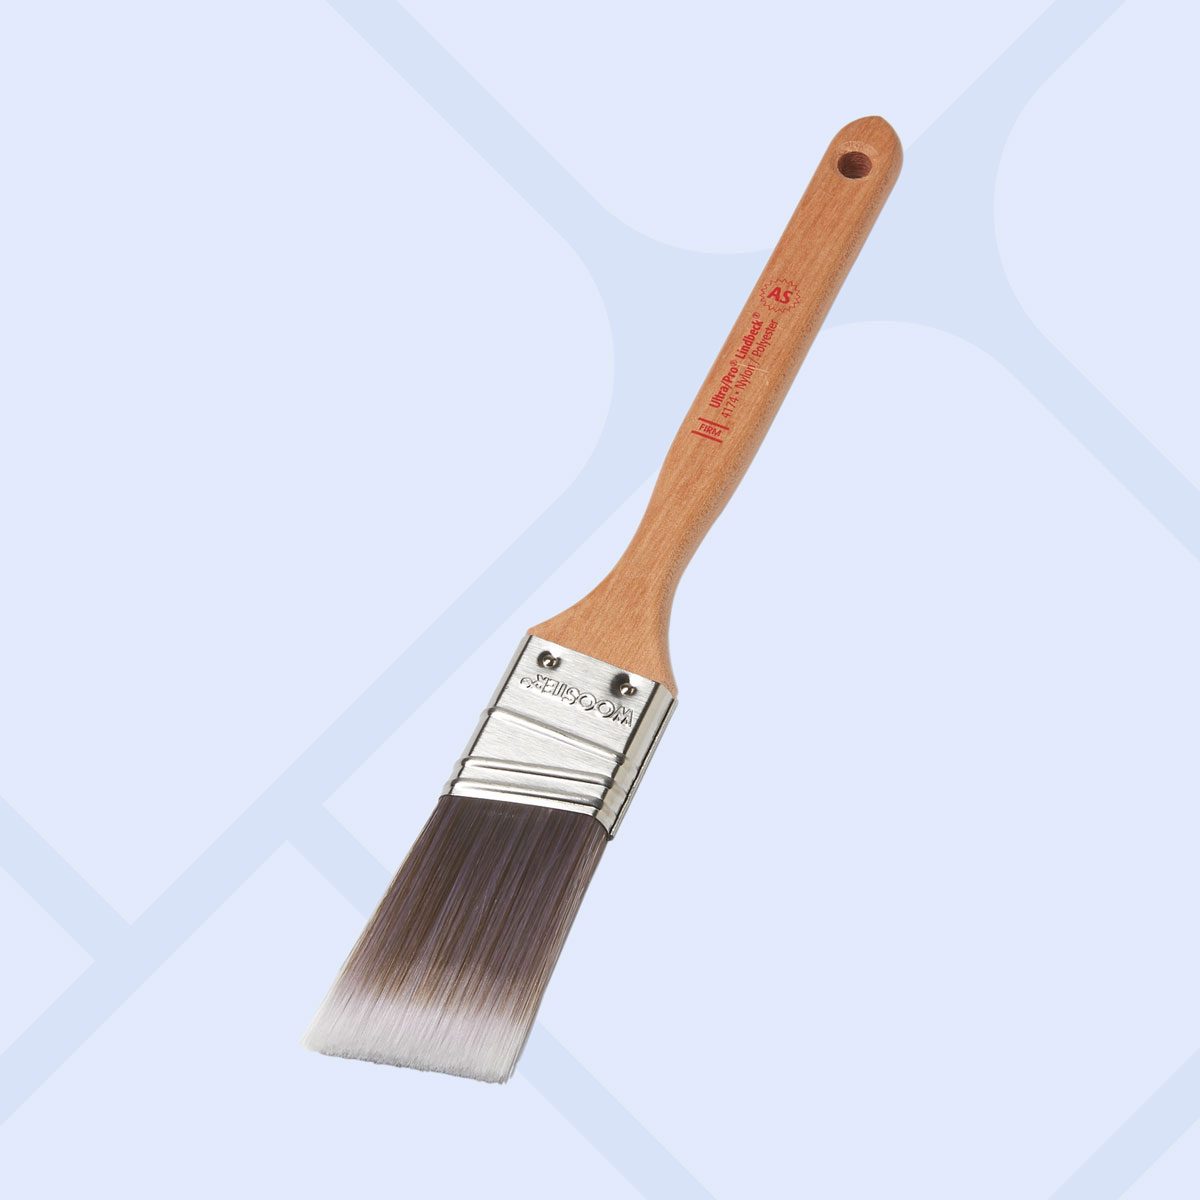
- The “right” brush is a matter of personal preference. Try a few different sizes to find the right fit for you.
- If you’re unsure where to start, we recommend a 1-1/5 angled sash brush.
- Most paintable surfaces on a window aren’t very wide, so a narrow paint brush will provide good coverage and be easier to control than a wider, flat brush.
- The angled bristles of a sash brush are specifically designed to neatly apply paint in tight corners and small spaces on windows.
- If you can, invest in a top-quality brush. Take care to clean and store it properly, and it will last for years.
8
/
10
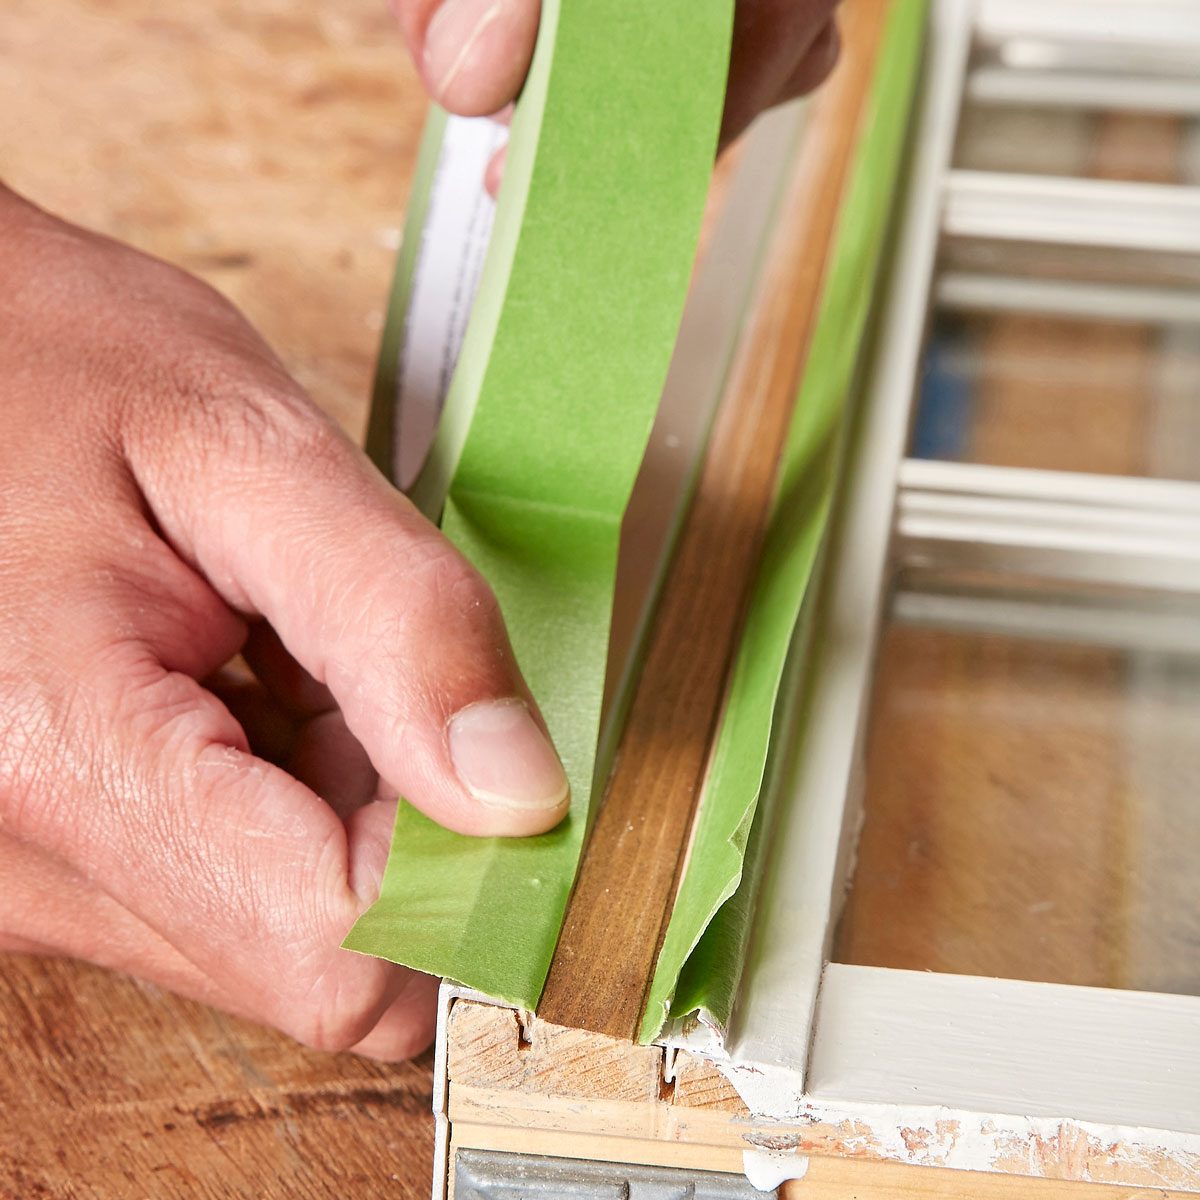
Avoid Painting Window Tracks or Weather Stripping
This is essential if you want windows that still open when you’re done painting!
- Window tracks and weather stripping won’t function properly if they’re covered with paint.
- Sometimes, the easiest way to avoid painting these parts is to cover them with masking tape.
- If you have an oddly shaped section or detail you want to protect, use a toy putty (such as Silly Putty).
- You can mold the putty into whatever shape you like, and it will stay in place as you paint.
- If you have an oddly shaped section or detail you want to protect, use a toy putty (such as Silly Putty).
- You can also slip a wide putty knife between the wood frame and the track, shielding them as you paint.
- Paint slightly less than the width of the putty knife, slide the knife down the frame, and repeat as needed.
- If you do slop paint onto these areas, wipe it off immediately with a damp rag.
- If you wrap the damp rag around a putty knife, you can use it more precisely.
9
/
10
Use Painter’s Tape Appropriately
Painter’s tape can keep your paintwork from spilling over onto other surfaces. With complicated shapes like windows, it’s a balance between the time it takes to apply tape, and your skill level at painting with a steady hand.
- When painting windows in place, it can pay off to only mask areas you think will be difficult to paint.
- Walker says that giving a little thought to what items you protect with blue tape can save a lot of time in the long run, instead of trying to get blue tape into every crack and corner of the project.
- Covering window glass with masking tape is so time-consuming that it’s usually quicker to simply paint neatly along the glass with your brush.
- If paint gets on the glass, it’s easy to scrape it off later with a razor blade or a damp rag wrapped around a putty knife.
- If you’d rather mask the glass, use masking tape with edge-seal technology to prevent paint drips from creeping under the tape.
10
/
10
Move the Sash Before the Paint Dries
Windows have moving parts, and you don’t want to gum up their motion with paint. (This tip isn’t as important if you’ve removed the sash from the window and waited until it’s completely dry to reinstall it.)
- Avoid a stuck window by opening and closing the window a few times before the paint dries completely.
- Return to the window about an hour after you’ve painted it and open and close it to break any paint seal that may have formed.
- You may even need to do this again the following day just to be sure everything is unstuck.
About the Expert
- Brandon Walker has been painting on jobsites for over 20 years. With a wide-ranging background in construction and remodeling, he’s currently a Superintendent with ASAP Restoration.