These ingenious workbench upgrades will make a huge difference in your workshop efficiency. And they’re easy to DIY!
Our editors and experts handpick every product we feature. We may earn a commission from your purchases.Learn more.

These ingenious workbench upgrades will make a huge difference in your workshop efficiency. And they’re easy to DIY!
Our editors and experts handpick every product we feature. We may earn a commission from your purchases.Learn more.

Mount charger stands for your cordless tools on scrap pieces of pegboard and hang them on a pegboard wall so they don’t become an octopus-like tangle on a shelf or workbench. Just pull one out for charging, or plug it into a power strip under the pegboard and charge batteries right on the pegboard. Most chargers have mounting holes or keyhole slots on the bottom. For those that don’t, use a large hose clamp ($2 at a hardware store) to mount them. Thanks to George Moyer for ending our charger clutter.

Reader R. B. Himes sent several cool tips for keeping pencils handy. Insert pencils into holes drilled in the edges of shelves, or put small screw eyes into the erasers and hang ’em from nails. Reader Jerry Seaward has another: Glue a scrap of window screen to the bottom of a piece of 1-1/2 in. dia. PVC pipe and clamp or screw the pipe to your workbench for a dust-free pencil holder. Other pencil hangouts? Wrap a strip of self-stick Velcro around a pencil and put a corresponding strip wherever you need a pencil. To make a pencil stay put on metal surfaces, attach a piece of magnetic tape ($2 a roll at fabric stores) to it.
Need another? Buy plastic coaxial cable holders ($2 for a 20-pack), reverse the brad direction and tack ’em on the side of a work-table or tool rack. You can quick-draw the pencils out of the plastic jaws.

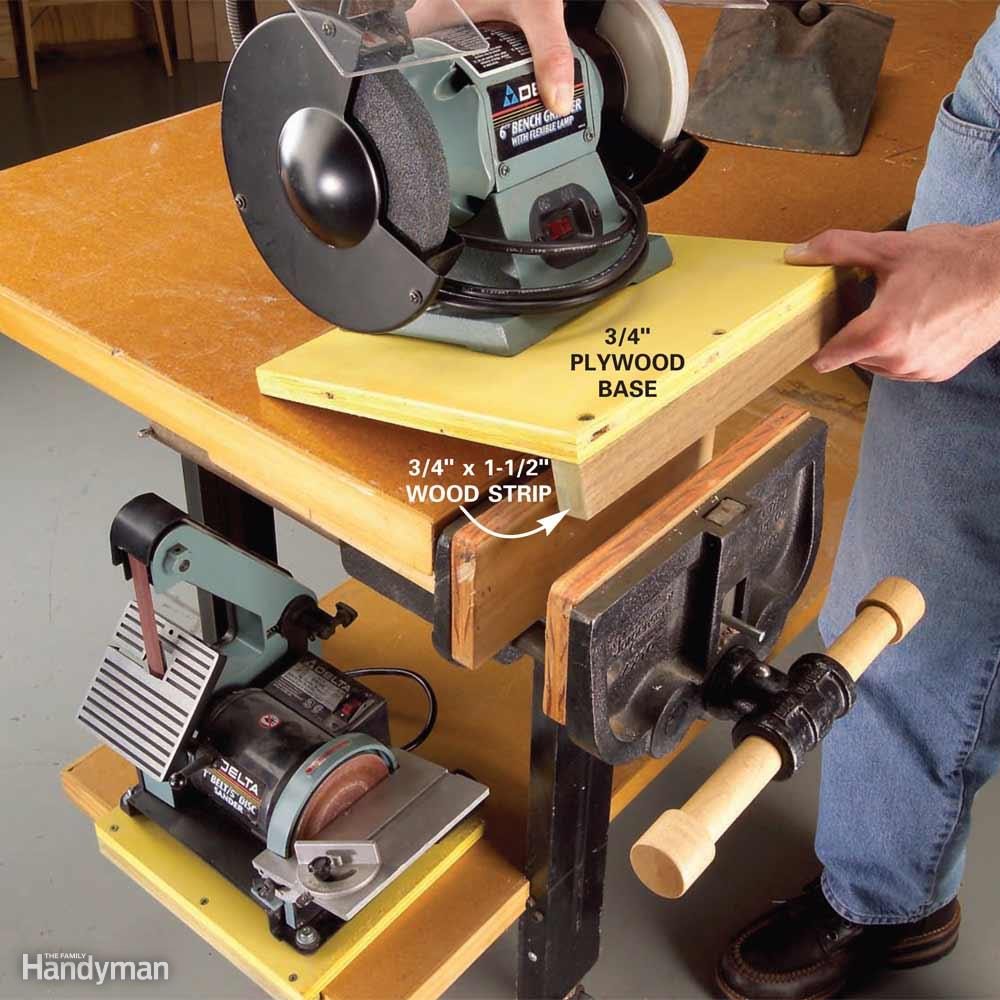
When you make a table for a portable workbench with a clamping top, bevel the edges of the auxillary table’s cleats at 10 degrees. Beveled cleats will keep it from popping up when you’re working. And using two cleats on the outside, instead of one in the middle, lets you store the table flat between jobs. P.S. Check out the Keter Folding Work Table, too—You can use this workstation as a miter saw stand, to secure boards for cutting or painting or for whatever projects are on your to-do list.

It used to drive me nuts waiting for my random orbit sander to stop spinning so I could set it down. If I didn’t wait, it would dance around and tumble off my workbench. My solution was to keep a piece of carpet on my bench. I just set the sander on the carpet and let it wiggle quietly to a stop. — Phil Wortford.

Holding odd-shaped parts in a bench vise is tricky. When I need to sand or file an odd-shaped part, I sandwich it between two pieces of rigid foam in the vise. This solidly holds the part without marring it. – Anne of All Trades

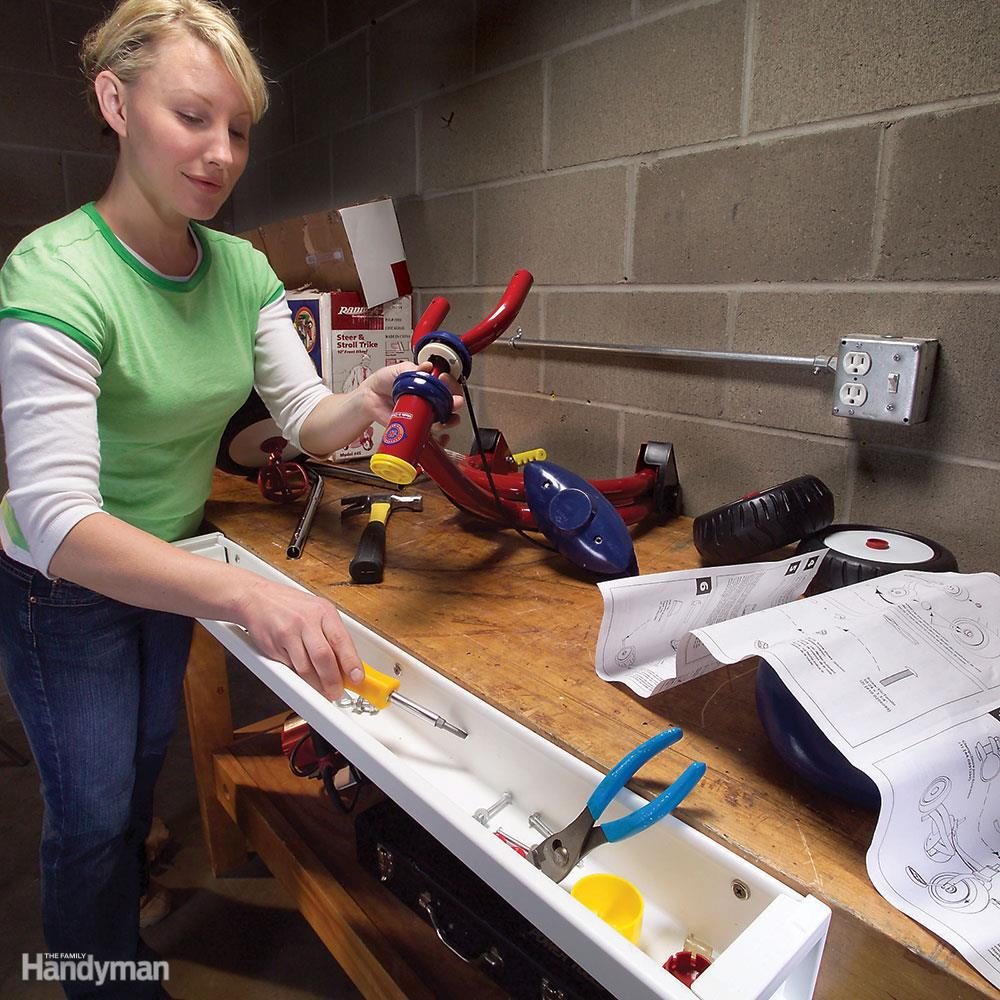
This oldie-but-goodie tip comes from David Gersic. Screw a power strip to the side of your workbench and you won’t have to monkey with extension cords anymore when using power tools for bench work. Next, check out 19 futuristic workshop tech products that’ll make DIYers drool.

Nothing has a chance to randomly accumulate in the shop—not in apron pockets, on cabinet shelves, not even in a drawer. There is truly a place for everything, everything goes in its place, and no usable area remains empty. One of his hardware drawers is a sublime example.
In this drawer, movable partitions are held in place by strips of foam weather stripping at the front and back. The 44-plus boxes rest on edge, labels up, for easy grabbing and stowing. Think of never having to wonder where to find a 1-in. drywall screw or a 3/8-in. washer!
Shop for boxes at craft, tackle, office or dollar stores. But if you want lots of just about any particular size box, check out althor.com. This is for super-organized shop rats, though. The minimum order is $100! But you get tons of high-quality boxes for the money.

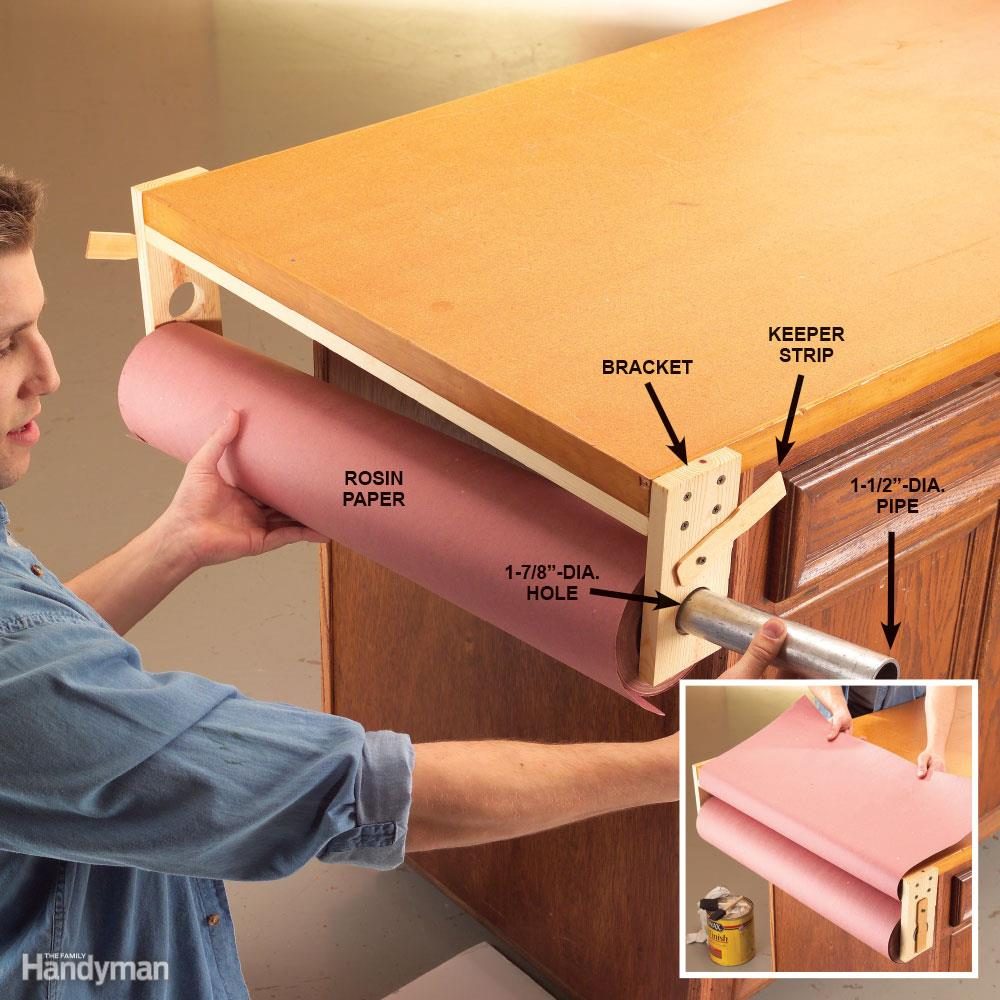
Cutting sandpaper is a quick way to dull your scissors or utility knife blade. Instead, I fastened a hacksaw blade to the edge of my workbench. I slipped a washer behind the blade at each of the mounting holes so a sheet of sandpaper to easily slides in behind the blade. I fold the paper where I want to cut, just as a reference. — Kim Boley. Have a small workshop? Try some of these brilliant storage solutions!

This waste-management ingenuity is pretty handy at a miter saw station. Directly below the hole is a recycling bin resting on a rollout shelf. When the bin fills up, it’s off to the burn pile. Learn 11 things you didn’t know about recycling.

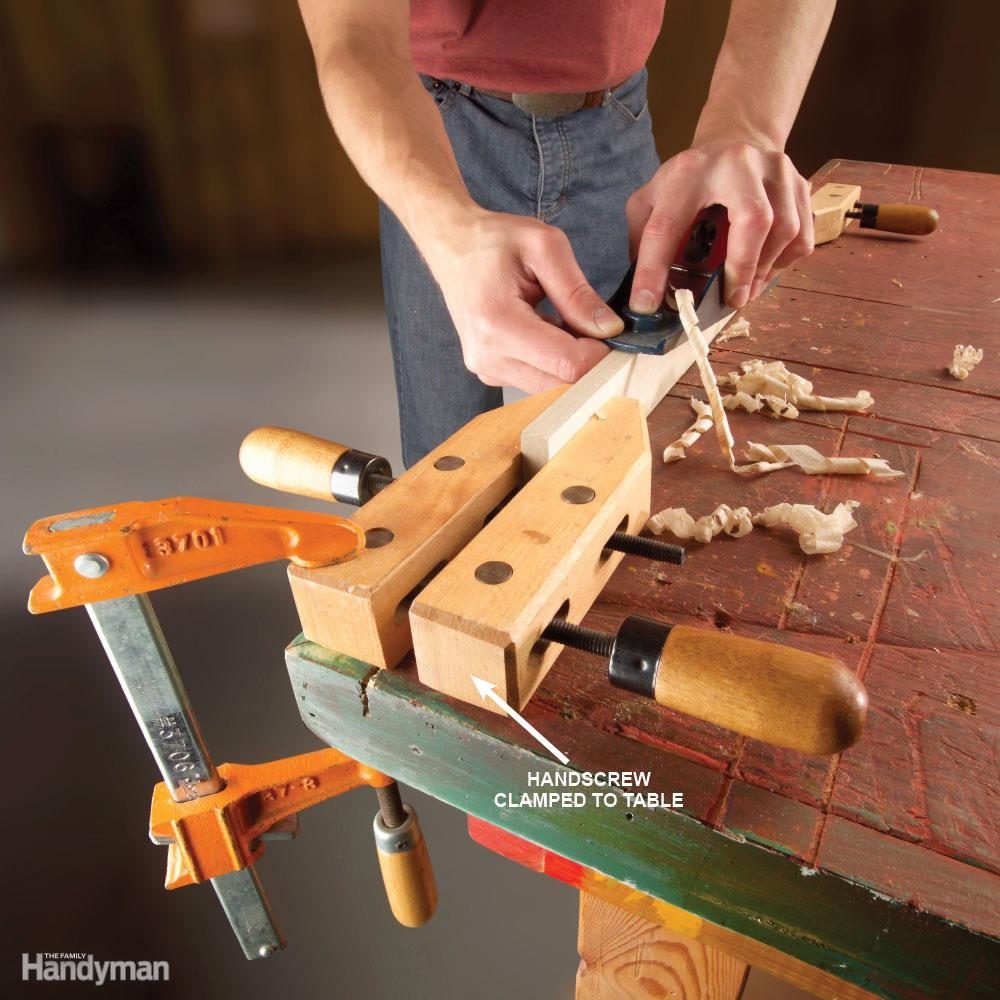
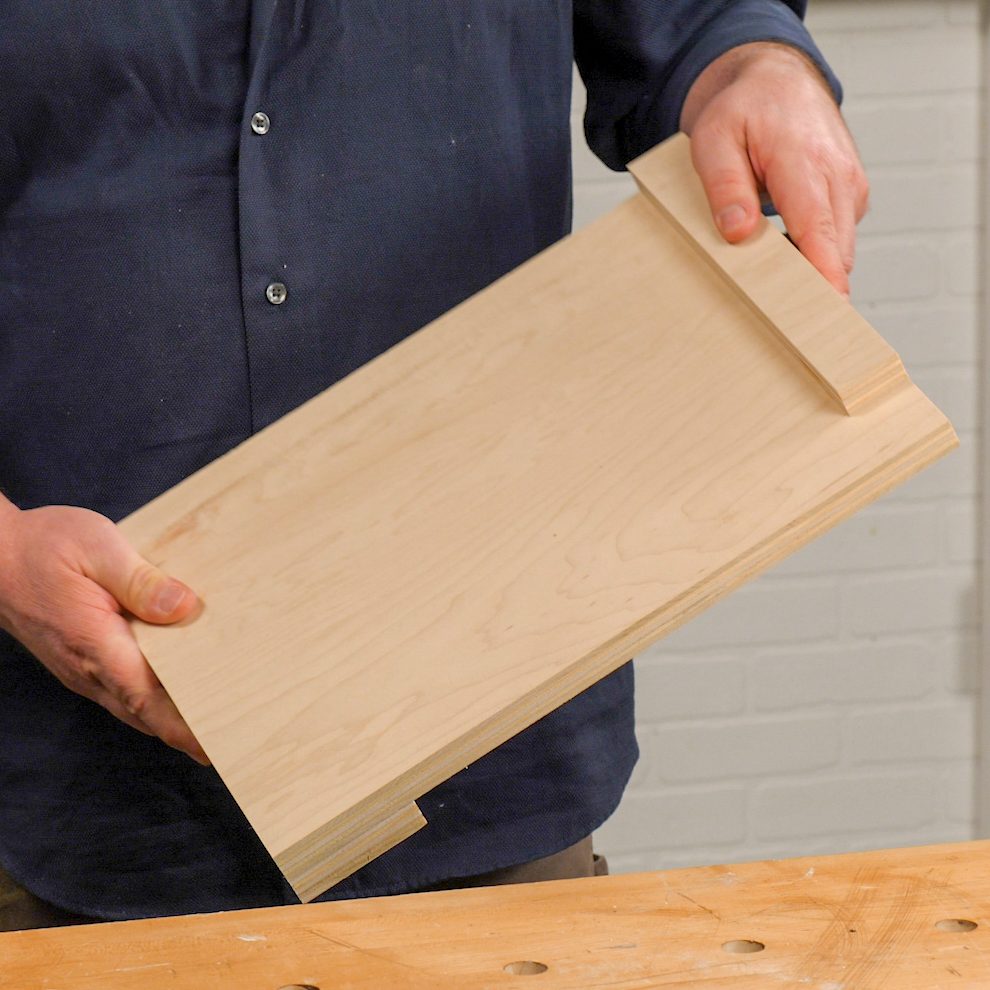
The right jig or fixture makes work efficient and produces excellent results. I made this jig to round over the ends of a group of identical parts. It’s just a platform with two rails that hold the parts in place. The rails are the same height as the parts. This, along with the “dummy” part at the end, negates any tear out. Also, on a big roundover like this, don’t take it all in one pass. Taking several shallower passes decreases the chance of leaving burn marks on end grain. – Christian Frost
Check out some more easy woodworking jigs right here.

You can mount a removable key-holed metal ruler on the front edge of your workbench, for both easy measuring on the workbench and for easy access for measuring and marking projects elsewhere. Simply drill keyholes (a larger hole with an overlapping smaller hole above it) in two locations along the ruler. After drilling the keyholes we sanded them smooth to get rid of the potentially dangerous sharp edges. Next, drill appropriately sized screws (ones that will fit into the smaller sized keyhole) to the front of the workbench and use the keyholes to mount the ruler to the bench with screws.
Also, it is important to note that we placed our screws in a location in which the ruler would lay flush with the edge of the workbench. This makes it extremely easy to use the ruler for quick project measurements because of its convenient location. Plus, check out these 45 hugely helpful handy hints!

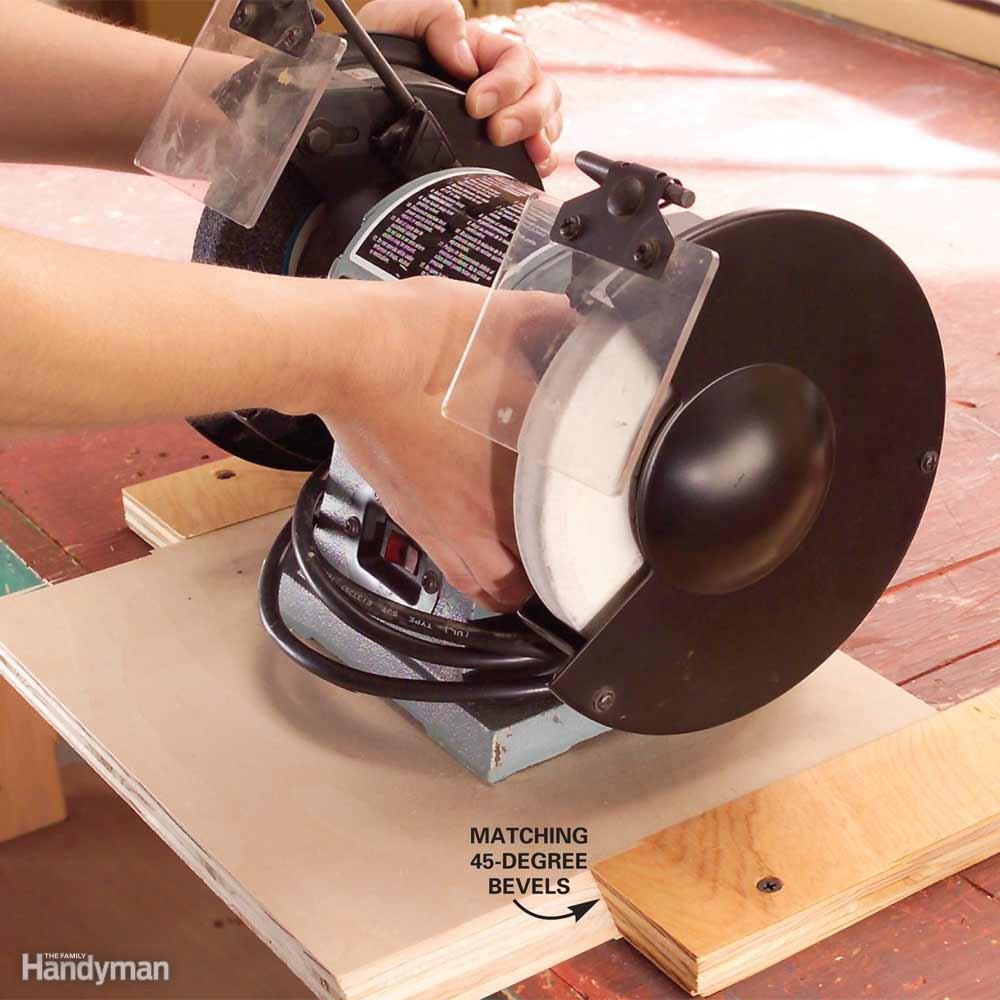
Belt sanders are essential woodworking tools, but you need to make sure the piece you’re sanding stays put. That’s sometimes difficult when you’re sanding something on your workbench, as clamps can get in the way of sanding. The trick is to screw boards to two edges of your work surface, creating a corner. As you sand, the belt’s spin pushes the workpiece against the boards or “fiddles” as they’re sometimes called. Make sure your fiddles are thinner than the part you’re sanding. — Travis Larson
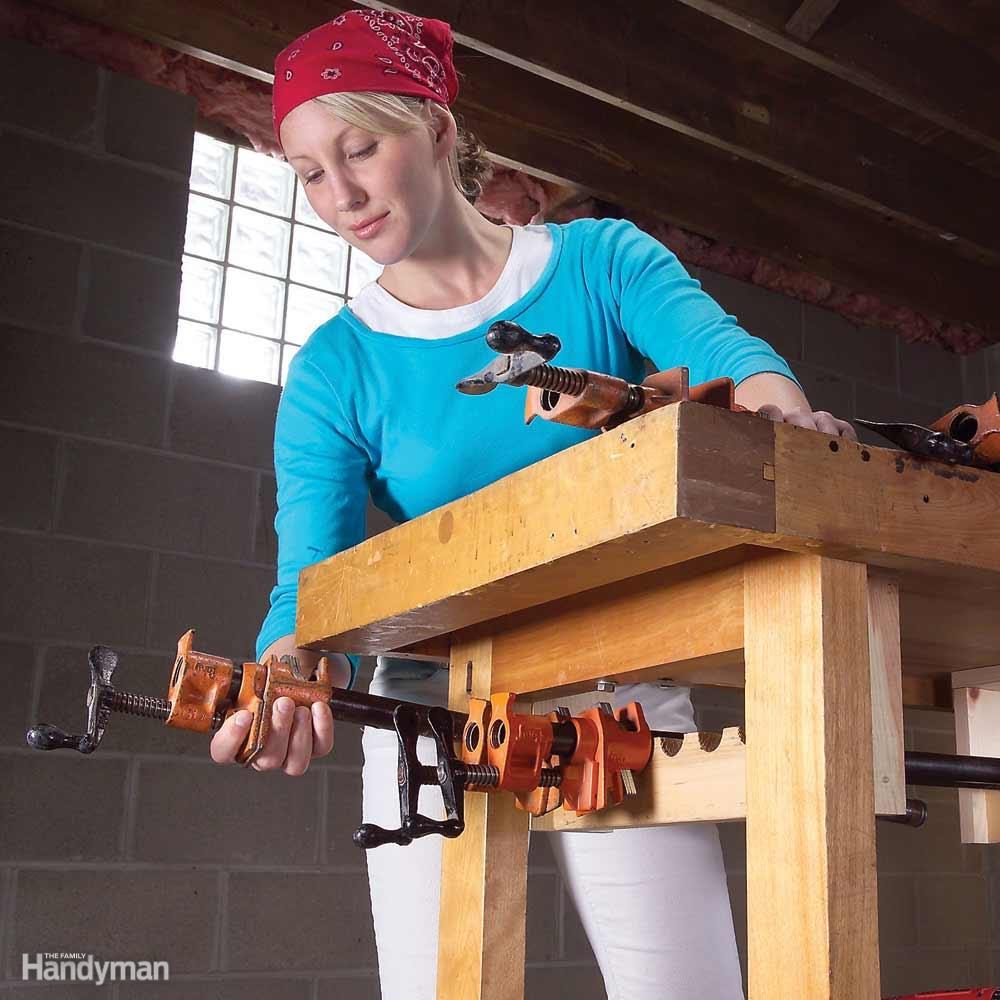
This handy under-mount rack keeps your clamps right where you need them. Simply cut a series of 1-1/4-in. diameter holes along the center line of a 2x6 and then rip the 2x6 in half to create the half-circle slots. Next, screw 1x4 sides and top to the cradle and screw it to the bottom of your workbench.

Ever scratched your head over how to position clamps on a project that requires clamping from all four sides? This gluing pedestal makes the job a breeze. Buy a 12-in. pipe nipple with pipe flanges on both ends and screw it to a couple of scraps of 3/4-in. plywood. Cut the pedestal top an inch or so bigger than the project to make clamping easier. Now, with the base of the pedestal clamped on your workbench, you can crank on the clamps from every angle; up, down and sideways. (Be sure to cover the top with plastic sheeting or wax paper, or the top will become a permanent part of the project.) Thanks to Travis Larson for this high-flying tip.
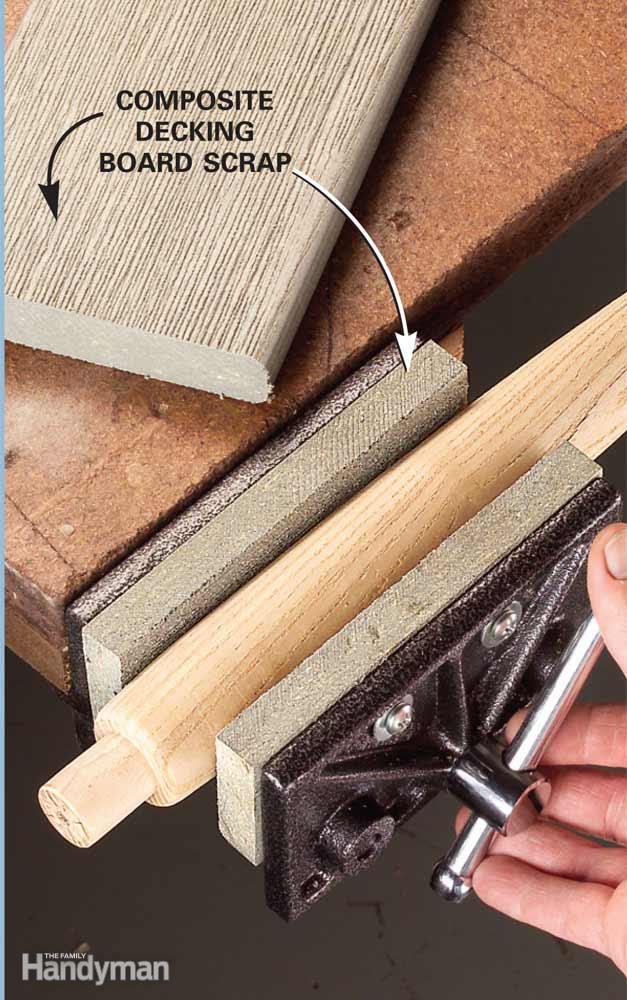
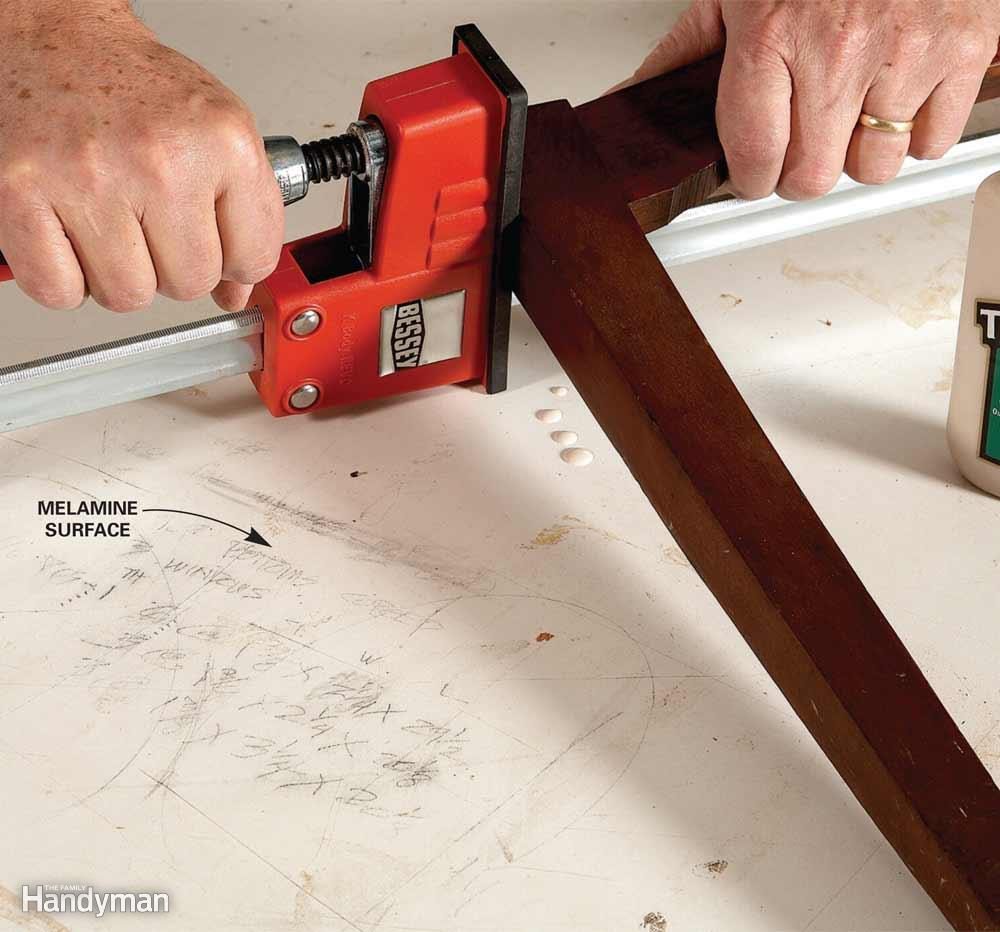
Scrap pieces of composite decking boards make ideal jaw liners for a woodworking vise. Compared with a wood liner, the rubbery surface has more give and grip. That makes composite liners good for holding cylindrical or oddly shaped work pieces. And when you release the clamp, the composite liner returns to its original flatness.

Save space and make plywood cutting easier by building this hinged, flip-up, open-web bench. It’ll take some care and patience to cut the interlocking joints, but after that, assembly is a cinch. Make everything from 1x4s. The bench shown is about 3 x 5 ft.—a good size for nearly any plywood cut. Keep the screws at least 1/4 in. from the top edge. Get it out of the way by tipping it up against the wall and locking it into place with a wooden turnbuckle, turned behind a 1×2 catch block that’s mounted with the thin side against the front board.
The grid work provides solid, even support for sawing or finishing. But make sure to set your saw to cut only 1/8 in. into the table so you don’t hit any of the assembly screws or weaken the table. Thanks to Bob Dawson for this cutting-edge tip. Build a workbench on a budget that functions like a million bucks.
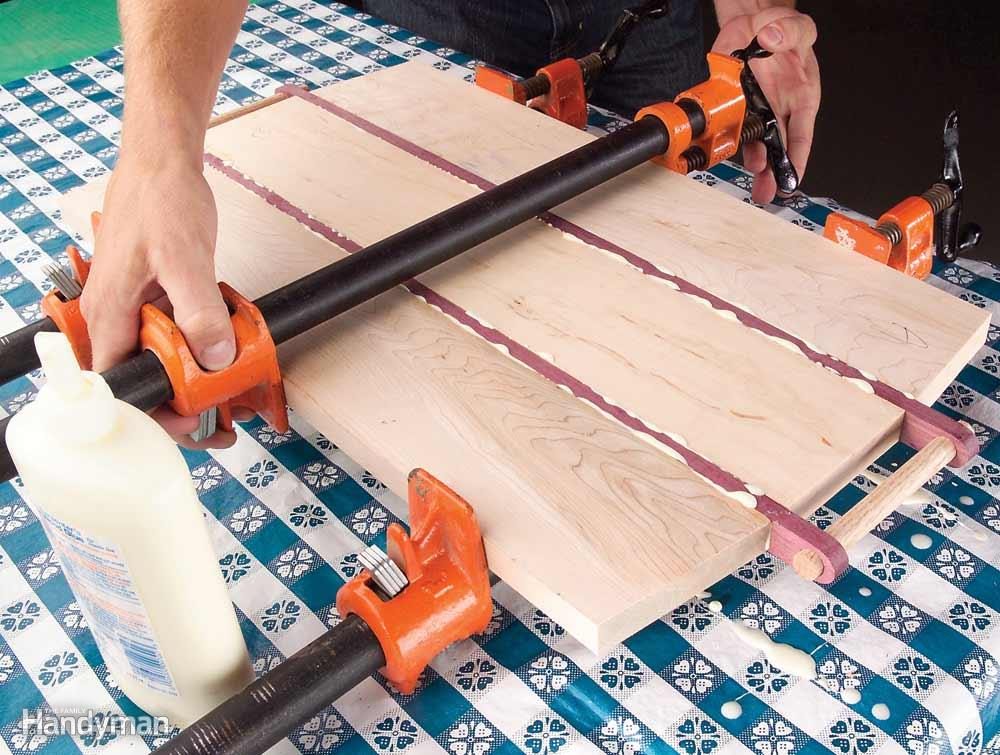
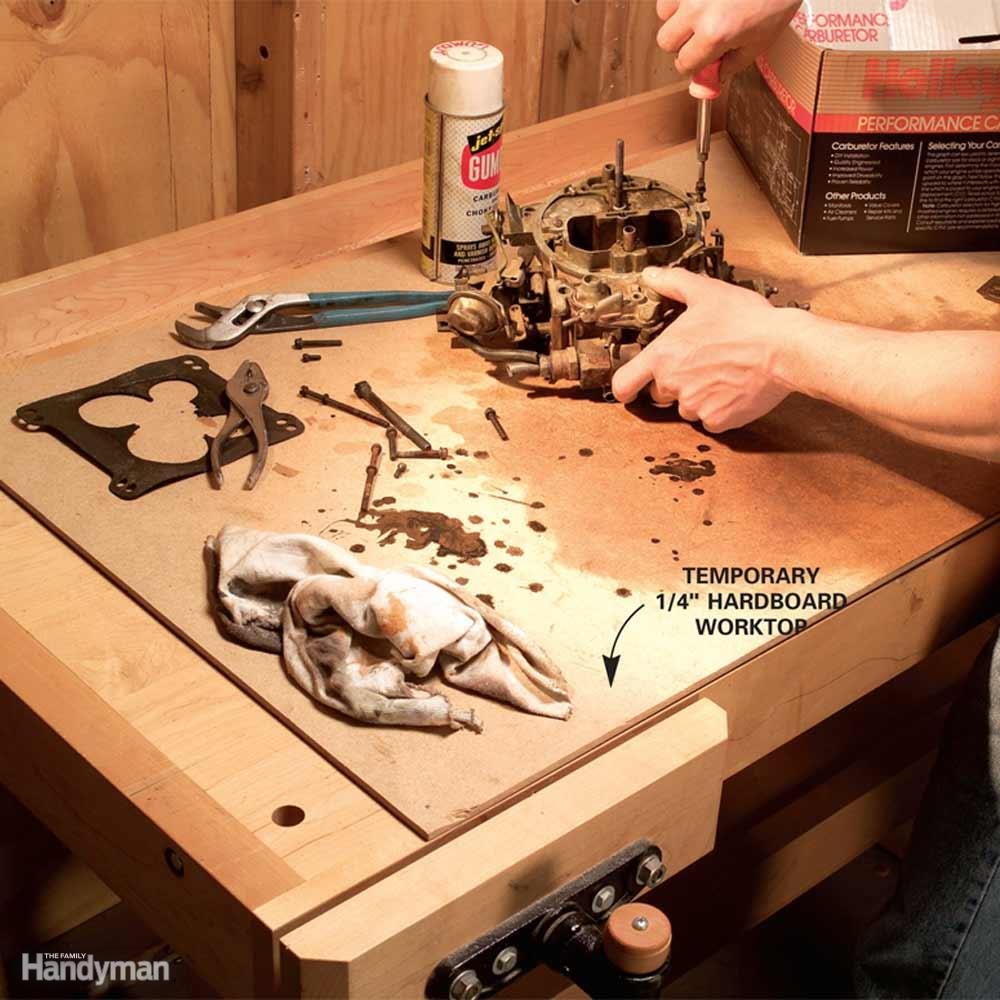
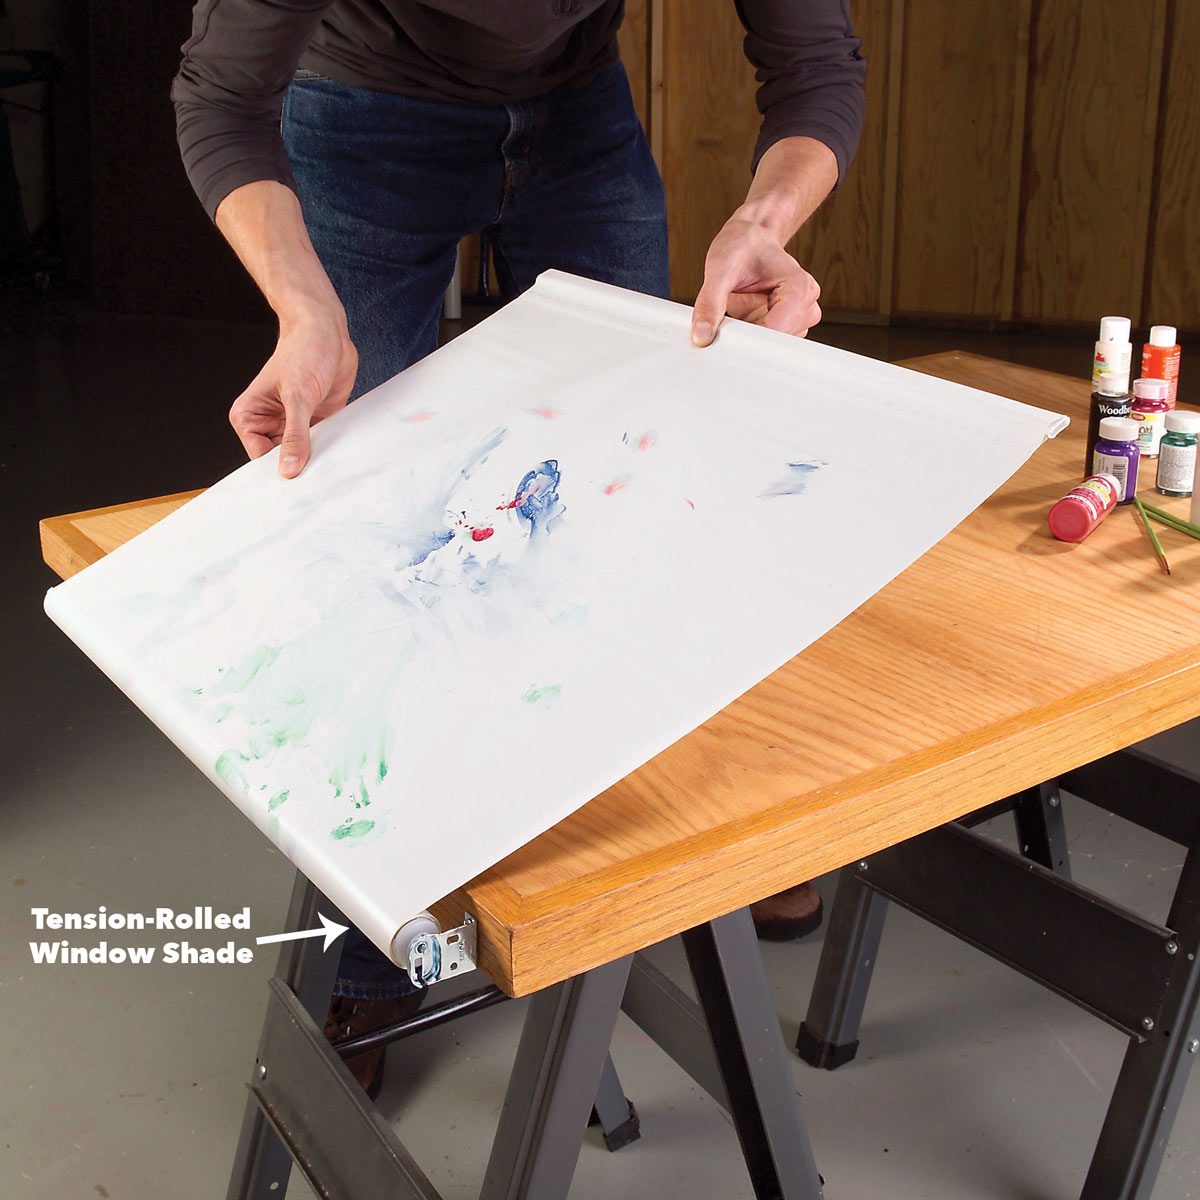
A vinyl tablecloth—any size—comes in handy for all kinds of woodworking jobs (available at discount stores). Put it under boards you're gluing together. Any glue drips will easily peel off the plastic surface after they dry. Or place the tablecloth as a thin cushion under workpieces you're sanding and finishing, and use it as a protective barrier between the workbench and project parts when you're tapping that next masterpiece together.