


When it comes to DIY experience, nobody can match Family Handyman's field editors. And here they’re sharing their best-kept secret tool tips with you!
30 Secret Tool Tips for DIYers
1
/
31
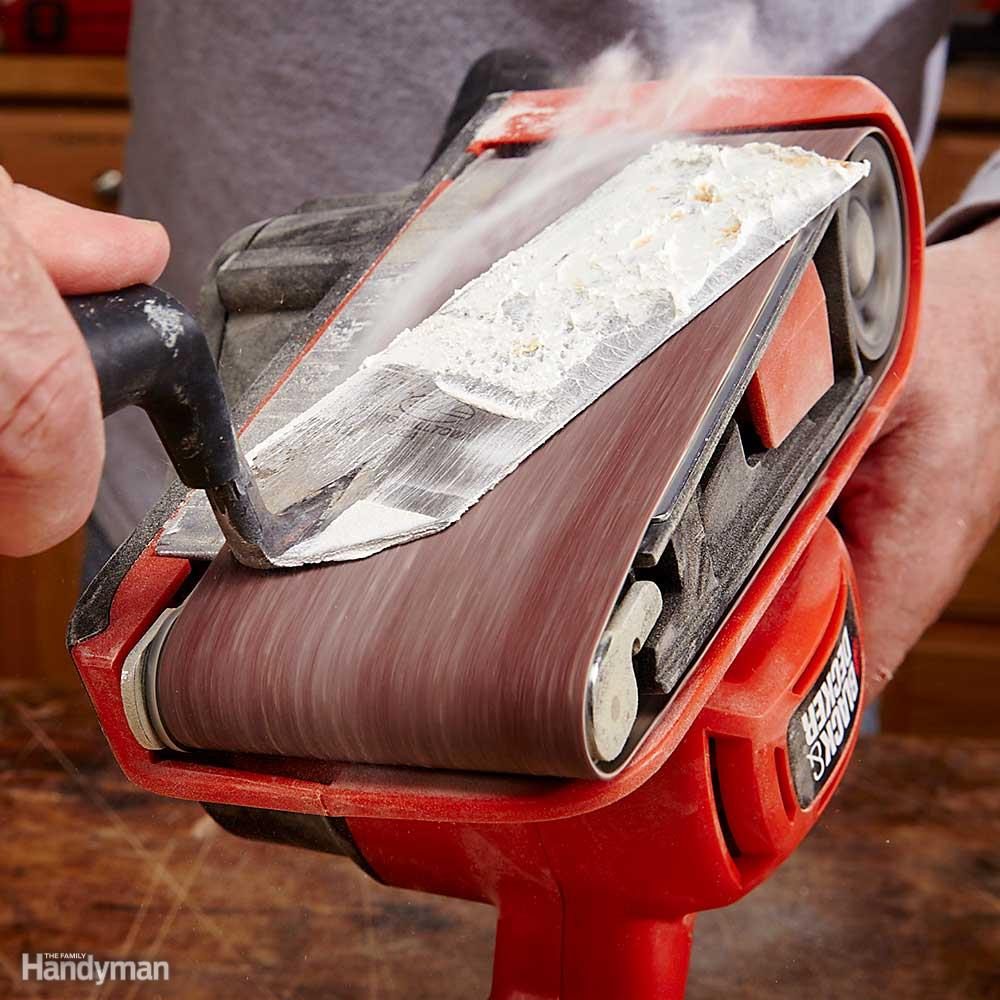
Belt Sanders Aren’t Just for Wood
Any shop teacher will tell you: Use a tool only for its intended purpose. But I confess—I often use a belt sander for jobs other than sanding wood. It works great to scour dried gunk off putty knives and trowels, and I use it to sharpen chisels, scrapers and shovels too. In fact, I’m a double offender: I use my chisel for all kinds of rough jobs that it wasn’t intended for, then I sharpen it with a belt sander. My belt sander actually gives my chisel a better edge than a grinder does.
2
/
31
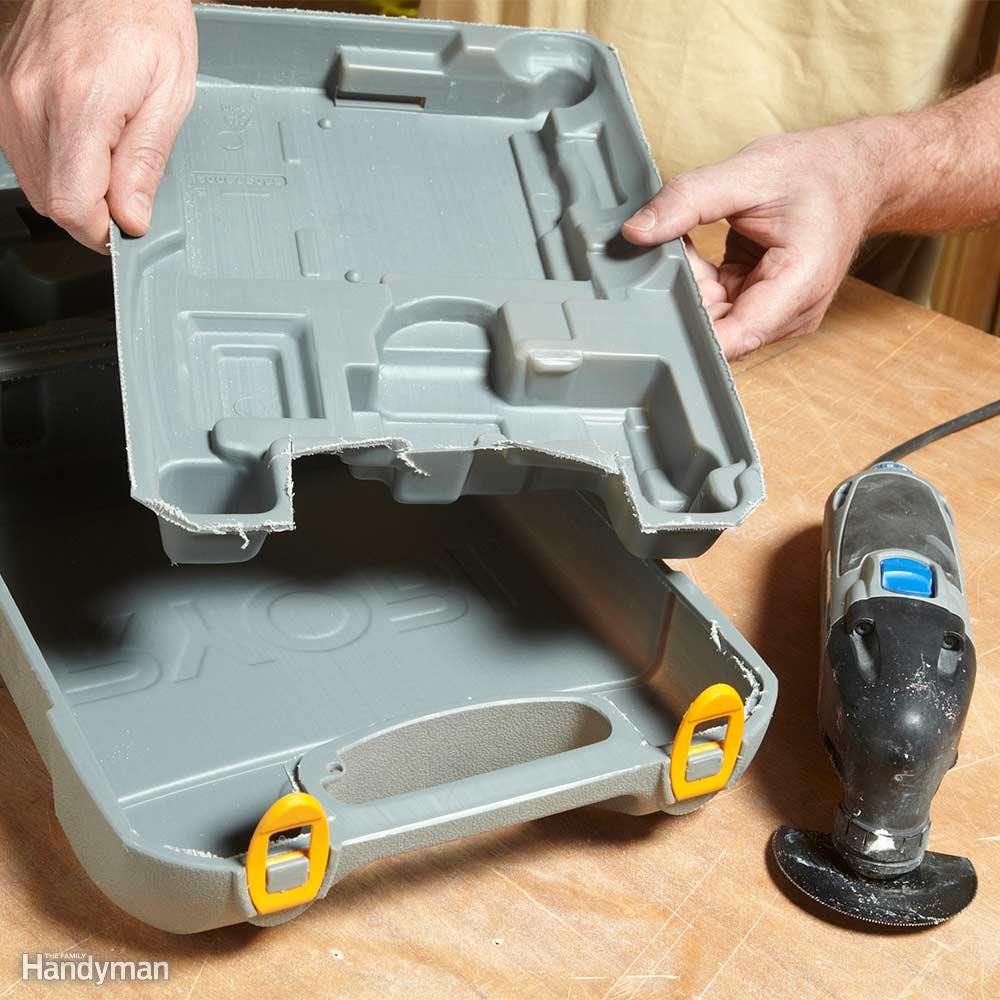
Tool Case Surgery
Packing a tool into its molded plastic case can seem like some kind of IQ test. But slice out those form-fitting compartments and the intended tool (or some other power tool) will fit in without all the fuss. An oscillating tool is the perfect surgical instrument.
3
/
31
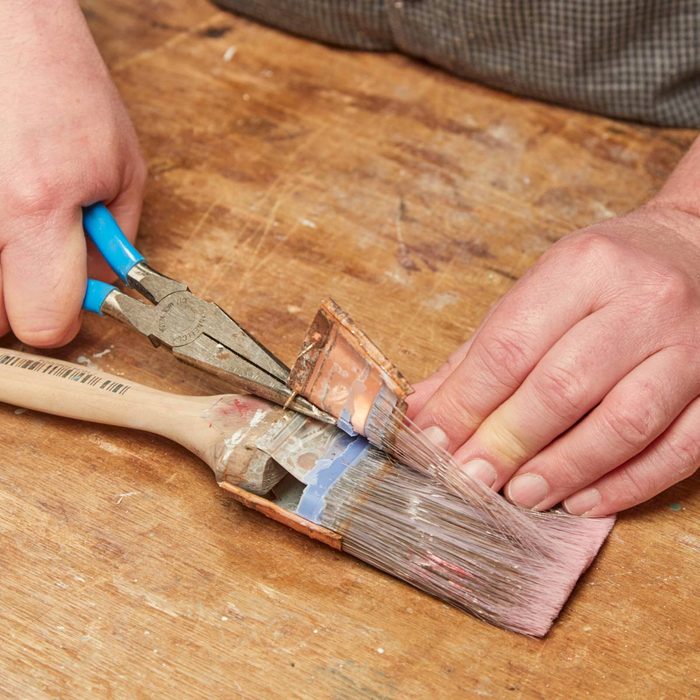
A New Use for an Old Paintbrush
After your paintbrushes wear out, strip off the metal ferrule with a needle-nose pliers and some strength. Use the wood or composite handle for a table saw push stick, since it is easy to lose or misplace these tools, we figured it would be better to have more rather than less of these handy tools.
4
/
31
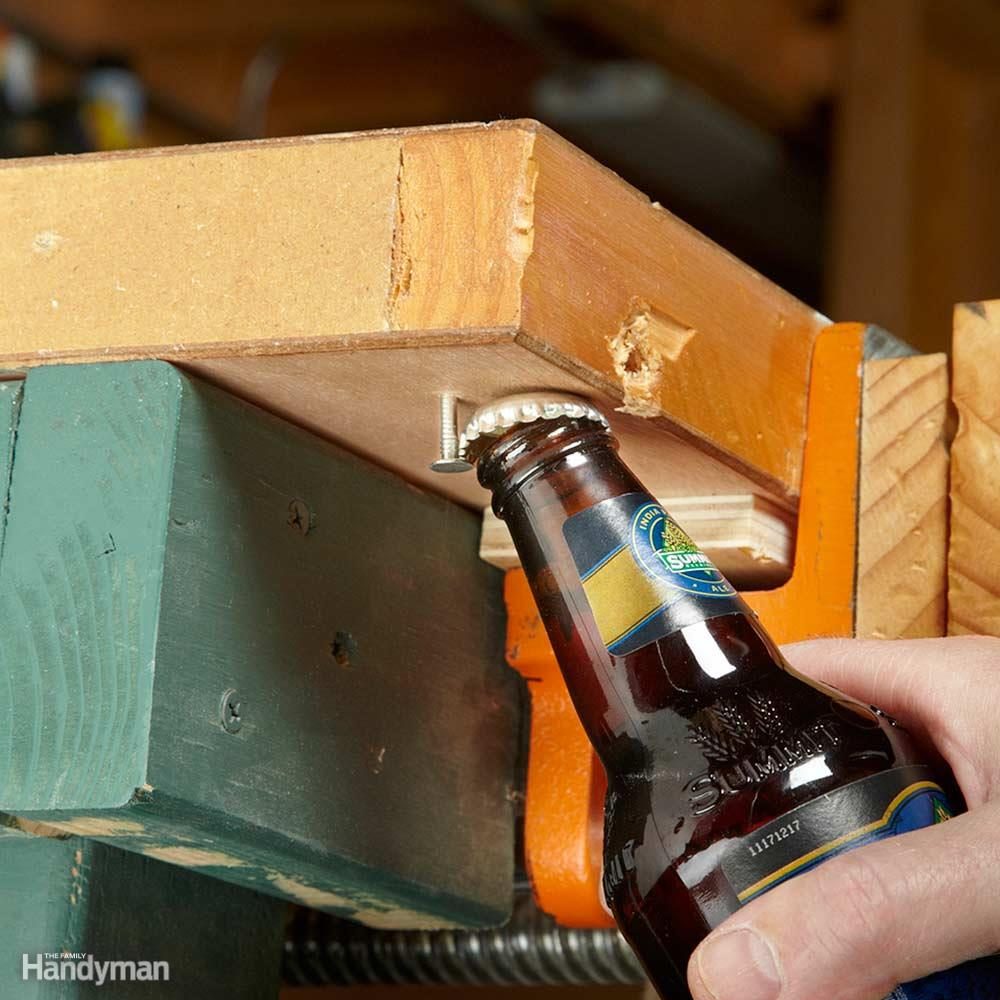
Essential Workbench Accessory
A nail or screw protruding under your workbench makes a handy bottle opener. Cheers.
5
/
31
These are the tools totally worth splurging on:
Feeling extravagant? You could pay less for most of these tools, but if you’re willing to splurge, you’ll get a lot of bang for your buck.
6
/
31
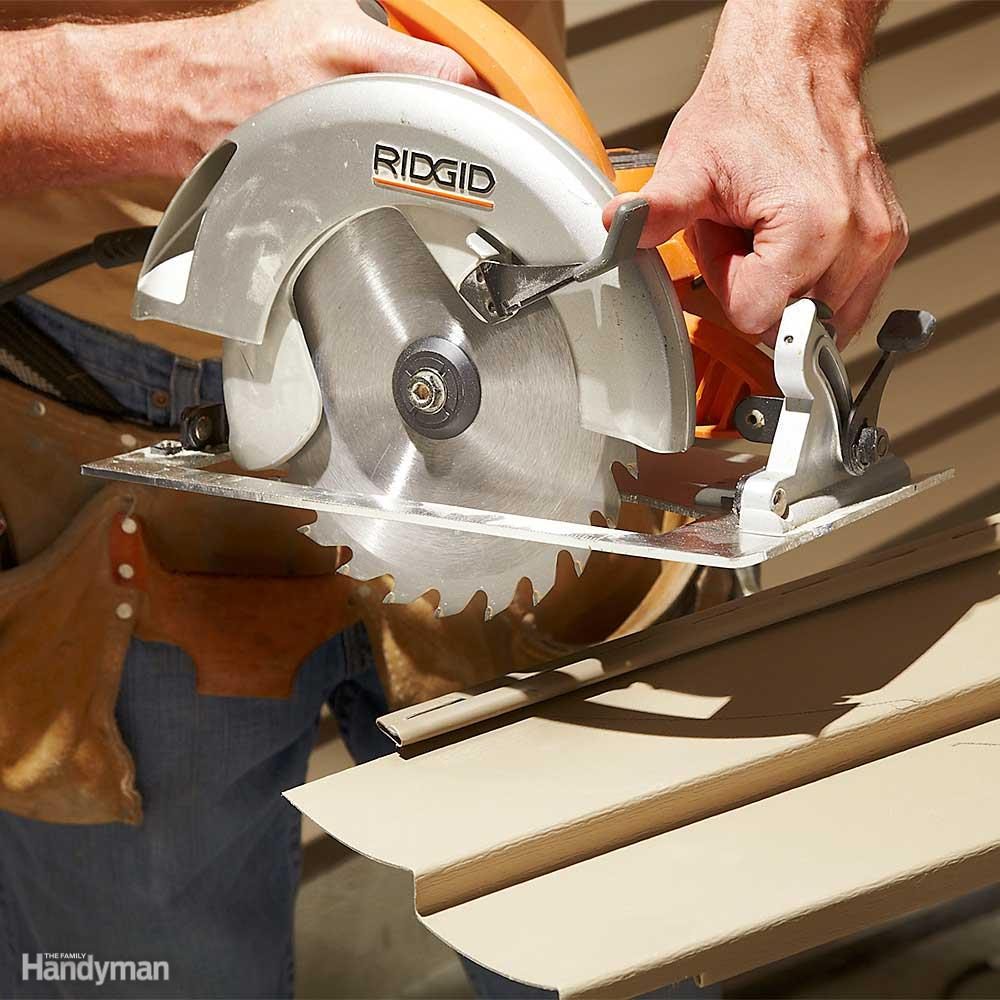
Reverse Circular Saw Blade for Clean Cuts
A standard circular saw blade chews up vinyl siding, leaving a chipped-and-ripped edge. For a clean cut, put the blade in backward.
7
/
31
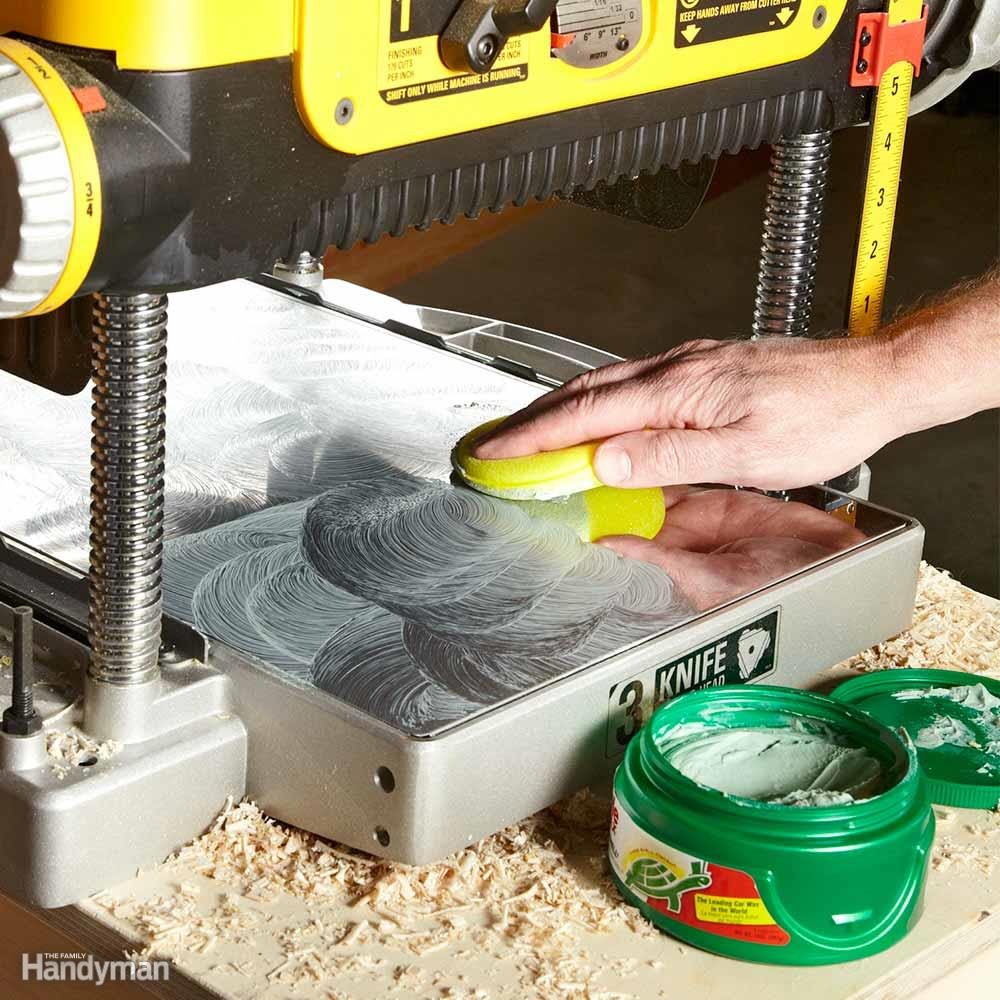
Slick Planer Bed
Everyone knows that a coat of wax makes wood slide nicely across a metal table saw, but the same treatment works on a planer bed. Any type of wax that dries hard will do: car wax, beeswax, floor wax, etc. Paste wax works well for polishing your table saw top.
8
/
31
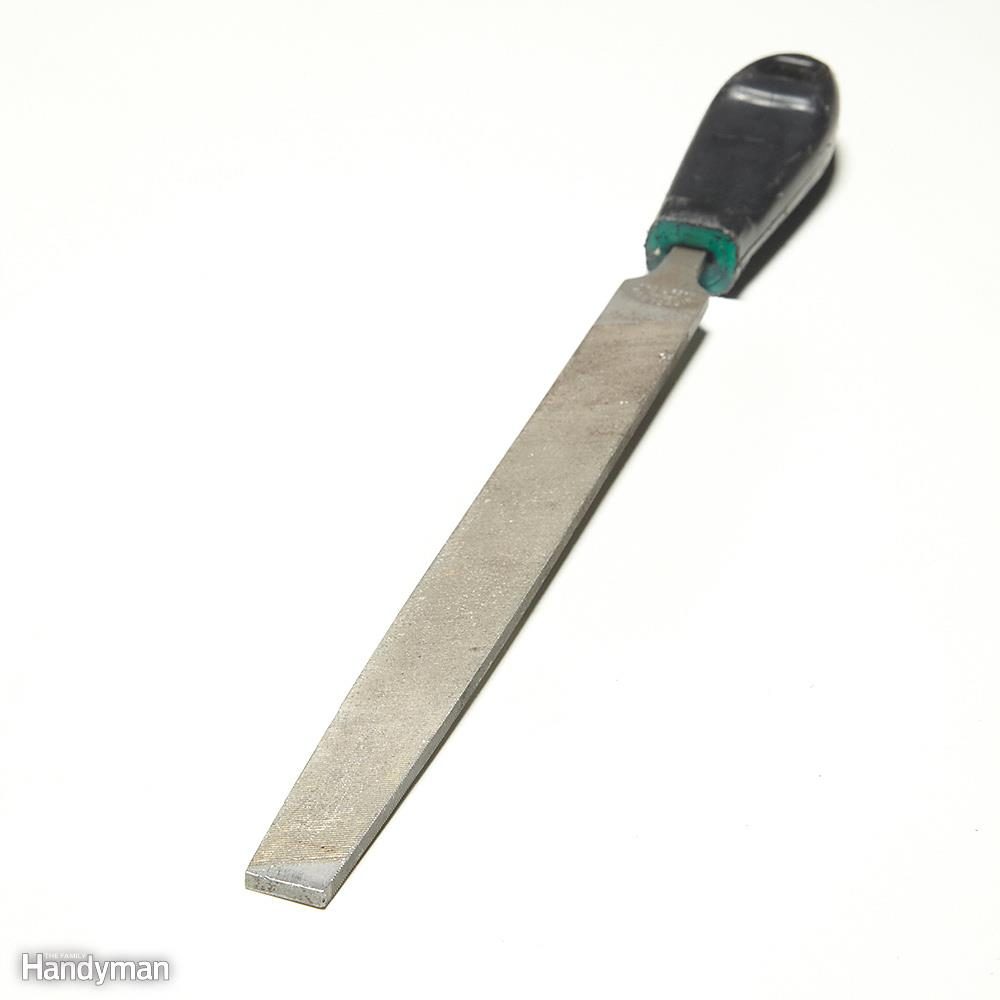
Be Kind to Your File
When you’re using a metal file, apply pressure on the forward push stroke only. Downward pressure during the return stroke dulls the file—fast. This hack will prevent your file from clogging up while you work.
9
/
31
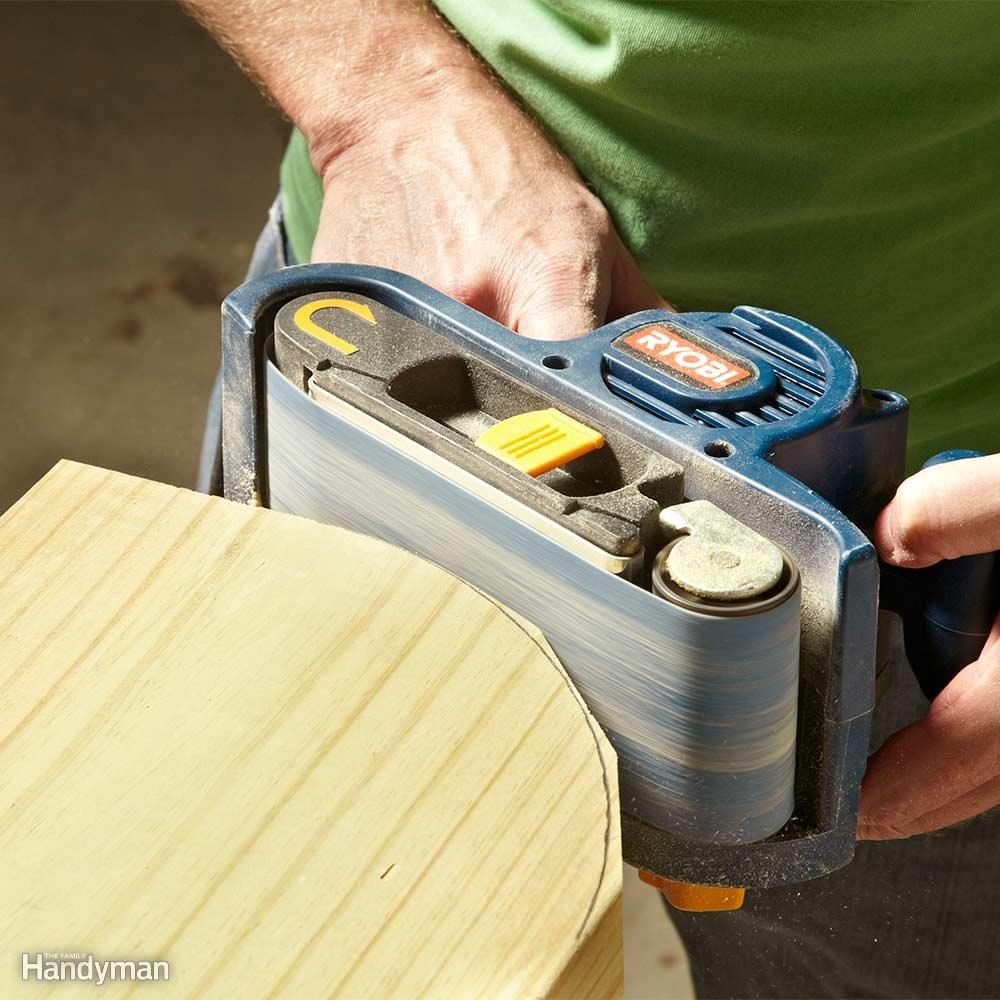
Rapid Rounded Corners
You don’t need a jigsaw or a band saw to create rounded corners. Just mark the curve, cut away the waste with a circular or miter saw, and then round off the curve with a belt or finishing sander.
10
/
31
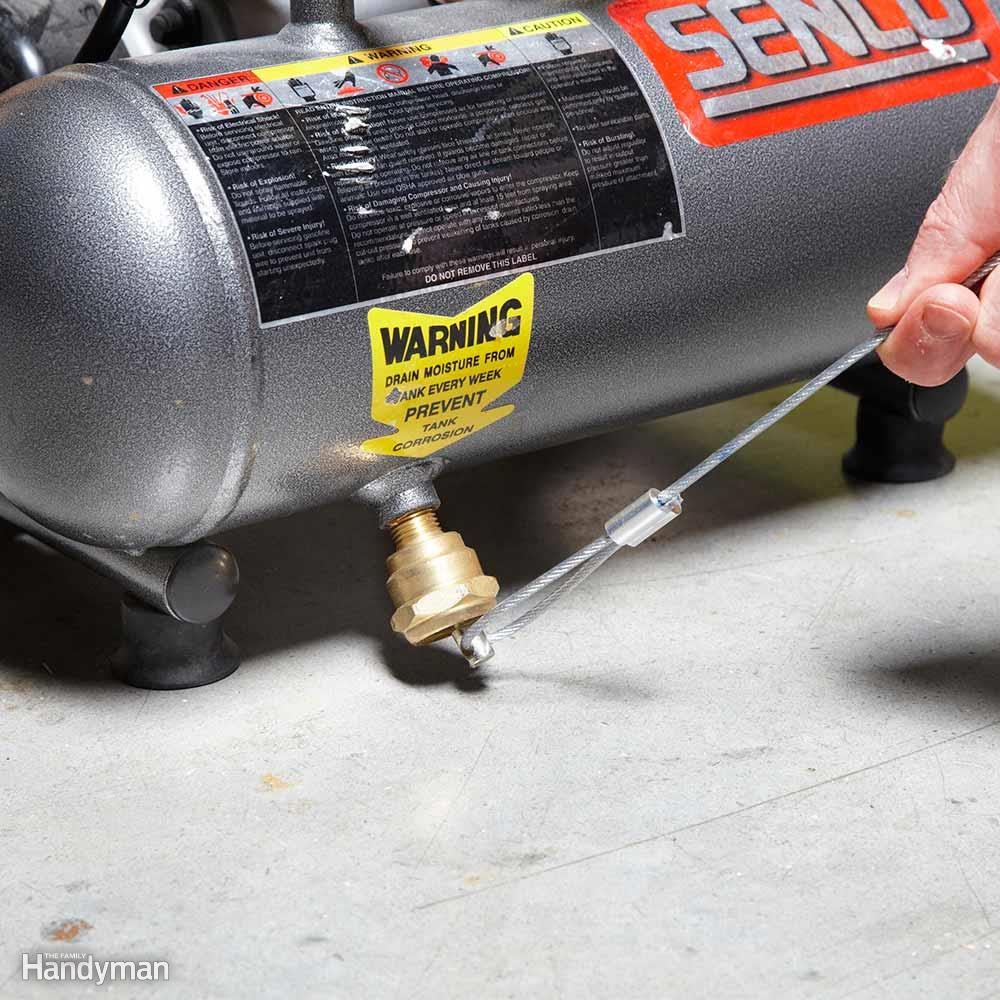
Easy Compressor Drain
Unscrew the drain valve under your compressor tank and screw in an air brake drain valve. Then, instead of bending over and fighting with a stuck valve, you just pull the cable to release air and water.
11
/
31
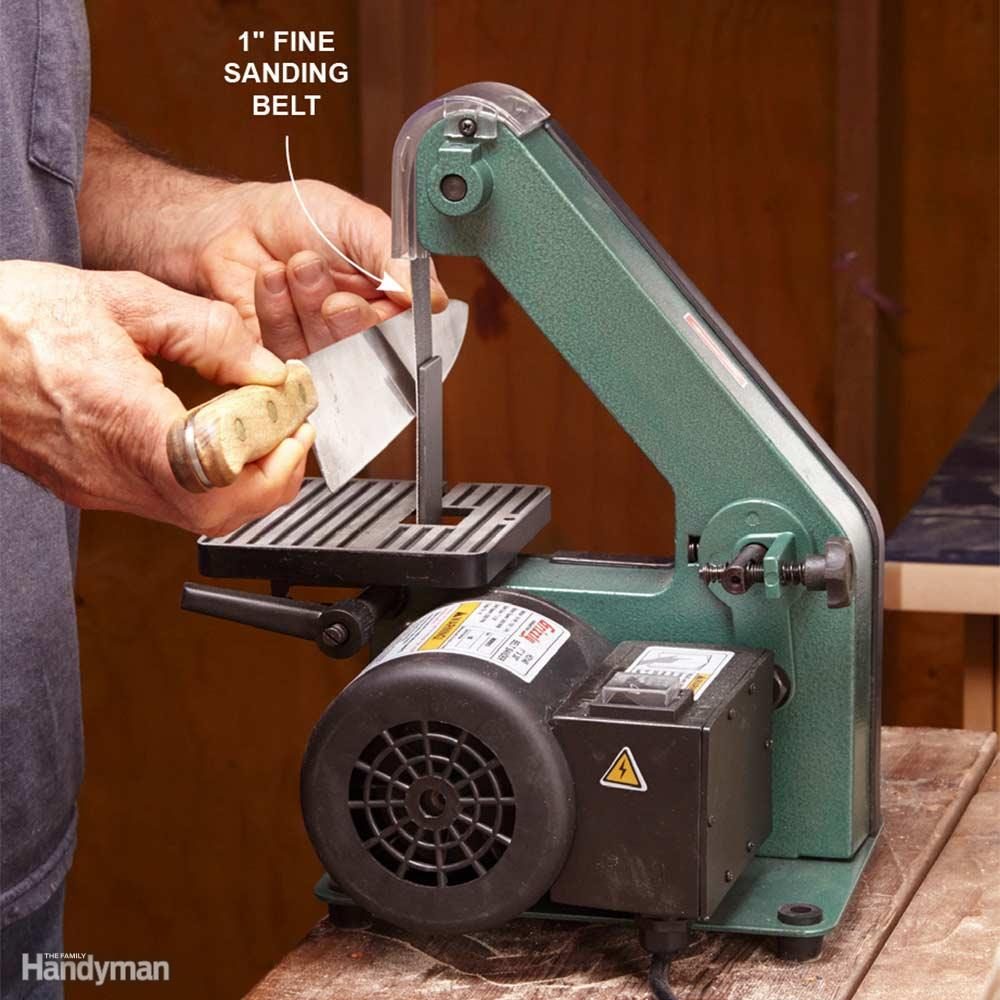
A 1-in. Belt Sander is a Versatile Sharpening Tool
Most carpenters know that a belt sander can produce a reasonably acceptable edge on a dull chisel. And knife-makers and professional sharpeners often use special belt grinders to shape and sharpen blades. You can get many of the benefits of a professional belt grinder for a fraction of the cost with a 1 x 30-in. benchtop belt sander. Buy 180- and 240-grit belts and you’ll be set for serious knife sharpening. Plus, you can use the belt sander to grind other tools like axes and chisels, and to sand small woodworking projects. For really dull knives, start with a 180-grit belt and finish with a 240-grit belt. Practice on an inexpensive knife until you get the feel of holding the knife at the correct angle as you move it across the belt. Try to maintain the angle that’s on your knife. This is usually about 20 degrees. For a razor-sharp edge, buy a leather belt along with honing compound and mount it on your sander for the final sharpening step.
12
/
31
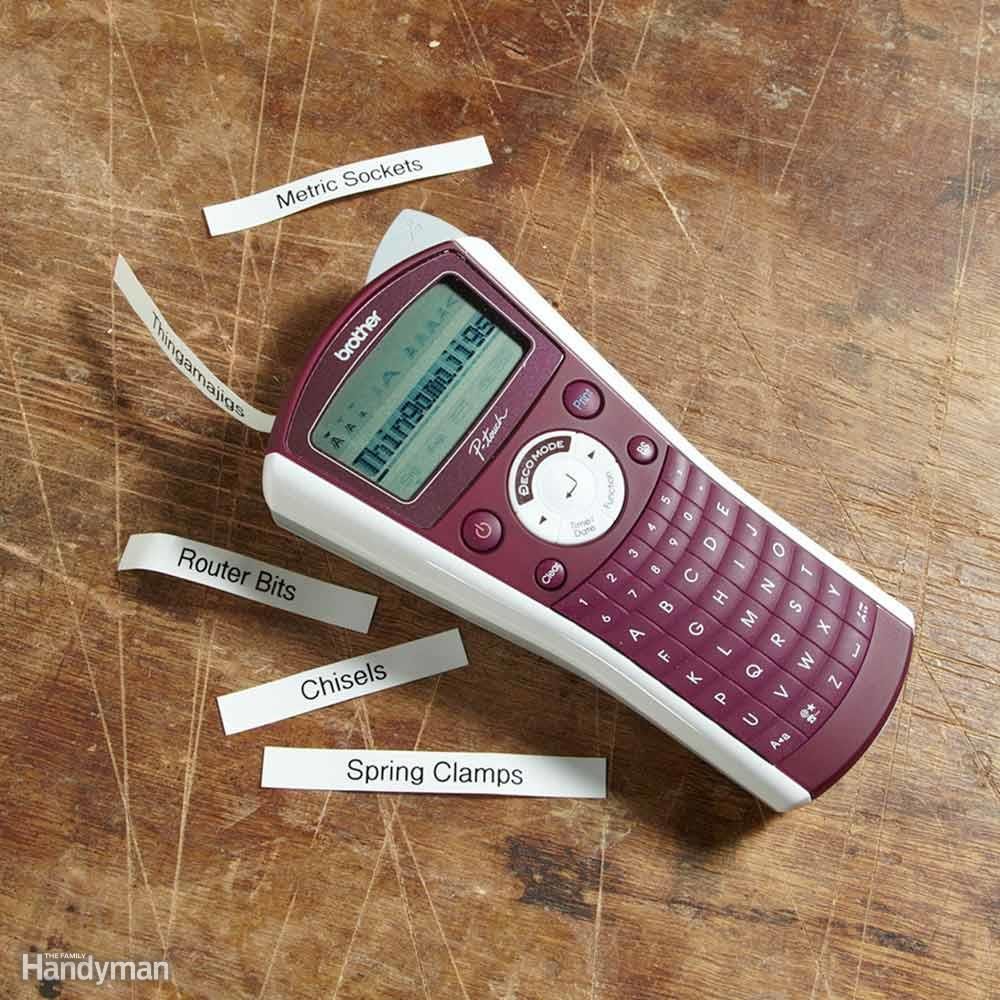
Labels Save Time
Label all of your tool drawers so you (and others) can find a tool when you need it. You’ll be amazed at how much time those labels save—far more than the time you’ll spend making them.
13
/
31
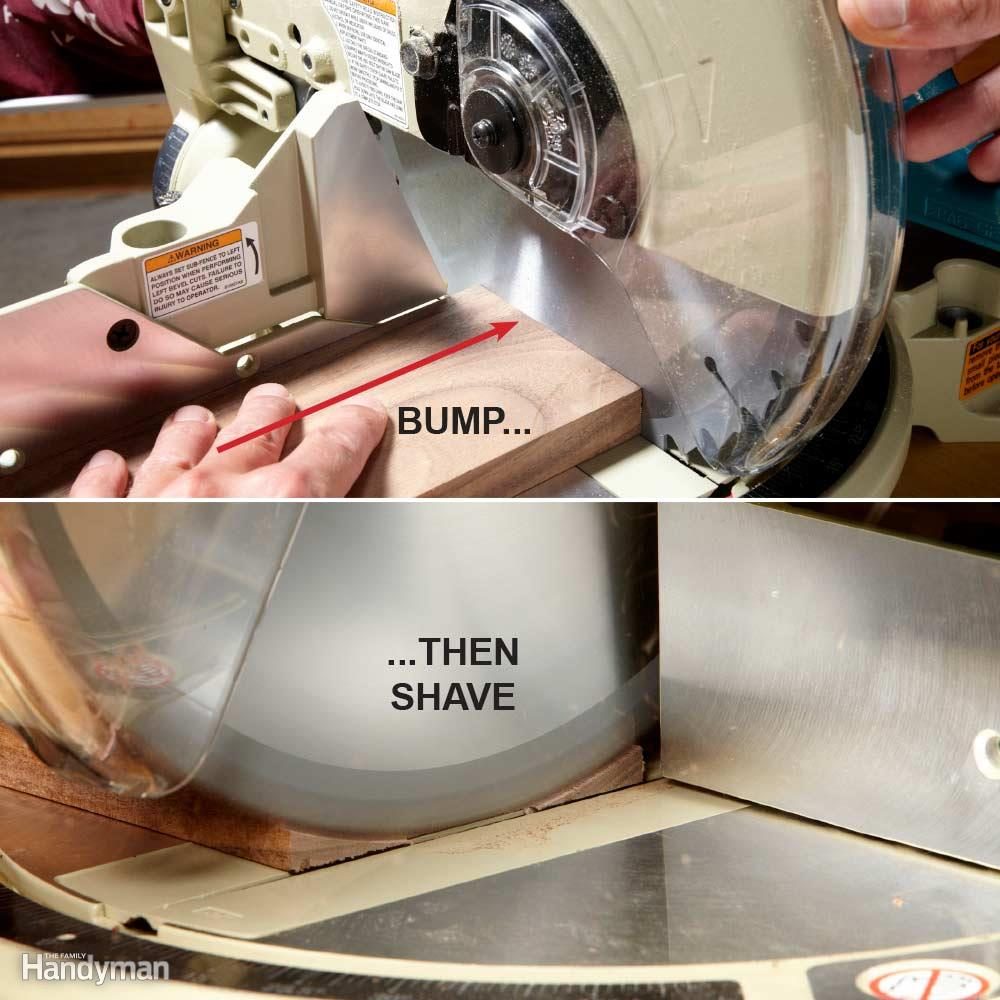
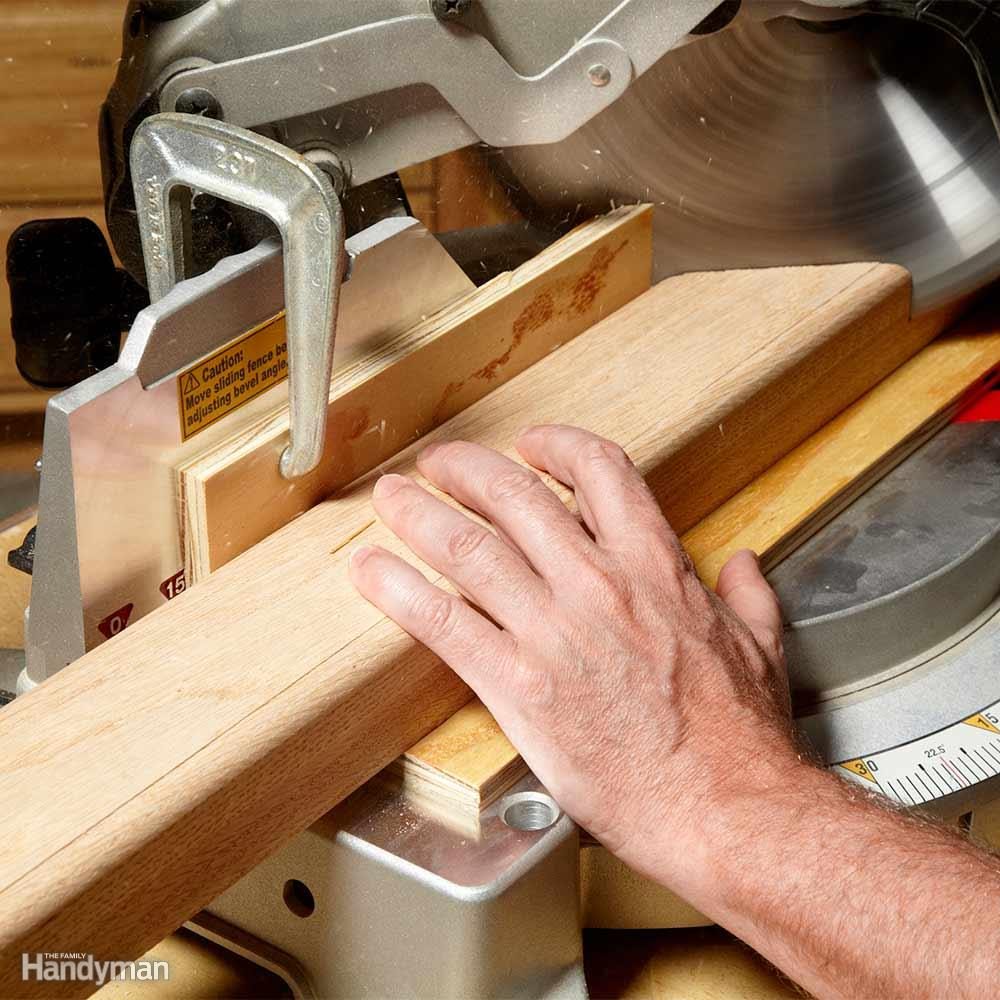
Bump and Shave with a Miter Saw
When you need to trim just a smidgen off a board or molding, try this: Lower the blade of your miter saw and press the end of the workpiece against it. Then raise the blade, pull the trigger and cut. Depending on how hard you pushed against the blade, you’ll shave off from 1/16 to 1/32 in. Once you get the feel of it, you’ll be able to adjust the pressure and the width of the shave.
14
/
31
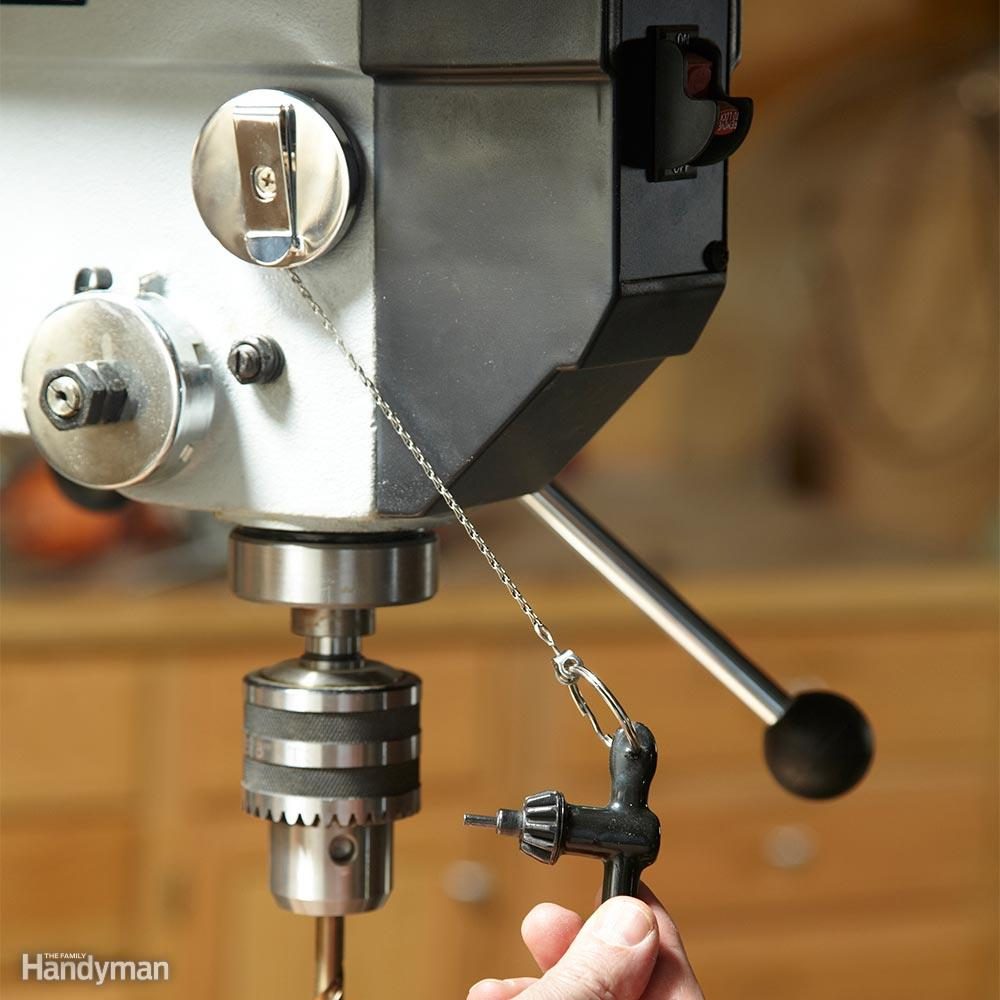
Drill Press Key Control
Mount a retracting key ring on your drill press and you’ll never have to hunt for the chuck key again. Plus: Check out our best drill press jigs.
15
/
31
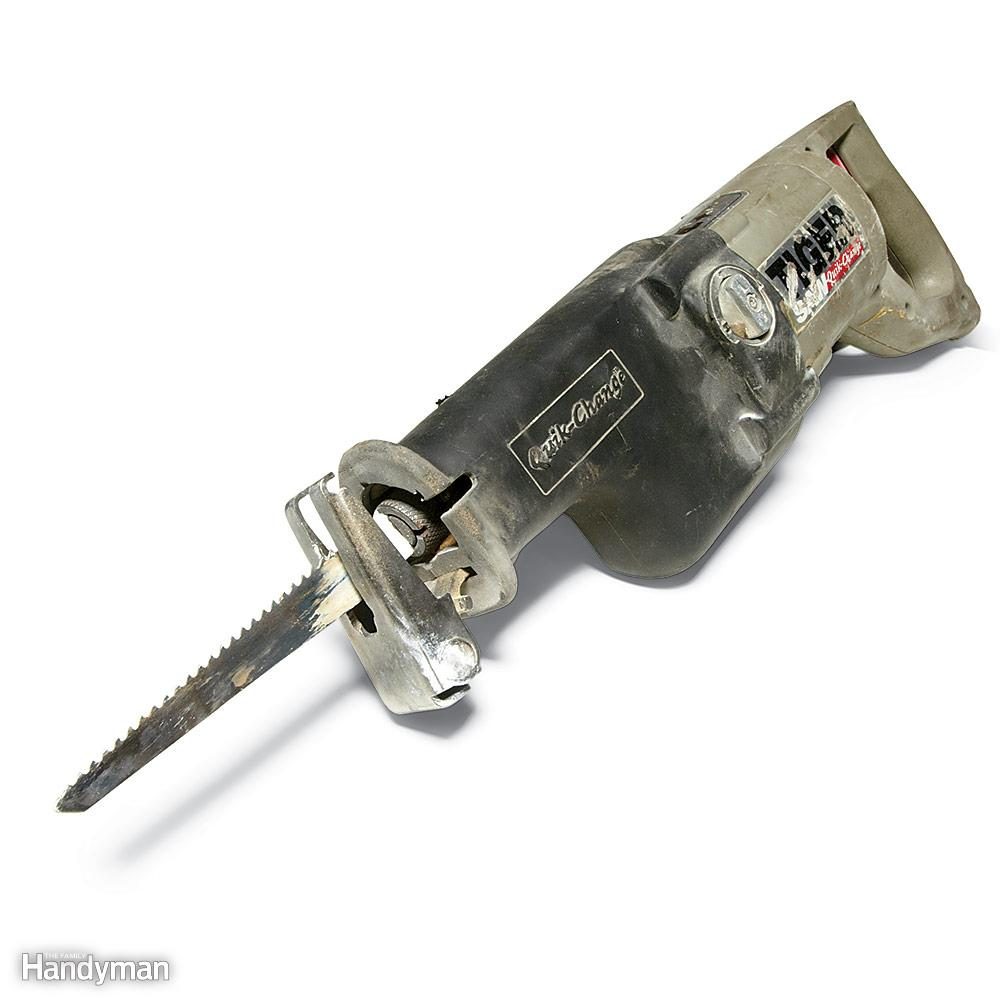
Backward Reciprocating Saw Blade
Recip saw blades don’t have to go in with the teeth pointing down. You can reverse the blade for flush cuts—like after wall framing, when you cut sill plates out of doorways.
16
/
31
Backers Banish Blowout
Even the sharpest saw teeth sometimes leave splinters where they exit the wood. When “blowout” is unacceptable, set a scrap under and/or behind your workpiece for a splinter-free cut. We’ve got 36 more miter saw tips and tool reviews here.
17
/
31

Sandpaper Cutter
Cutting sandpaper is a quick way to dull your scissors or utility knife blade. Instead, I fastened a hacksaw blade to the edge of my workbench. I slipped a washer behind the blade at each of the mounting holes so a sheet of sandpaper to easily slides in behind the blade. I fold the paper where I want to cut, just as a reference.
18
/
31

Hand Screws to the Rescue
When I started woodworking, I thought hand screw clamps were old-fashioned school-shop tools, not something any modern woodworker would use. Boy, was I wrong. Sure, fast-action metal clamps are better for most jobs, but for anything out of the ordinary, reach for a couple of hand screws. Why? First, the jaws can clamp tapered parts or parts that aren’t parallel. And second, because they’re made from wood, you can cut them, drill them and screw stuff to them. Here’s just one example: This oval stool seat would be tough to clamp with standard clamps. But with hanger screws driven into a hand screw clamp, it’s easy. Drill a couple of holes into the seat, insert the hanger screws and squeeze the split seat together.
19
/
31

Upright for Edge Work
A woodworker’s vise is the best way to hold boards on edge. But a pair of hand screws works almost as well. Depending on how you set it up, you may want to insert strips of cardboard under the board to protect it from the hand screws’ sharp threads.
20
/
31
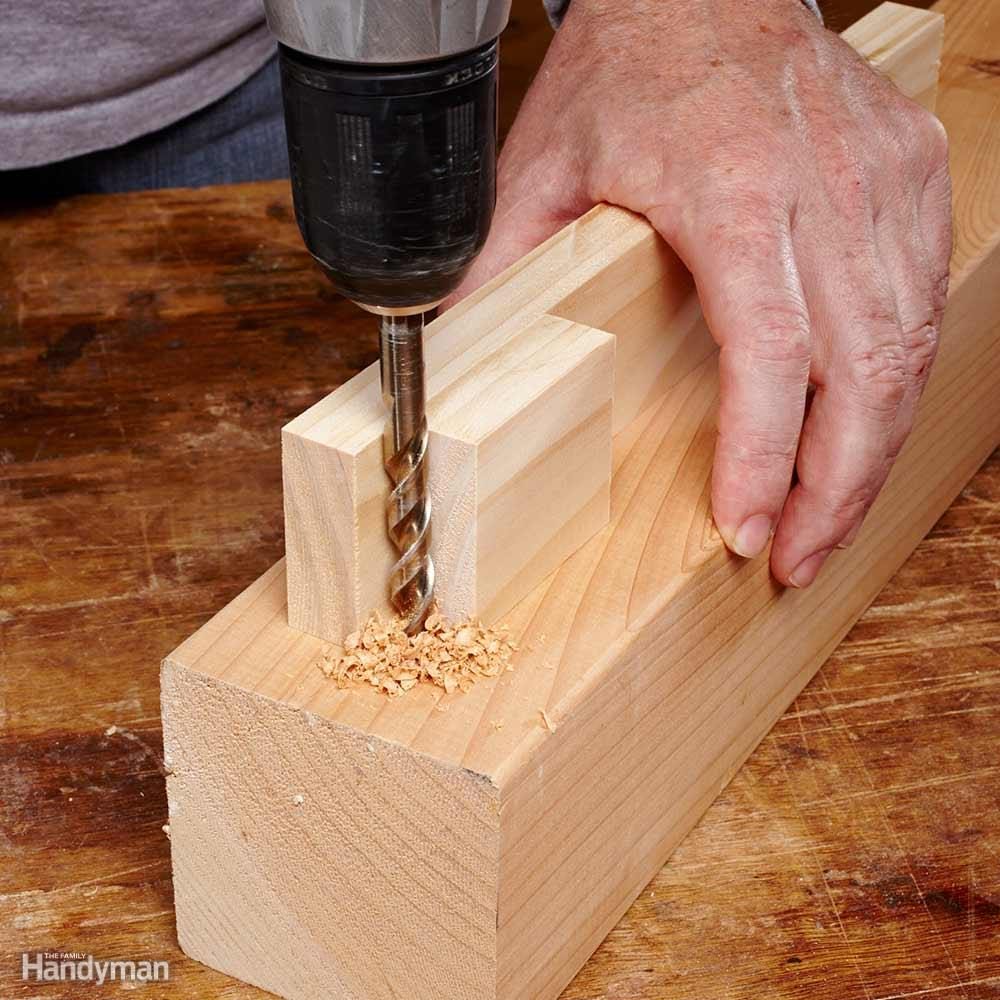
Straight-Up Drill Guide
To bore a perfectly perpendicular hole, you need either a drill press or a couple of scraps of wood screwed together. The corner created by the scraps will steer the bit straight in every time. But if you’re looking for an excuse to buy a drill press, forget you ever saw this tip.
21
/
31
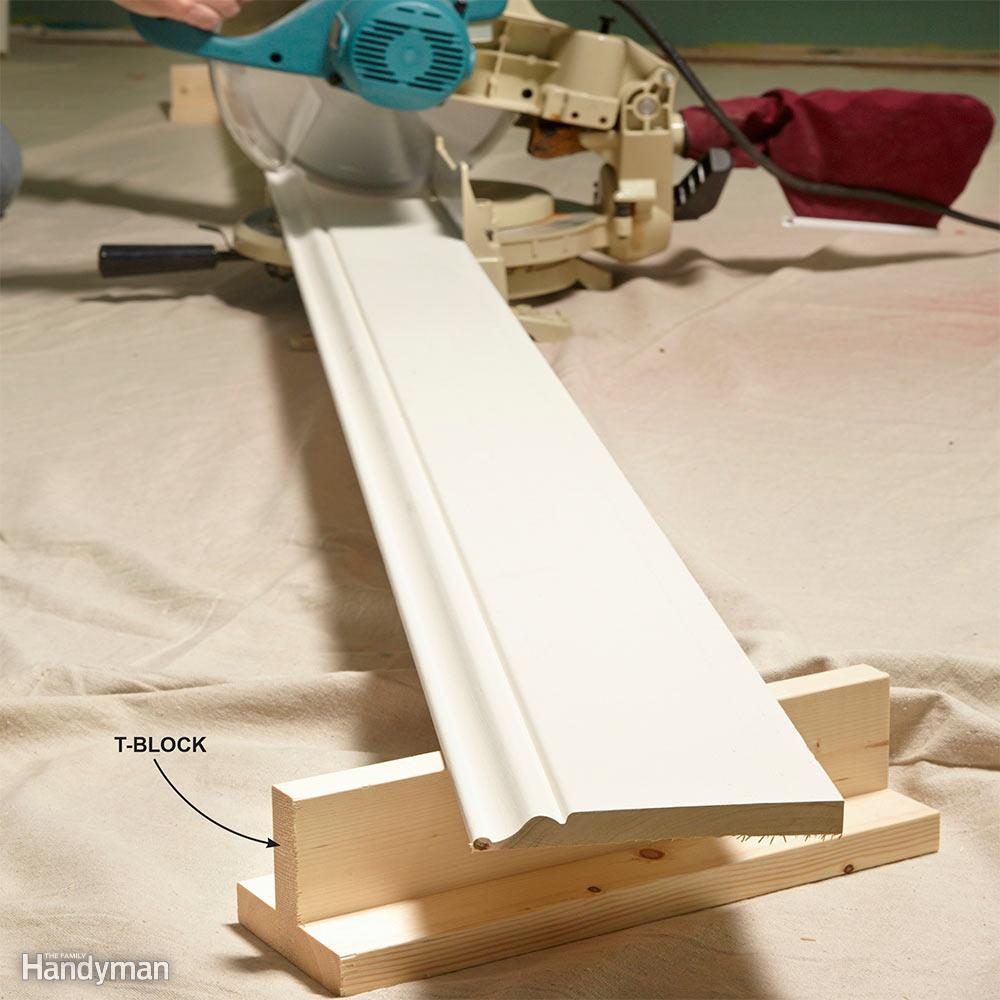
Instant Saw Support
Simple T-blocks have endless uses. They support long boards, raise projects off your workbench so you can work more comfortably, prop up assemblies so you can slip clamps under them, make a drying rack for finishing projects—the list goes on and on. Build a few from scrap wood and you’ll find uses we haven’t even thought of.
22
/
31
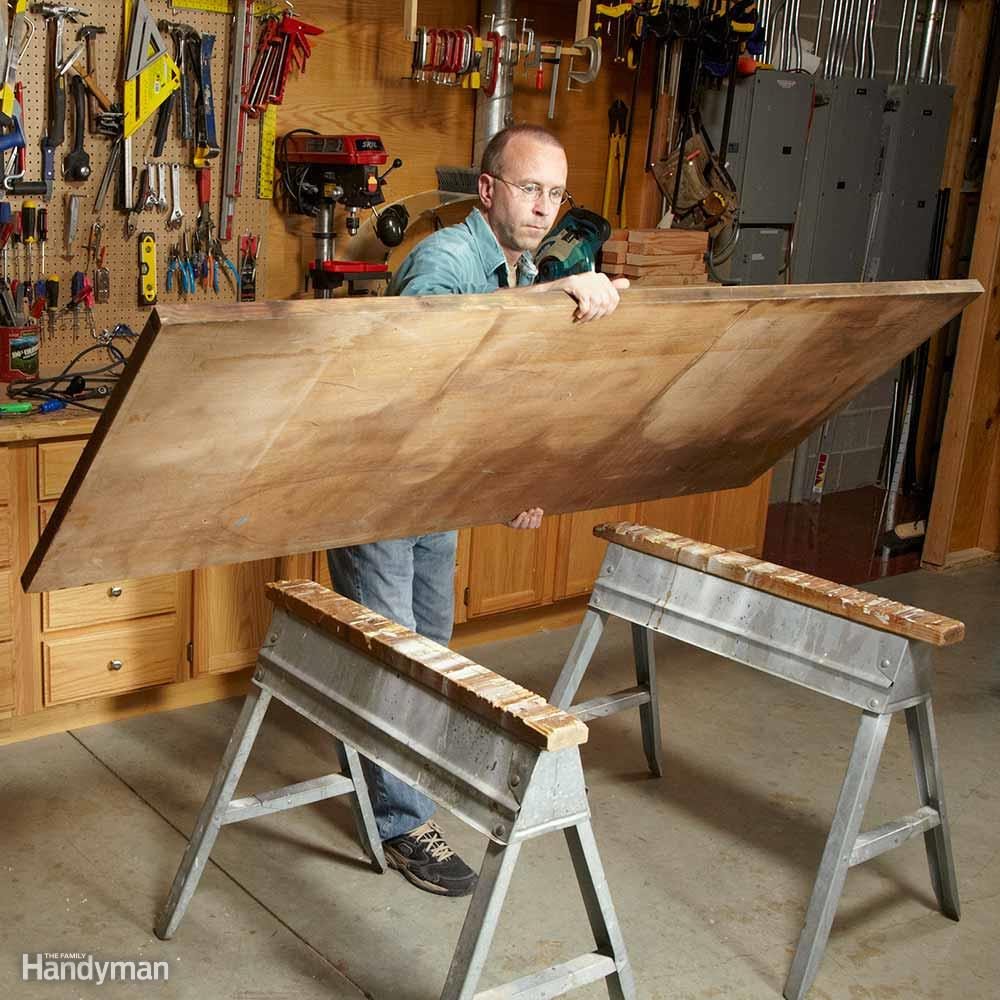
Perfect Worktable
An old hollow-core door isn’t trash; it’s the perfect portable worktable. Set it on a couple of sawhorses and you’ve got a surface that’s flat and strong but lightweight and easy to store.
23
/
31
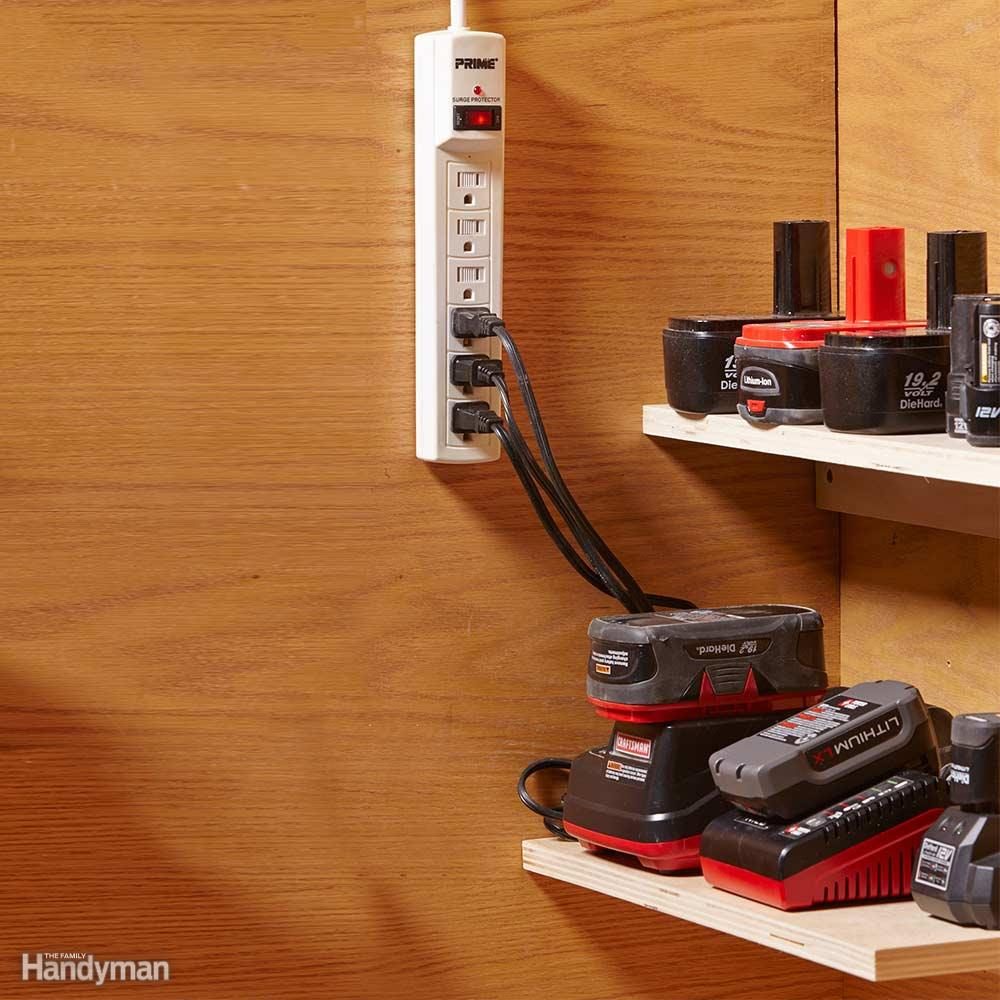
Recharge Station
Cordless tools are the greatest advance in human history. Well, at least for some of us. But they’ve also brought charger chaos. We recommend herding all your chargers into one place and plugging them into a power strip. You’ll get organization, surge protection and an instant way to switch them all off after the batteries are charged.
24
/
31
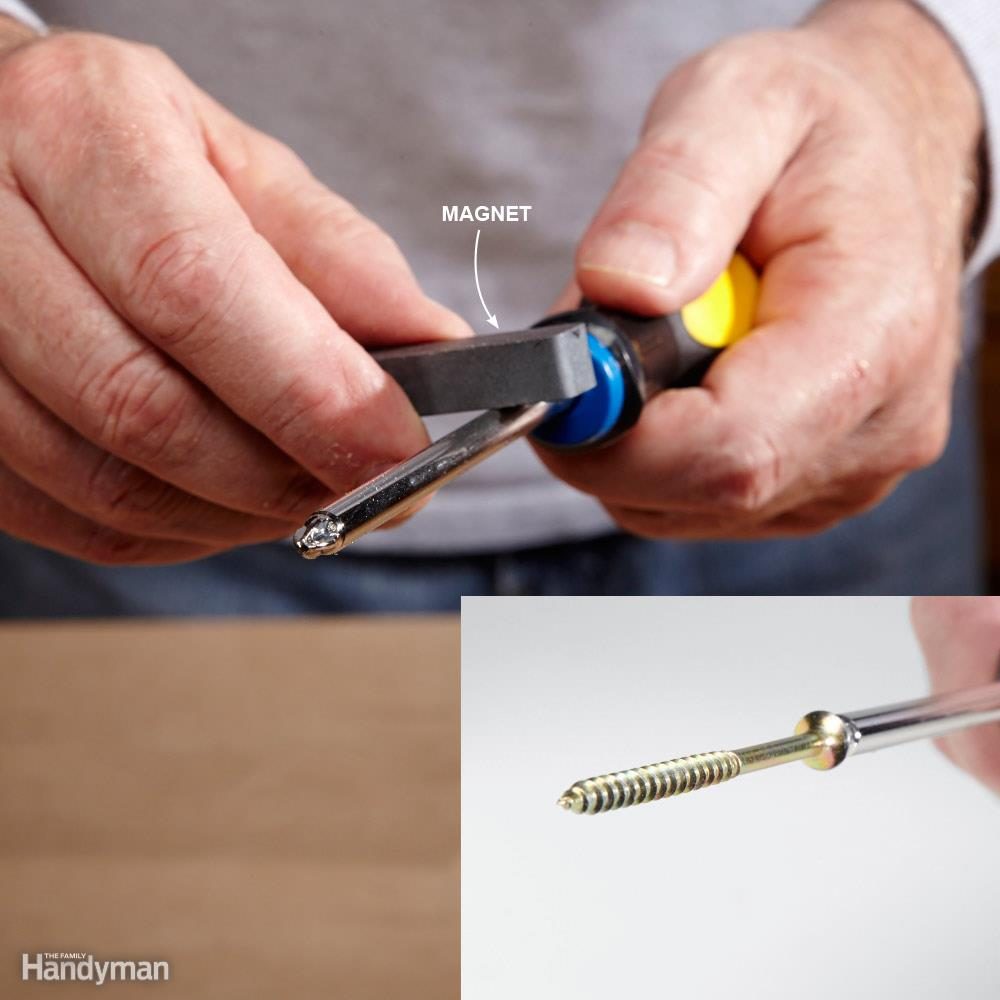
Magnetize a Screwdriver
This old trick could save you hundreds of dropped screws over your DIY lifetime. Grab a magnet and rub it along the shaft of a screwdriver a dozen times or so. Rub in one direction only, kind of like sharpening a knife. In about 10 seconds, you’ll have a magnetic screwdriver. Repeat as needed. Add a magnetic strip to the workshop for an even better use of magnets.
25
/
31
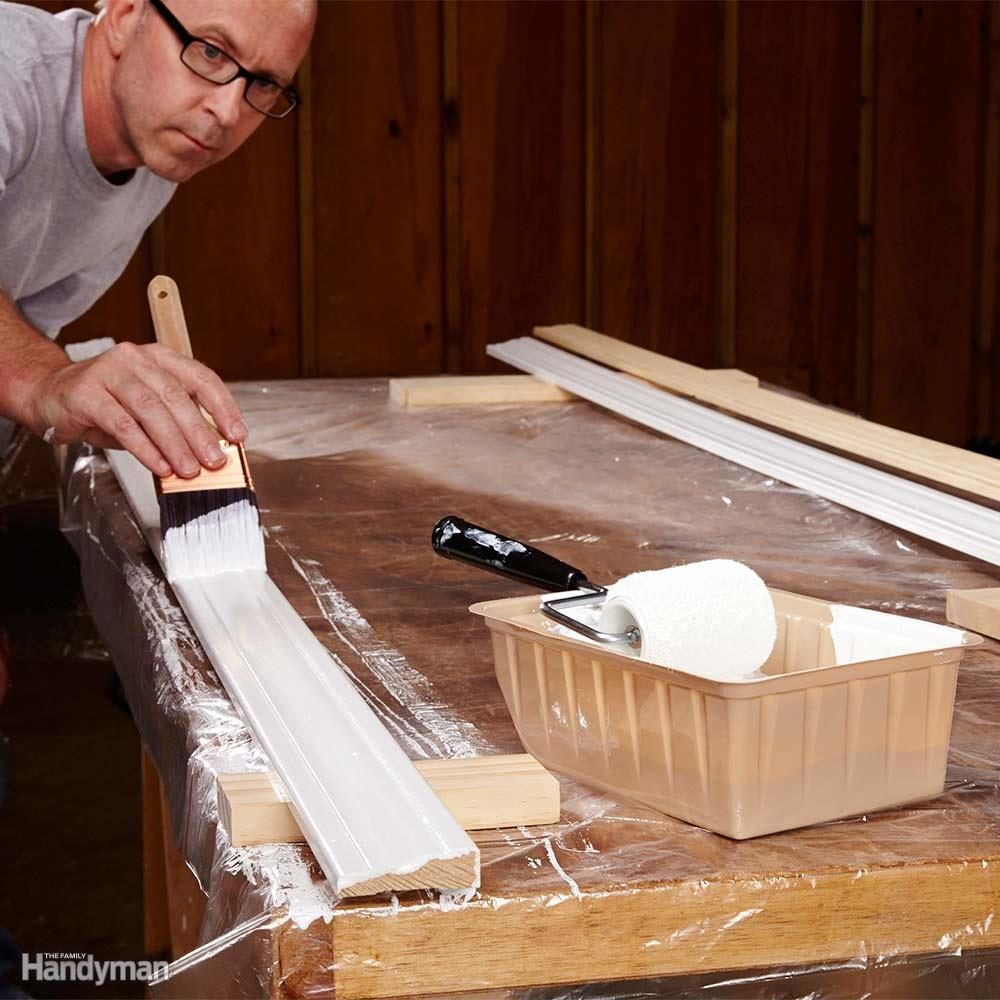
Two-Stage Speed Painting
A roller lays on paint fast, but a brush leaves a smoother finish. To get the best of both, roll on the paint then immediately brush it out. The quicker you get to the brushwork, the better. In warm, dry conditions, the paint will start to dry and lose its self-leveling ability in a minute or two.
26
/
31
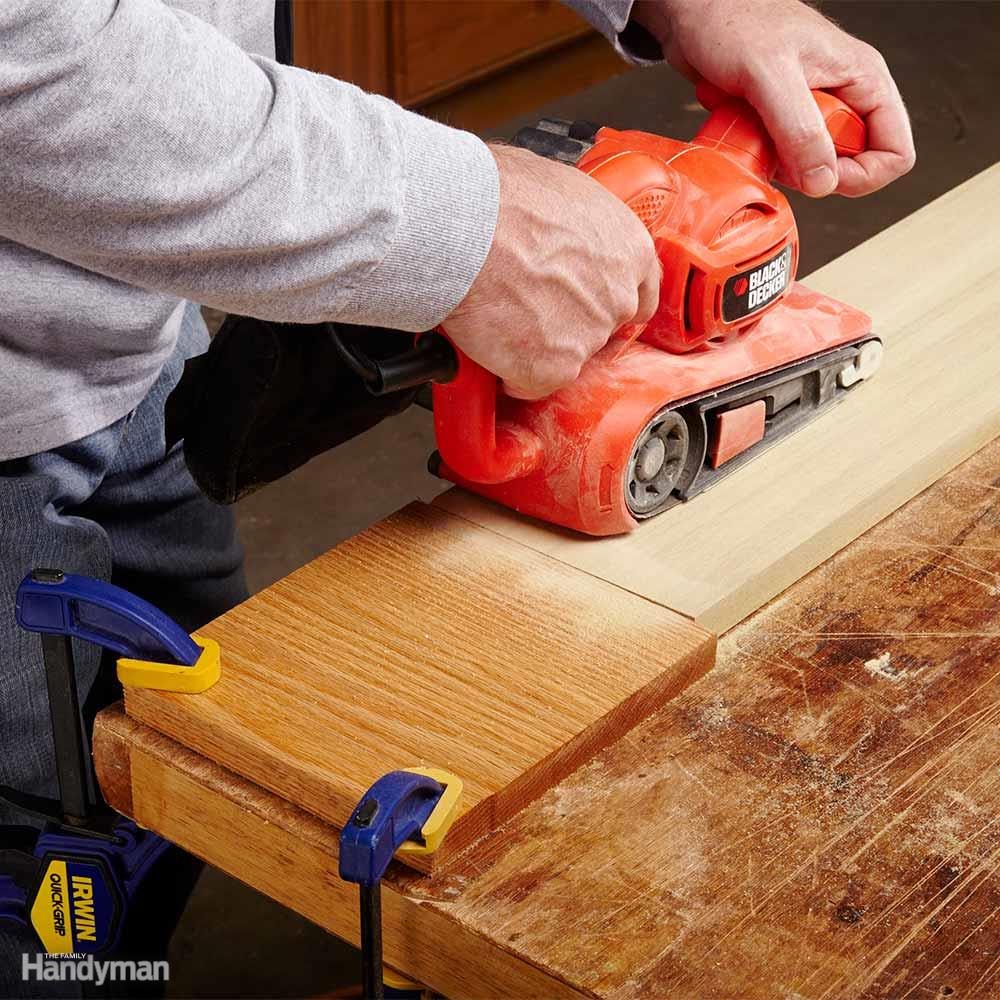
Belt-Sander Stop Block
A belt sander is a great tool for sending boards flying across your shop. If you don’t want that to happen, clamp a stop block to your workbench. A block of the same thickness as your board will also prevent the sander from tipping down and tapering the end of your workpiece.
27
/
31
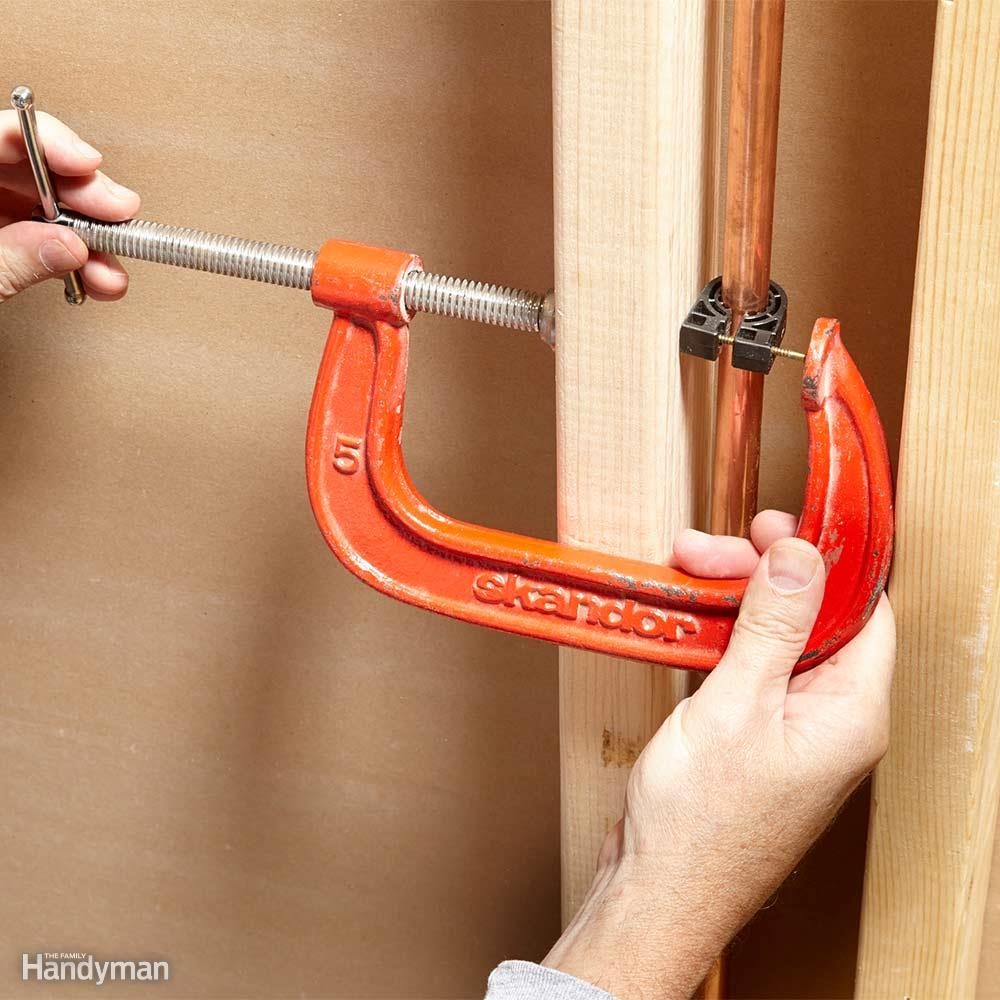
Clamp a Nail
When there’s no room for a hammer, sink the nail with a C-clamp. This trick works for plumbing and electrical straps, junction boxes, and even joist hangers.
28
/
31
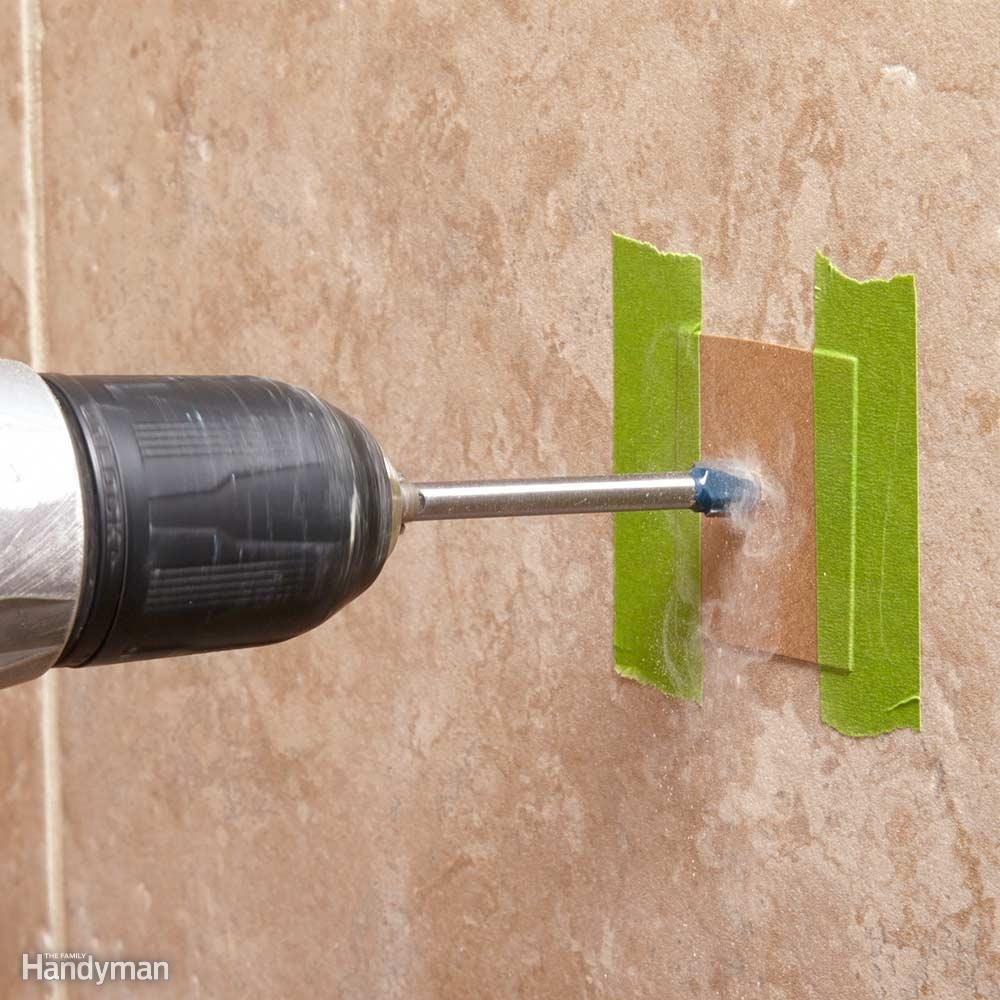
Stop a Wandering Bit
Even the sharpest drill bits tend to skate across hard materials like tile, metal or glass, leaving loopy scratches behind. To steady a wandering bit, give it a softer place to start. Thin cardboard (the stuff cereal boxes are made from), taped firmly in place, works perfectly.
29
/
31
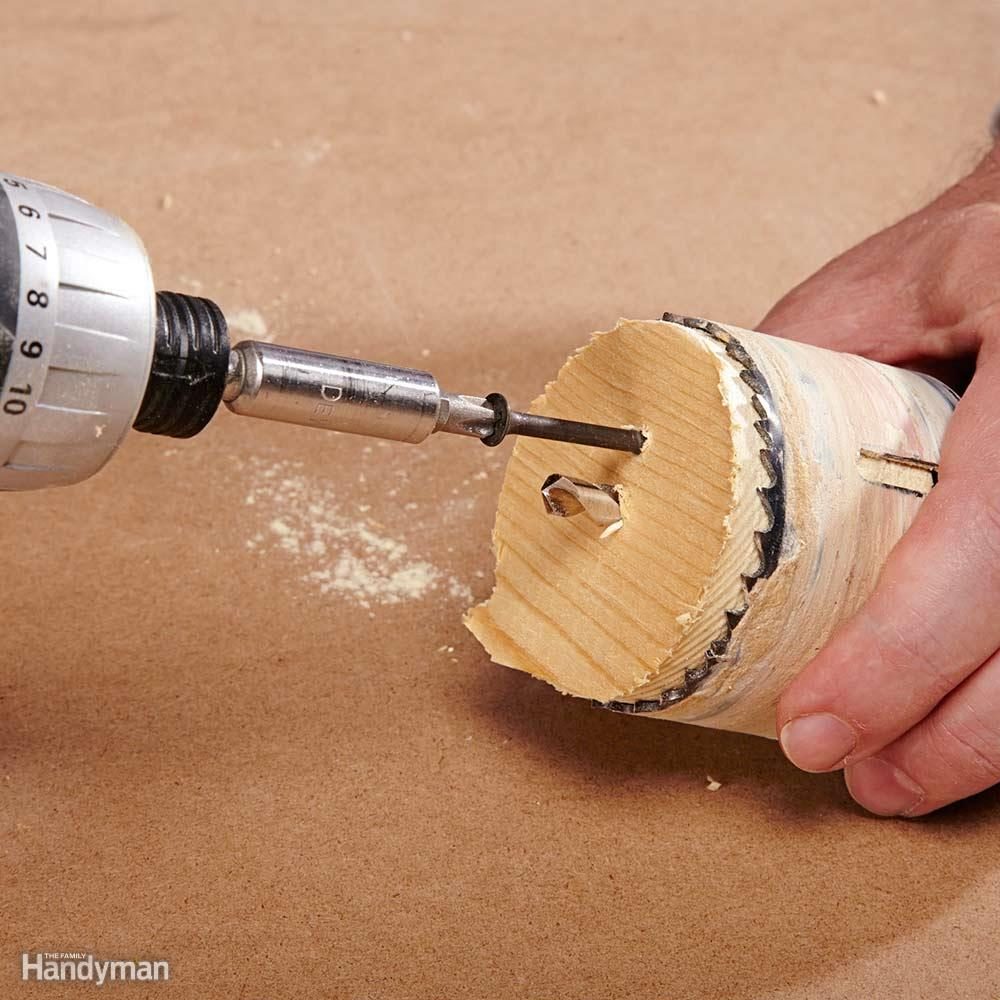
Extract a Stuck Plug
Struggling to pry the plug out of a hole saw might make you mutter, ‘Aw, screw it.’ And that is indeed the correct approach. Drive a long screw into the plug. When the screw hits the back of the hole saw, keep driving and the screw will magically pull out the plug. If the plug is really stubborn, you might have to add a second screw on the other side of the drill bit. Then alternate between the screws, turning one and then the other until the plug is out.
30
/
31

Is Your Level a Liar?
Once upon a time, a man built a house using a lying level, so his floors were not level and his walls were not plumb. And all of the interior work, from installing cabinets to hanging doors, was a real nightmare. If you want to live happily ever after, give your level a 60-second checkup. Set it on your workbench and slip a shim under the low end until the bubble is centered. Then flip the level around, positioning the other end on exactly the same point on the shim. If the bubble isn’t centered, the level is a horizontal liar. To check vertical accuracy, follow the same steps against a wall.
31
/
31
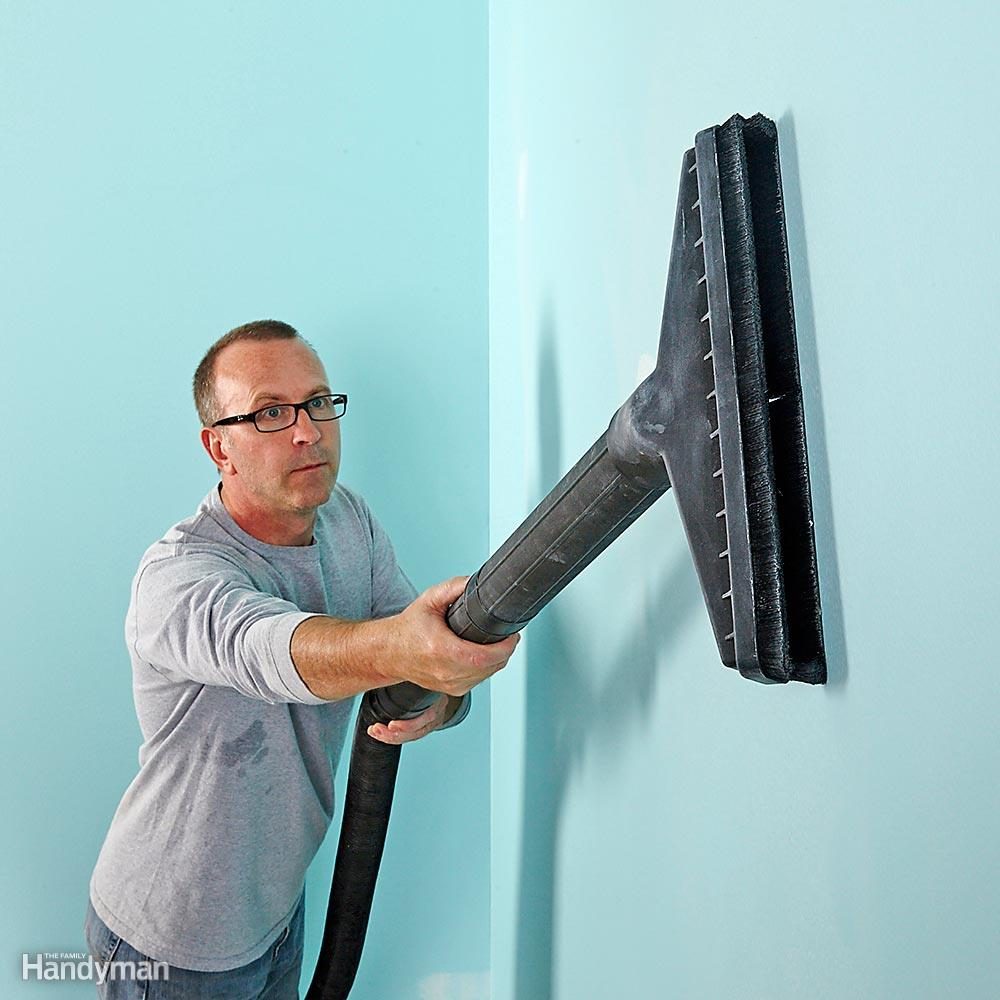
Final Paint-Prep Step
Prep is the key to a fine paint job, says a 35-year veteran painter. Here’s how he does it: First, patch the walls, then sand down all the walls with 100-grit paper. (He uses a drywall pole sander.) That leaves a bunch of dust and debris on the wall, so the next step is to vacuum with a wide floor brush. It’s faster and more thorough than a damp rag, and it gets rid of any cobwebs at the same time. You’ll still need a rag or small vacuum brush to reach into corners, but then it’s on to taping off the woodwork. You can also use a Swiffer to clean up walls.
Next on the list: Learn how to sharpen garden tools.