


You'll definitely regret skipping over any of these important home maintenance tasks this fall.
50 Crucial Fall Maintenance Tasks You Should Never Forget
1
/
50
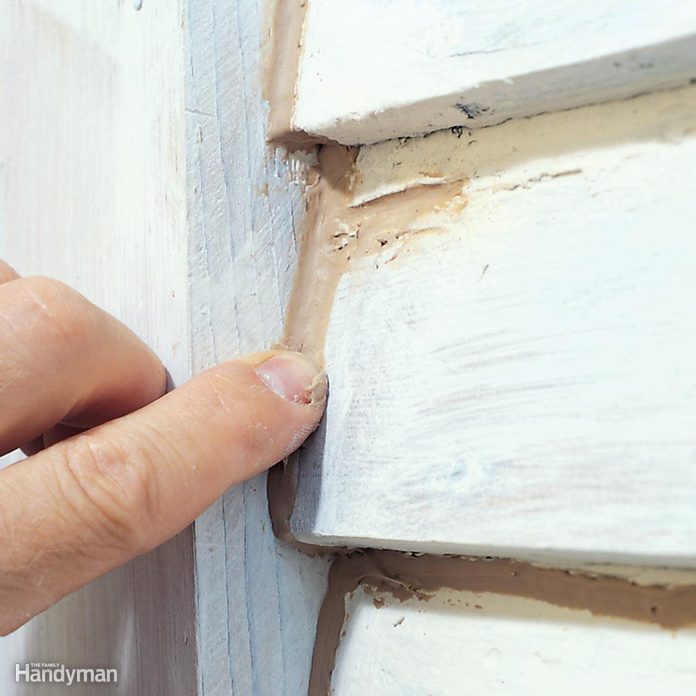
Check Exterior Caulking and Weatherstripping
Fall is the perfect time to make sure your house is properly caulked and your weatherstripping is in good shape. Inspect around windows, doors and anywhere else two materials meet to make sure the caulk is in good shape. Check weatherstripping around doors and replace if it’s broken or missing – it’s super easy to do.
2
/
50
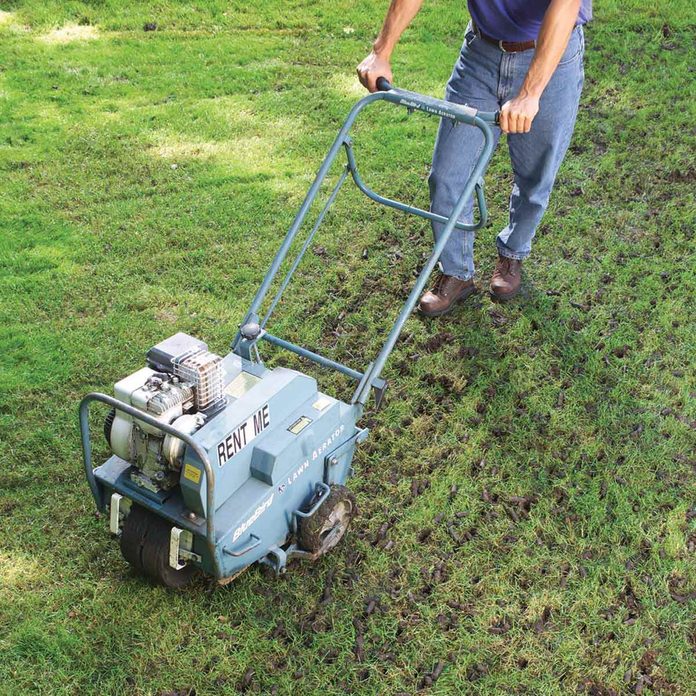
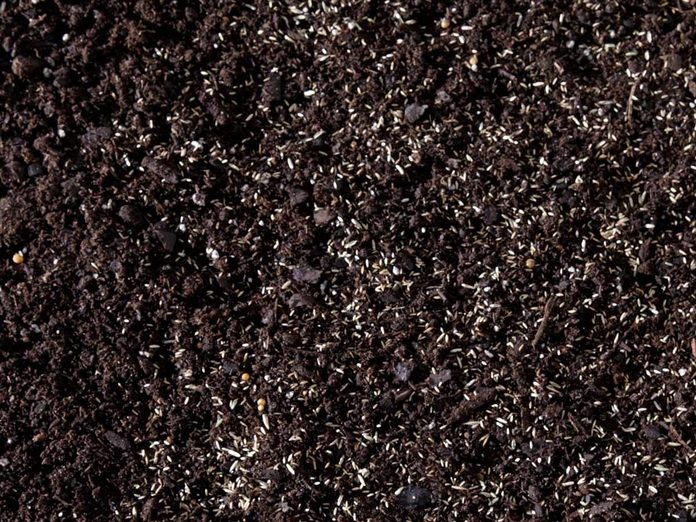
Aerate the Soil
Aerating simply means making holes in the ground by removing plugs of soil. And it’s the single most important task you can perform to maintain a healthy, good-looking lawn. Nothing else comes close! It relieves compaction caused by foot traffic and creates extra pore space in the soil, allowing air, nutrients and water to enter. All of that helps roots to thrive.
Aerate your lawn at least once a year, preferably in the fall. Do it two or even three times each year if you can. The more, the better. You can rent a lawn aerator at any equipment rental store. Get one that will remove plugs of soil rather than one that pokes holes in the ground.
3
/
50
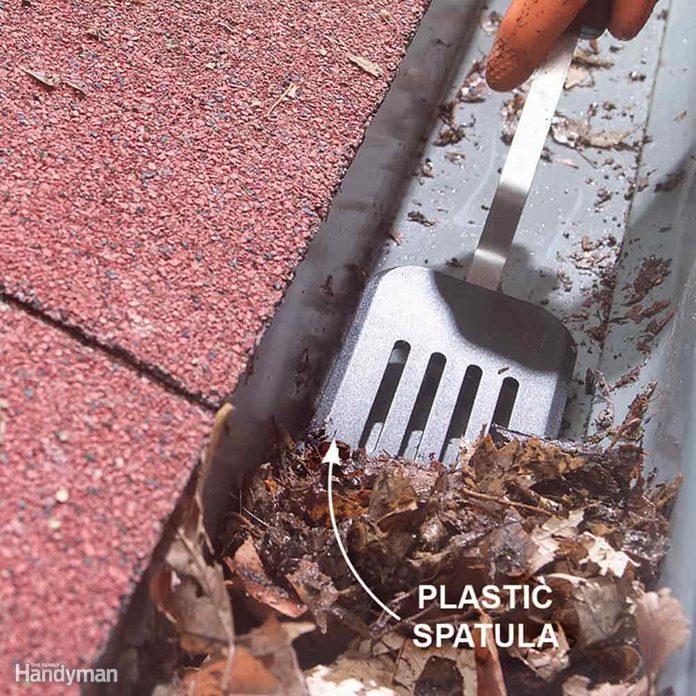
Gutter Cleaner
An old plastic spatula makes a great tool for cleaning debris from gutters! It doesn’t scratch up the gutter, and you can cut it to fit gutter contours with snips. Grime wipes right off the spatula too, making cleanup a breeze. Don’t feel like putting in that much elbow grease? Consider a gutter cleaning robot.
4
/
50
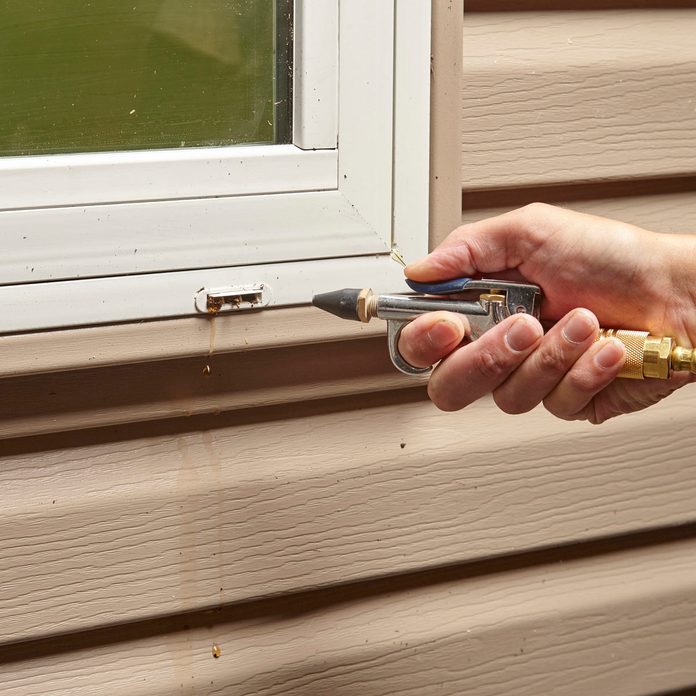
Clean Weep Holes
Weep holes may be the tiniest feature of many sliding windows and vinyl replacement windows, but they serve a big function. The little holes, located on the exterior bottom of the frame, are an outlet for rainwater to drain away from the home, but they often can become clogged up with debris.
To make sure they’re working properly, spray the outside of the window with a garden hose – a steady stream of clean water should exit from the holes. If it doesn’t, use a wire hanger or compressed air to force the blockage out. Re-test with fresh water to ensure they’re completely cleaned. While you’re at it, do these ten more vital home maintenance tasks you’ll regret if you forget.
5
/
50
Reseed Late in the Growing Season
Reseed in the late summer/early fall. Whether you’re seeding a small patch or a whole yard, you’re going to be much more successful if you wait for the cooler, damper weather. It’s almost impossible to get seeds to survive during the dog days of summer. It’s simply too hot and dry. You’ll most likely just waste your time and expensive seed.
6
/
50
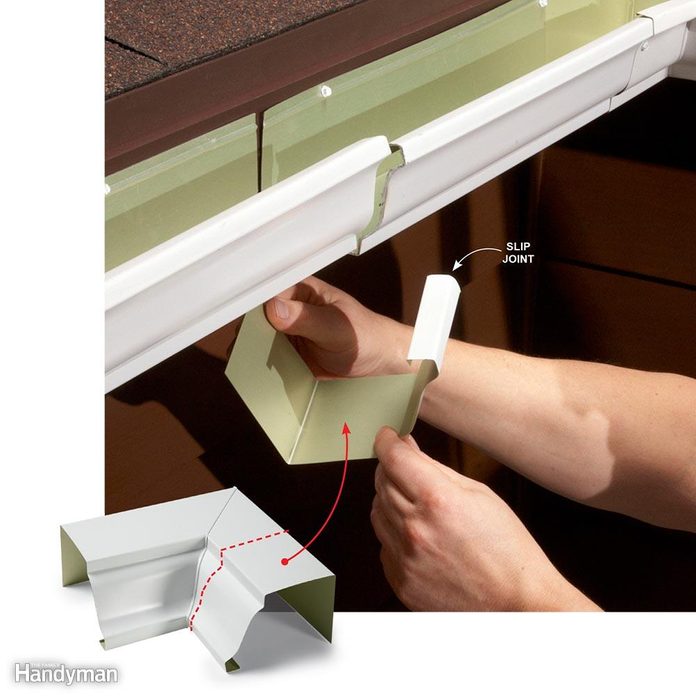
Get Your Gutters Ready
Make sure your home is ready to deal with the rain and snow that comes as the seasons change. Walk around your home and check for loose gutters, broken pieces and detached downspouts and make the necessary repairs. Ensure your gutters are clear of leaves and other debris and that your downspouts are directing water away from your foundation.
Plus: Pumpkin spice deodorant? Yep, they’ve taken it too far!
7
/
50
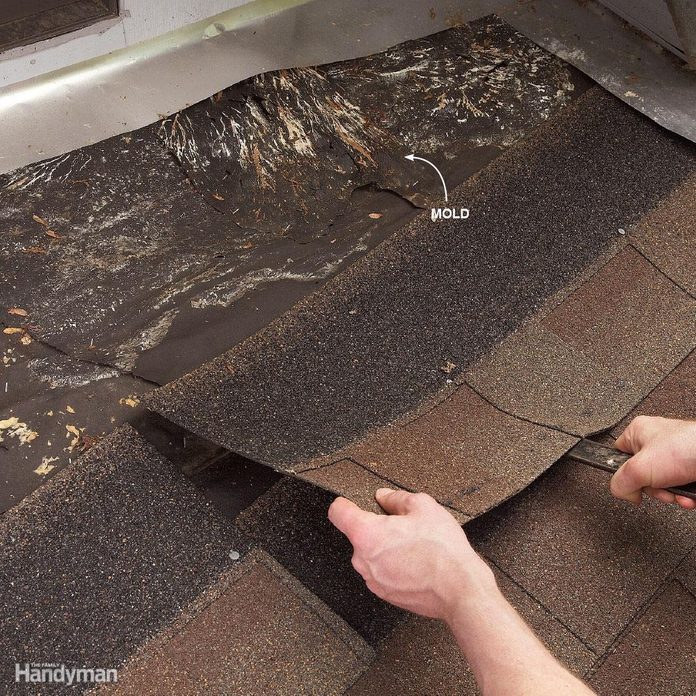
Give Your Roof a Once-Over
No one wants to be fixing a roof in the dead of winter. Give it a once-over to make sure there aren’t any signs of trouble. Pay attention to broken or missing shingles, missing flashing and any discoloration.
8
/
50
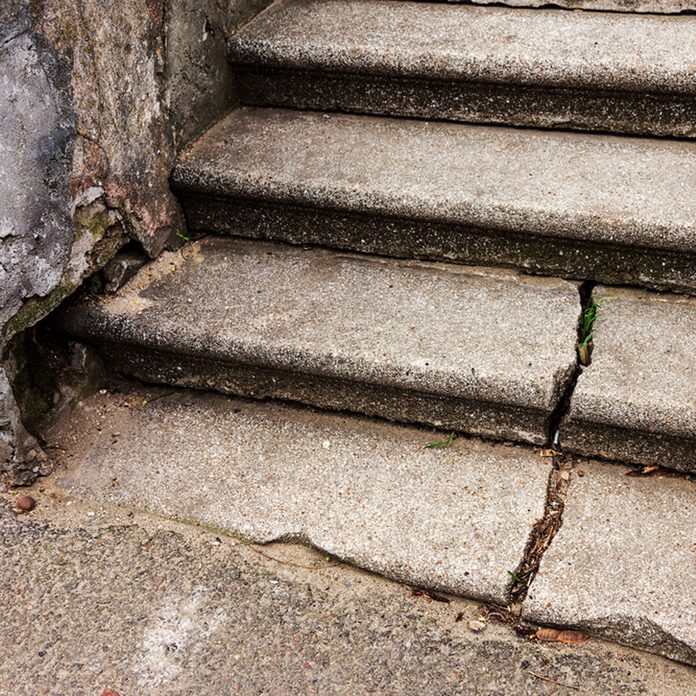
Fix Driveway and Sidewalks Before They Get Worse
Changing temperatures and moisture can turn a small concrete problem into a big one. Take some time to repair broken concrete and get some more time out of your sidewalk, driveway and steps before they’re in need of full replacement.
9
/
50
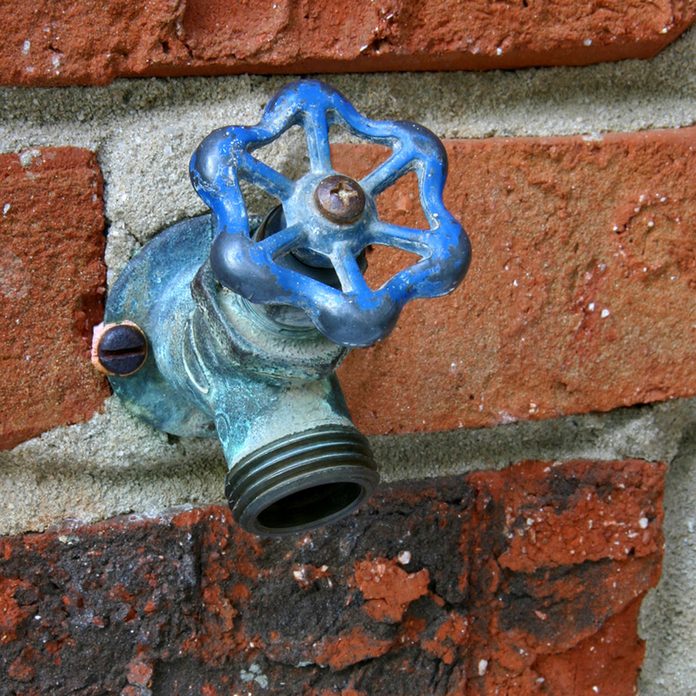
Install Frost-Proof Outdoor Faucets
New outdoor faucets are frost-proof and also prevent unsanitary water from contaminating your water system. Installing a new outdoor faucet takes just a few hours and will give you peace of mind all winter long.
10
/
50
Winterize Your Gas Grill
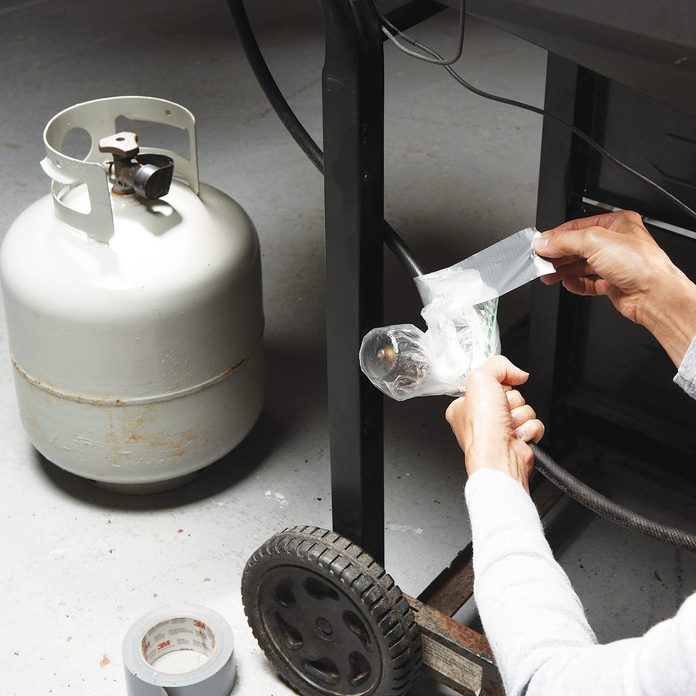
If you’re not a winter griller, now’s the time to pack away your grill before it’s covered with a foot of snow. In addition to giving your grill a thorough cleaning to remove grease and food scraps, take these steps to help prevent any unpleasant surprises when you fire up your grill again next spring. Here’s how to winterize your grill:
- Shut off the gas at the LP tank, unfasten the burner, slip the gas tubes off the gas lines and lift out the unit.
- Coat the burners and other metal parts with cooking oil to repel moisture that can build up over the winter and to prevent rust.
- Then wrap the burner unit in plastic wrap or a plastic bag to keep spiders and insects from nesting in the gas tubes during the winter. This is a common problem that can make for balky starts, uneven flames or even a one-alarm fire the next time you light your grill.
If you’re storing your grill outside during the winter, just keep the propane tank connected (but shut off) and put a protective cover over the entire grill when you’re done cleaning it.
11
/
50
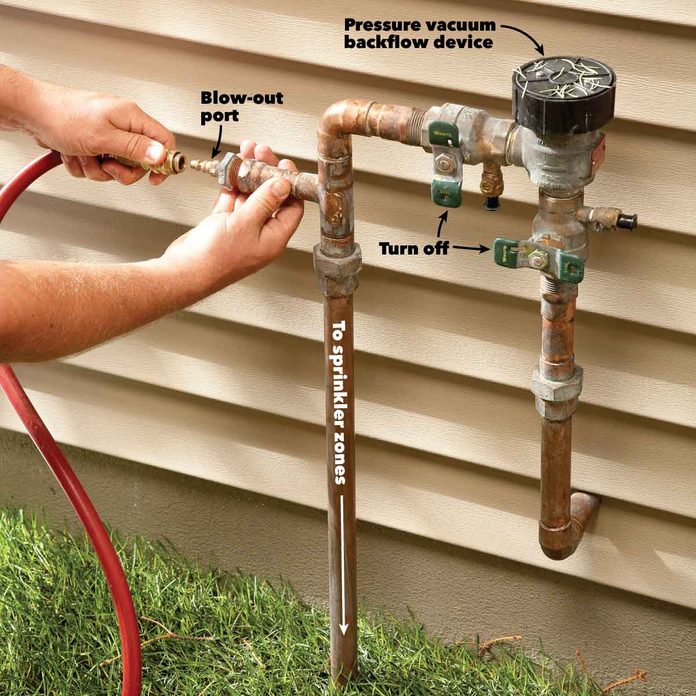
Winterize Your Sprinkler System
You can pay the irrigation company every year to blow out your sprinkler system, or you can use your air compressor and do it yourself. You just have to be careful not to leave any water in the line or it might freeze over the winter and burst a pipe. Also be aware that even the largest home compressor isn’t powerful enough to blow out the entire system at once, so you’ll probably have to blow it out zone by zone.
If you’re into number-crunching and you have the original irrigation layout showing the gallons per minute (gpm) of each sprinkler head, just divide the total gpm of each zone by 7.5. That will give you the cubic feet per minute (cfm) your compressor needs to blow out the zone. Otherwise, just rent a 10-cfm compressor and hose from your local tool rental center.
Set the compressor air-pressure regulator to a maximum of 80 psi for rigid PVC pipe systems, or 50 psi for flexible black polyethylene pipe. Then turn off the water supply and set the system timer to open just one zone. Next, open the manual drain valve at the end of that zone (if equipped).
Close off both valves on the backflow preventer. Then remove the plug on the blow-out port and screw in a quick-connect hose adapter. Snap on the air hose and connect the other end to the compressor (see photo). Then blow out the line. The heads should pop up and spit out water. Disconnect the hose as soon as they run dry.
Don’t overdo the blow-out — without water cooling the plastic gears, they can melt in less than a minute. So move on to the next zone and allow the heads to cool. Then, go back and blow out each zone a second time. Plus: Learn how to install an irrigation system yourself.
12
/
50
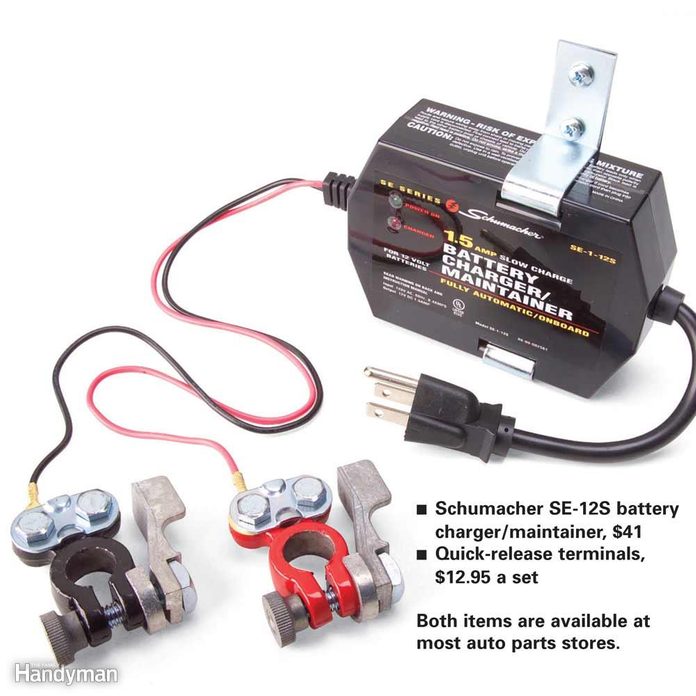
Seasonal Battery Storage
You’ve emptied the gas, sealed the exhaust and prepared the engine for seasonal storage. But before you throw the tarp over your boat or roadster for the long winter sleep, think about how you’re going to care for the battery.
Batteries lose their charge when they sit idle, and when that happens you could wind up with a worthless battery in the spring. To keep batteries healthy, they should be charged every six weeks. But leaving a standard battery charger connected for the whole season isn’t a good idea — that will overcharge the battery and shorten its life.
Instead, invest in a battery maintainer, designed to be left on the entire offseason. They monitor battery voltage and automatically adjust the charge to avoid under- and over-charging. For more on how to winterize your inboard/outboard motorboat, check out our instructions which include an oil change, draining the engine block, lubing the lower unit and more.
13
/
50
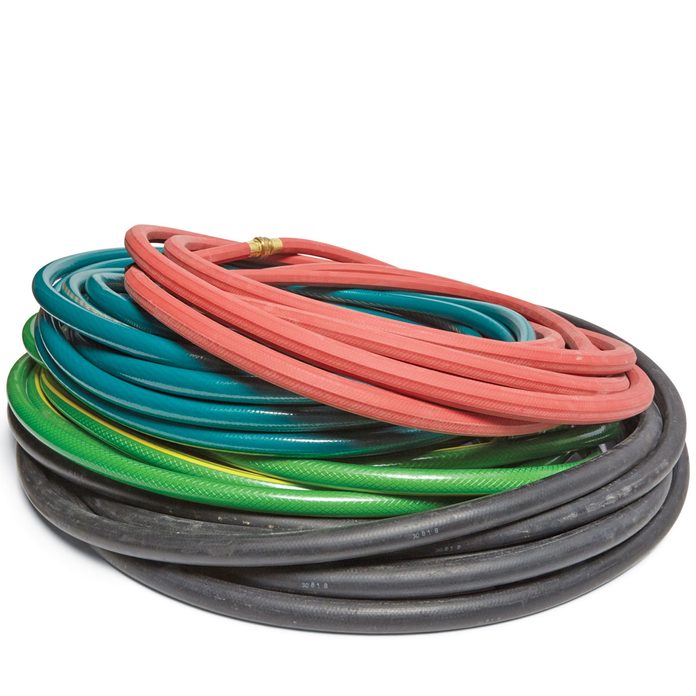
Drain Garden Hoses or Waste Money on Replacements
Due to circumstances (laziness), I sometimes neglect to drain garden hoses before putting them away for the winter. Usually it’s not a problem. But every once in a while, freezing water splits a hose open. I’ve lost a few cheap hoses this way and a super-expensive one (ouch!).
That’s just dumb because draining hoses is so quick and easy: Blast out the water with an air compressor or stretch them out on a sloped yard or driveway. If you need to buy a new garden hose, learn how to do a simple test, right in the store, to see if the hose will be kink-free! — Gary Wentz, Family Handyman Editor-in-Chief.
14
/
50
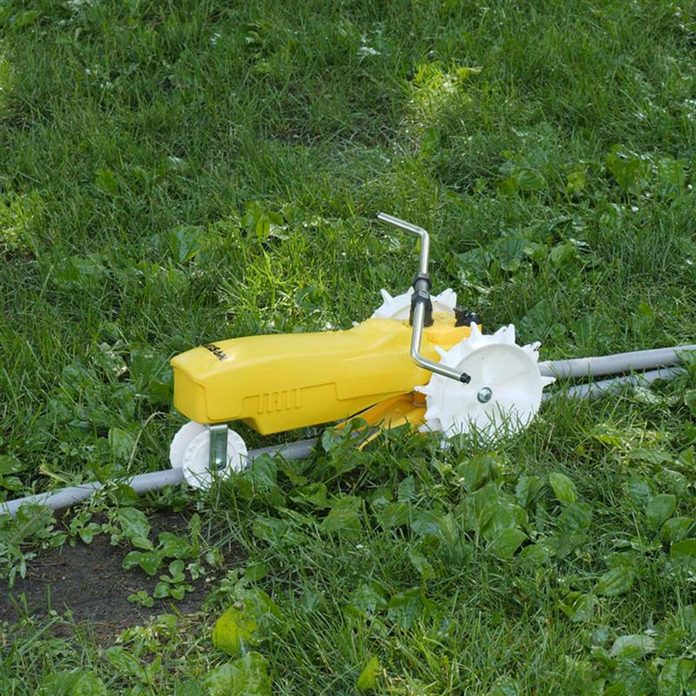
Drain Mechanical Sprinklers or Buy a New One in the Spring
I bought one of those sprinklers that looks like a little tractor. It’s designed to follow the path of the hose on the ground. It was expensive, but it worked perfectly for my irregular-shaped yard — that is, until it spent the winter in my unheated garage. The residual water froze and destroyed the gears inside. The following spring, all it did was dribble water and make a clicking sound.
I should have drained it before storing it. Just to be safe, I’ll keep the new one on a shelf in the basement. If you’d like to find out how to save time and money on lawn watering, check out these 11 clever tips. — FHM Editor Ken Collier.
15
/
50

Change Your Furnace Filter
Changing your furnace filter is one of the easiest things you can do to keep your furnace in good shape. If you haven’t changed it in a while, make sure you have a fresh one before your turn your furnace on for the first time.
16
/
50
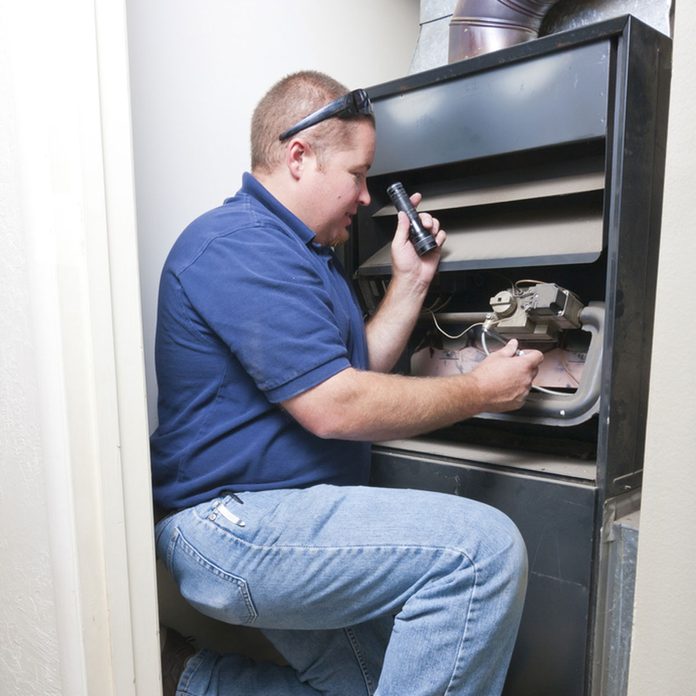
Take a Peek at Your Furnace
Make sure your furnace is in good shape before you really need to use it. With a few tools and some time, you can perform a DIY furnace inspection to head off problems before they start.
17
/
50
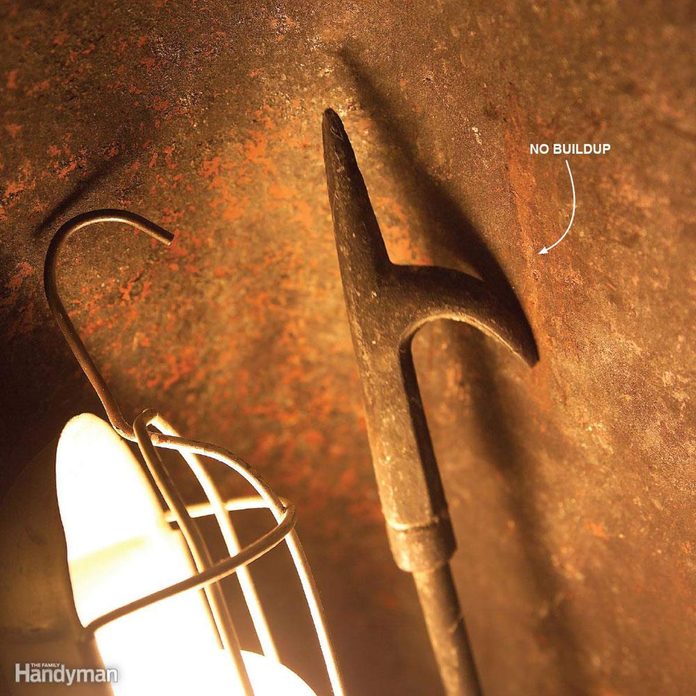
Check Your Chimney or Risk a Fire
Creosote buildup causes chimney fires. You should have your chimney professionally inspected or cleaned after every 70 fires. If you burn wet wood (which you shouldn’t), have it inspected or cleaned every 50 fires.
Can’t remember the last time you had it cleaned by a pro? A quick way to tell if your chimney needs cleaning is to run the point of your fireplace poker along the inside of your chimney liner. If you find a 1/8-in. layer (or more) of buildup, call a chimney sweep. For additional expert chimney maintenance advice, check out what two certified professional chimney sweeps have to say.
18
/
50
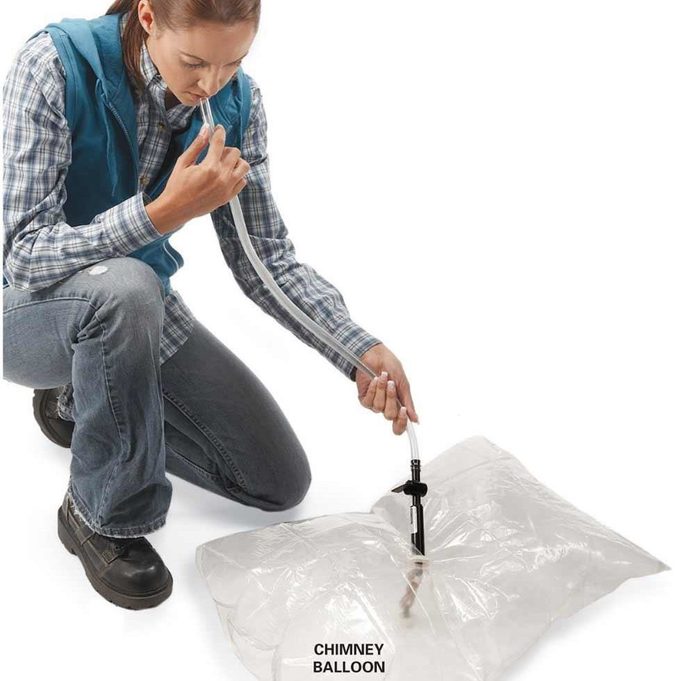
Stop Airflow Up the Chimney
Fireplace chimneys can be inefficient, letting your warm inside air disappear like smoke up a chimney. If you have airtight glass doors that seal the opening, you’re in good shape. (The doors are available at fireplace retailers and home centers.) If not, a special balloon or chimney-top damper will get the job done. For fireplace chimneys that are seldom or never used, inflate a Chimney Balloon inside the chimney to stop the air leaks.
Partially inflate the balloon by mouth or with a pump, then stick it into the chimney and blow it up the rest of the way. Putting in and taking out the reusable balloon can be messy (here’s when to clean a chimney flue), so you don’t want to hassle with chimney balloons if you regularly use your fireplace. But that doesn’t mean you have to settle for energy loss.
Instead, install a chimney-top damper system like the Chim-a-lator, which seals the top of the flue when the chimney’s not in use. A lever in the fireplace controls the damper via a long cable. Installation involves attaching the damper and screened-in cap to the chimney top, then mounting the lever in the fireplace. If you don’t feel comfortable working on the roof, hire a chimney sweep or mason who can install the system for you.
19
/
50
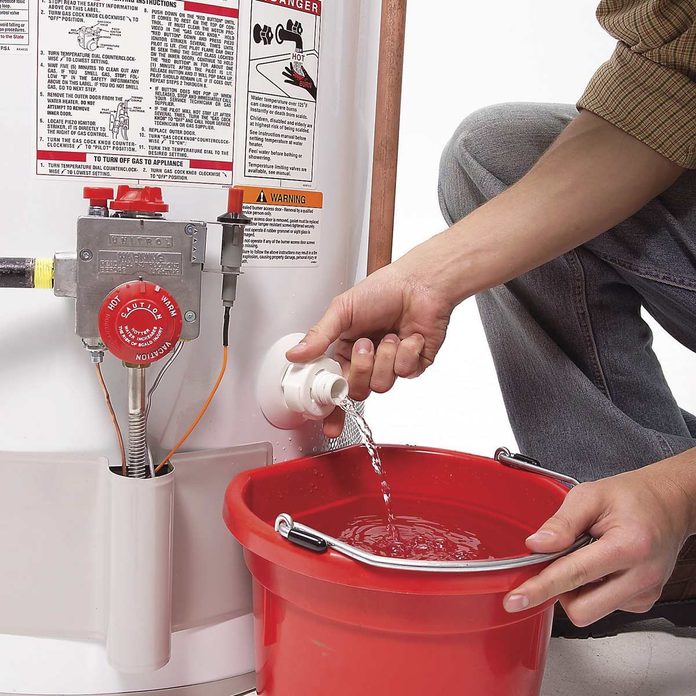
Check Your Water Heater
Extend the life of your water heater tank and maintain your water heater’s efficiency and safety with a few minutes of basic maintenance once a year. Learn how to clean sediment from your water heater.
20
/
50
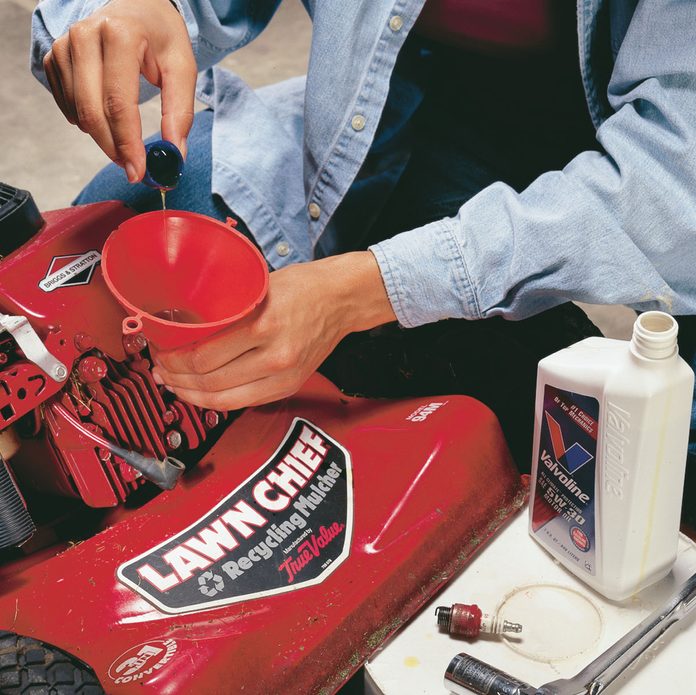
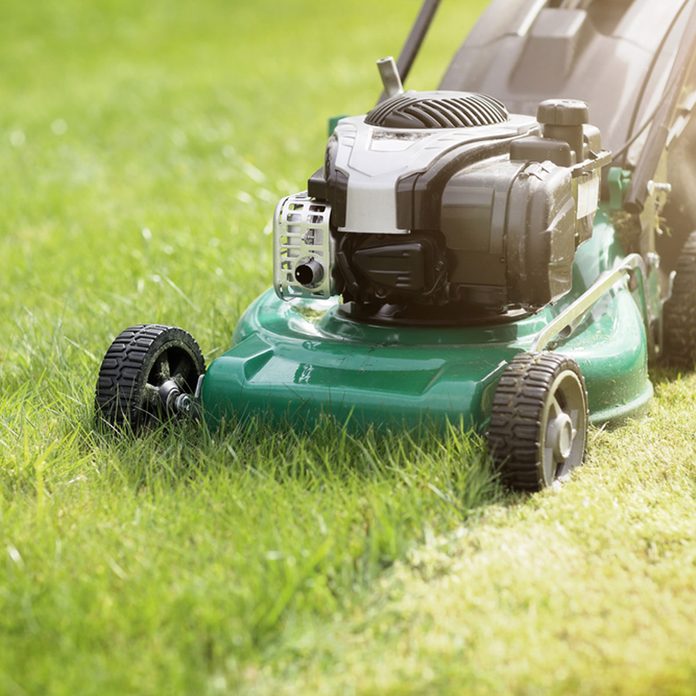
Winterize Your Lawn Mower
Don’t just shut off your lawn mower and leave it until spring – that’s a bad idea. But winterizing your mower only takes an hour. Give the deck a thorough cleaning. Then add fuel stabilizer and a few ounces of oil to make sure the engine will start right up without hesitation in the spring. In case your mower starts smoking, use these tips to fix it,
21
/
50
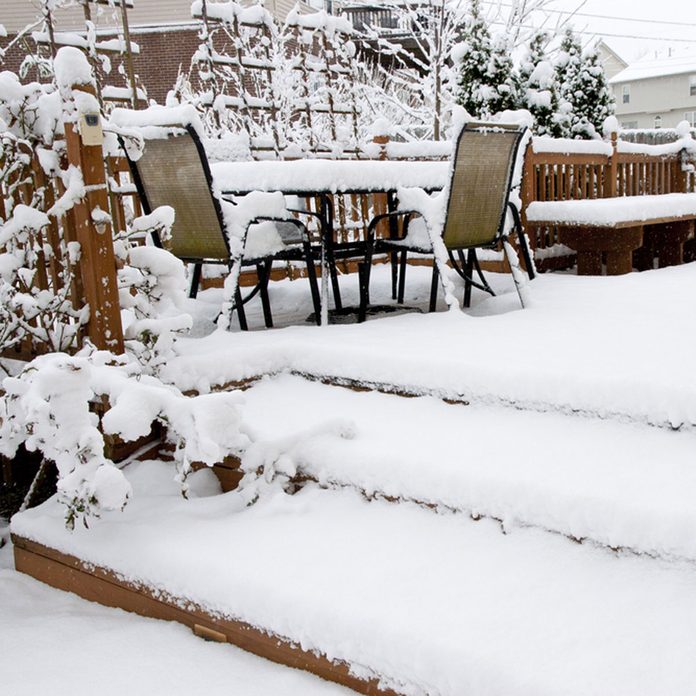
Store Outdoor Furniture
Don’t leave your outdoor furniture exposed to the elements all winter long. Give your furniture a thorough cleaning and cover it, or bring it inside for the season.
22
/
50
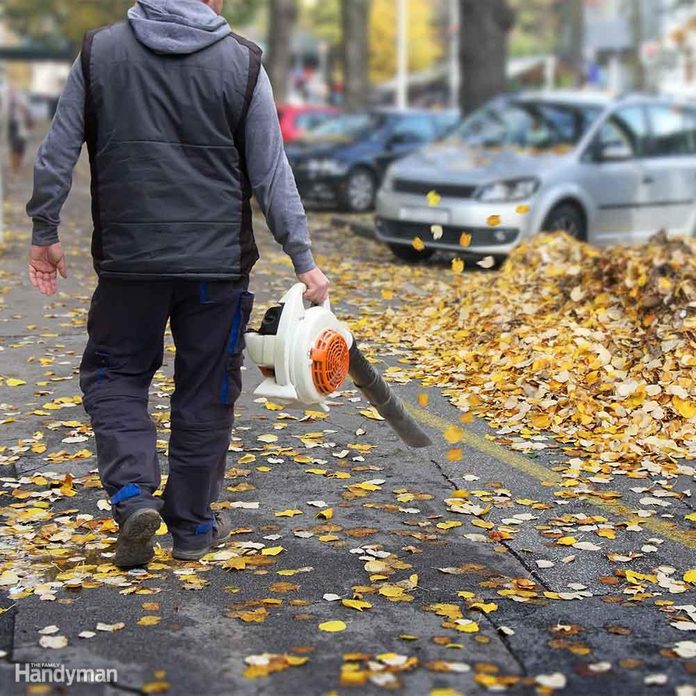
Take Care of Those Leaves
Once leaves are on the ground, put aside some time to tackle that chore. Check out these great ways to make dealing with leaves easier!
23
/
50
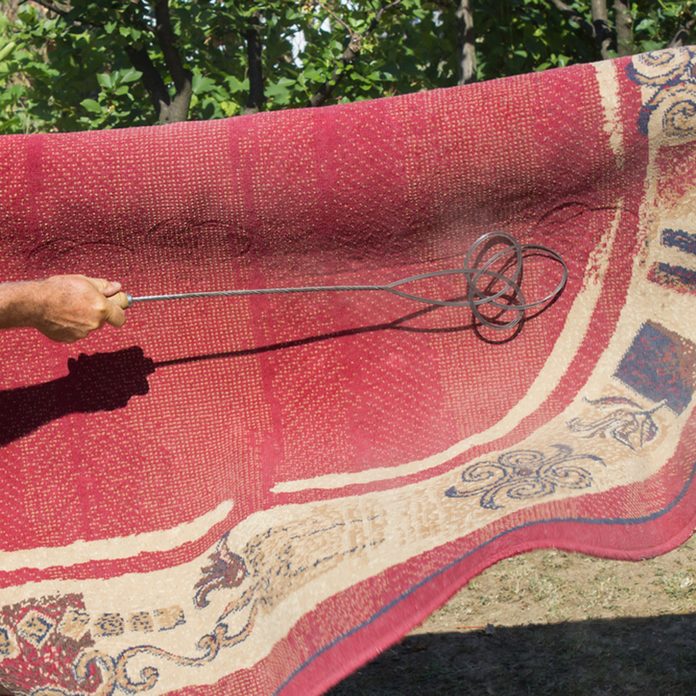
Deep Clean Rugs and Carpeting
Take advantage of one of those beautiful fall afternoons to give your rugs a deep clean. Take area rugs outside and give them a good shake (or a good whack), then give them a thorough vacuum with your shop vac. Don’t forget your interior carpets. You can rent a carpet cleaner and give your carpet a deep clean before you start hosting holiday gatherings.
24
/
50

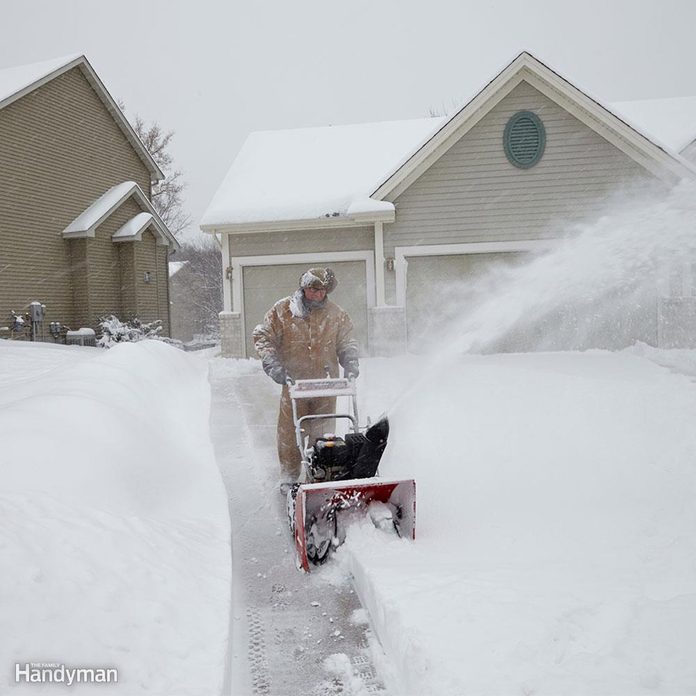
Get Your Snowblower Ready for Service
Be sure your snowblower starts before the first big snowfall. Take some time to get your snowblower running and in good order so it will be tossing snow as soon as it hits the ground.
25
/
50
Get Your Property Ready for Snow
Before the snow flies and you start using your snowblower, take a few minutes to inspect your property. Remove rocks, dog tie-out cable, extension cords, holiday light cords and garden hoses. Then stake out paths that run near gardens so you don’t accidentally suck up rocks and garden edging. Mark your walk and driveway perimeters by pounding in driveway markers. If the ground is frozen, just drill a hole using a masonry bit and your battery-powered drill.
26
/
50
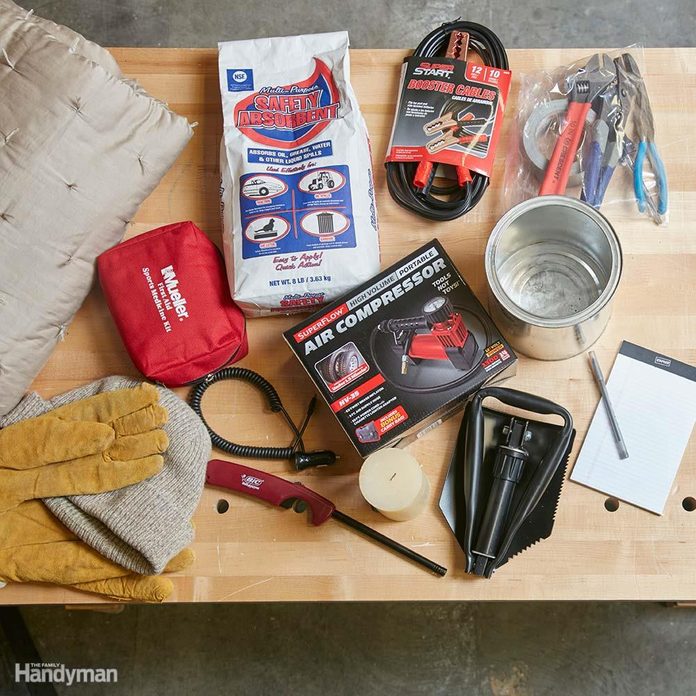
Make a Winter Driving Kit
This kit is overkill for year-round driving, but it could be handy during winter. It only takes a few minutes to put together and you probably already have most of the stuff!
27
/
50
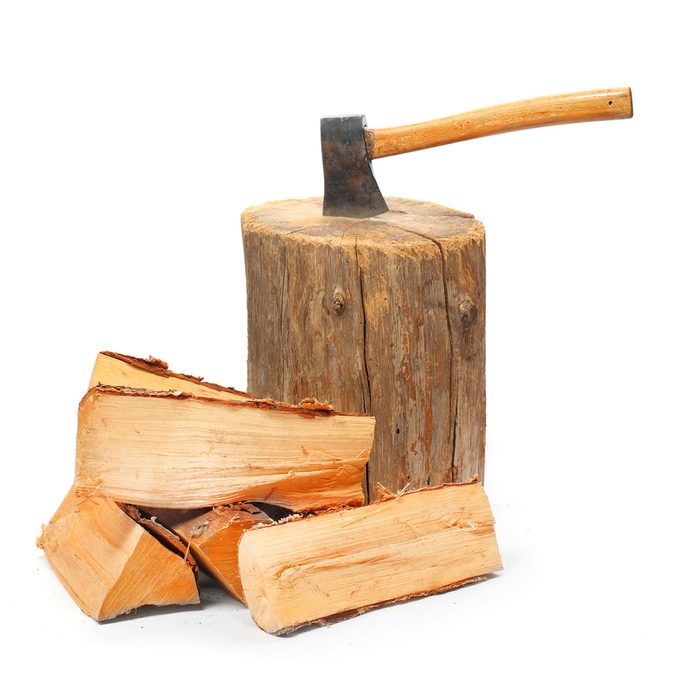
Stockpile Firewood
Whether you have a source of wood on your property or need to purchase a cord or two, fall is a great time to spend cutting and chopping wood to burn in your fireplace all winter long. And if you’re using a chainsaw, make sure to brush up on your safety knowledge before you hit the forest.
28
/
50
Cut Your Lawn Short
Keep mowing your grass until it stops growing. And your last mow of the season should cut your grass nice and short. This reduces the chance that your lawn will get snow mold and vole damage.
29
/
50
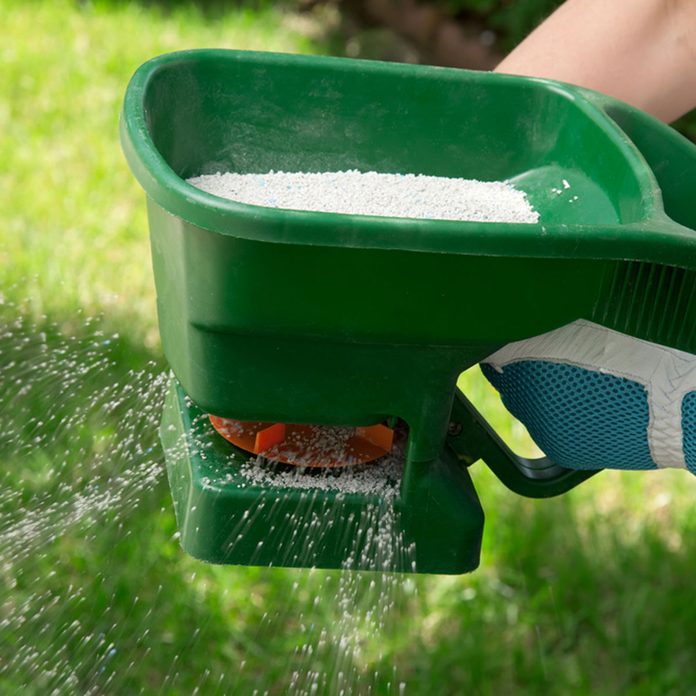
Fertilize Your Lawn
It’s important to apply fertilizer to your lawn during the fall. If you only apply fertilizer once a year, fall is the time to do it. Your lawn has spent all summer growing and it’s hungry.
30
/
50
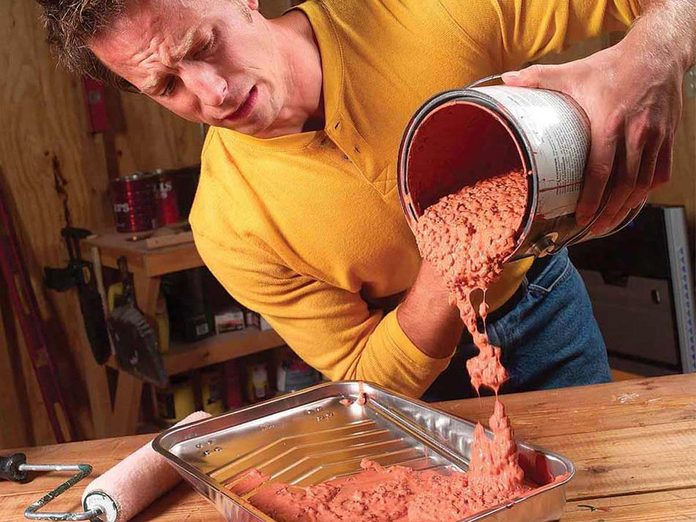
Bring Paint Inside
Paint doesn’t handle extreme temperatures well. So if you live in a cold climate, add this to your fall chore list: Bring the latex/acrylic paint into the house. And while you’re at it, don’t forget the latex caulk. Freezing ruins latex paint and caulk.
Another temperature-related painting mistake is painting when it’s going to freeze. Paint can’t dry properly in freezing temps. It will only dry partway and will easily come off when touched. At the other extreme, painting a hot surface is also a bad idea. The paint starts to dry before you can spread it evenly and can bubble and slough off. Plan your painting to avoid direct sun if possible. Or at least try to paint south-facing walls in the morning or evening when the sun is less intense.
31
/
50
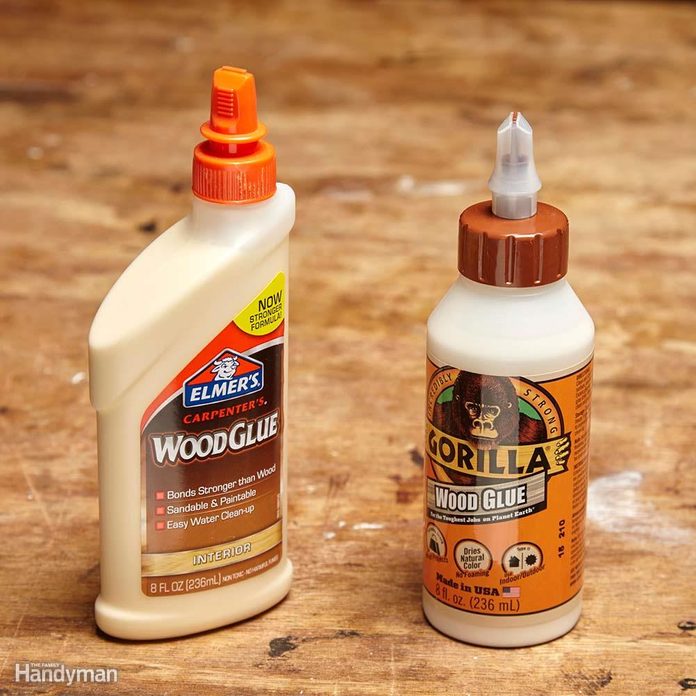
Don’t Let Glue Freeze
Many adhesives – wood glue especially – can be ruined by one freeze/thaw cycle, so it’s a good idea to store them in a heated space during cold months. Even glue left overnight in a car can freeze and become unusable. Can you still use paint that froze?
32
/
50
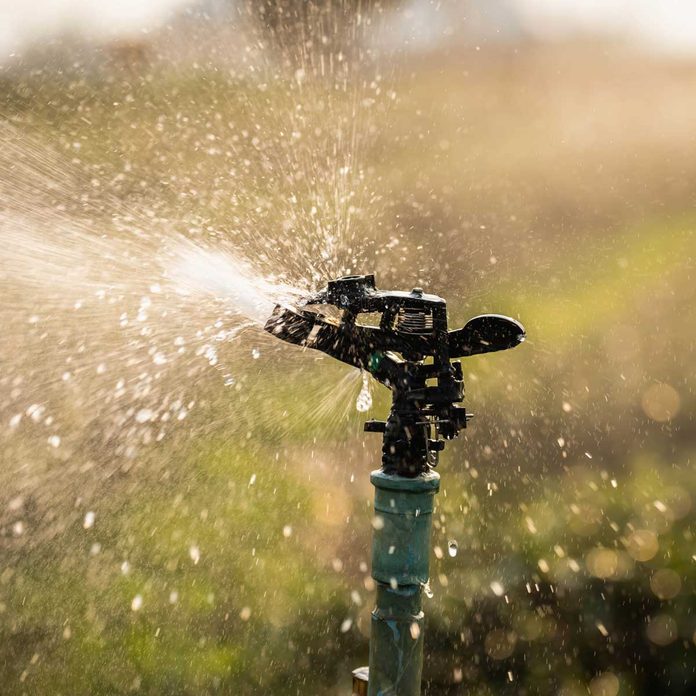
Best Way to Water Lawn: Water in the Fall
Your lawn still needs water in autumn, even though the leaves are changing, the growing season is winding down and your grass isn’t growing fast. Fall watering helps your lawn recover from summer stress and gain strength for the winter ahead. Also, if you fertilize in the fall, watering is necessary for the fertilizer to dissolve and soak into the ground where it’s needed. So don’t put your hoses or sprinklers away until the ground starts to freeze. Your fall grass needs it.
33
/
50
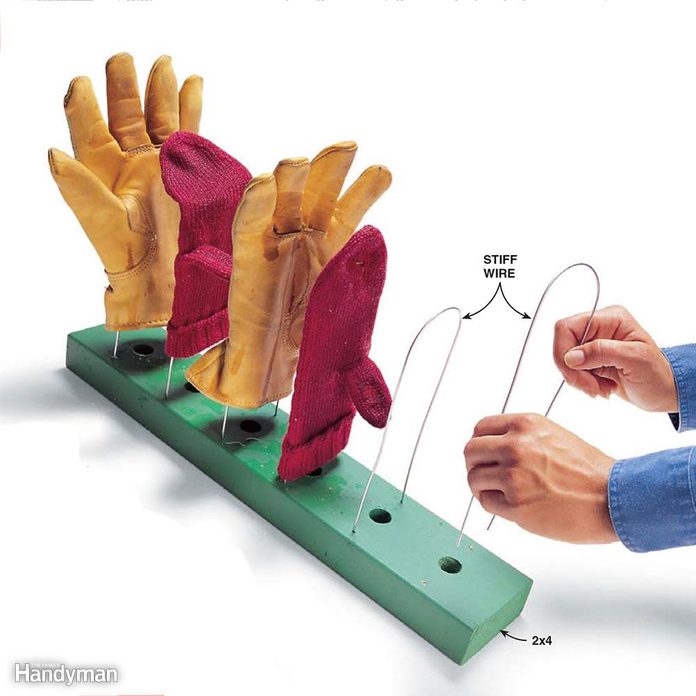
Build a Mitten and Shoe Dryer
Drill pairs of 1/8-in. holes in a scrap of 2×4 and insert U-shaped pieces of galvanized 14-gauge wire. If you have forced-air heat, drill one-inch holes between the pairs of 1/8-in. holes using a spade bit, and set the rack on a register for fast drying.
34
/
50
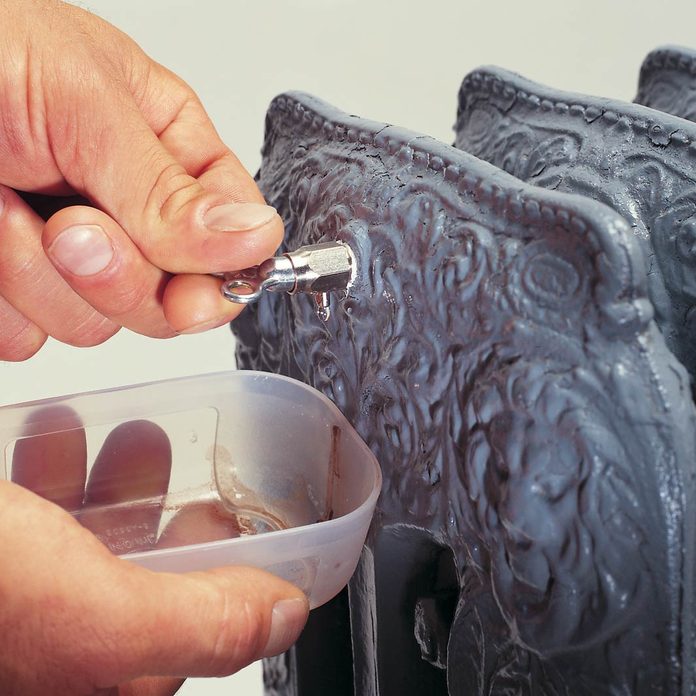
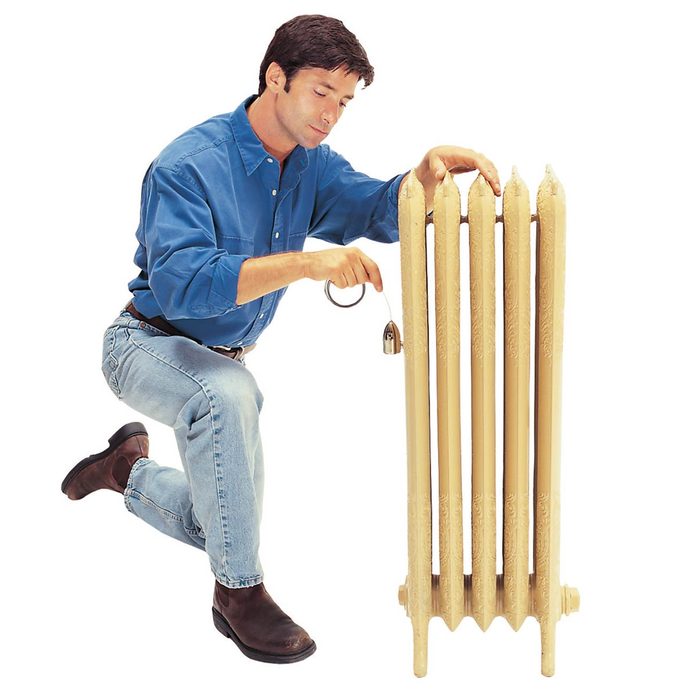
Bleed Hot Water Radiators
When trapped air clogs a hot water radiator, some or all of the “fins” will stay cold. At the top of the radiator, look for a small valve like the one shown. Take a radiator key, 1/4-in. 12-point socket, or a flat screwdriver (depending on the valve type) and slowly turn the valve counter-clockwise until water starts dripping out. This releases the trapped air and lets hot water into the cold fins.
While you’re at it, you might as well repeat the process on all of your radiators. Have a cup or dish handy to catch the water.
35
/
50
Clear Steam Radiator Vents
Steam radiators have an air vent like the one shown. Unfortunately, many of these vents get painted over, plugging the air hole. Clear the air hole in the top of the vent with a small wire or sewing needle. If you’re still worried about the air vents working properly, consult a hot water/steam heat specialist who can replace the vents. Next, check out some clever ways to cover an old radiator here.
36
/
50
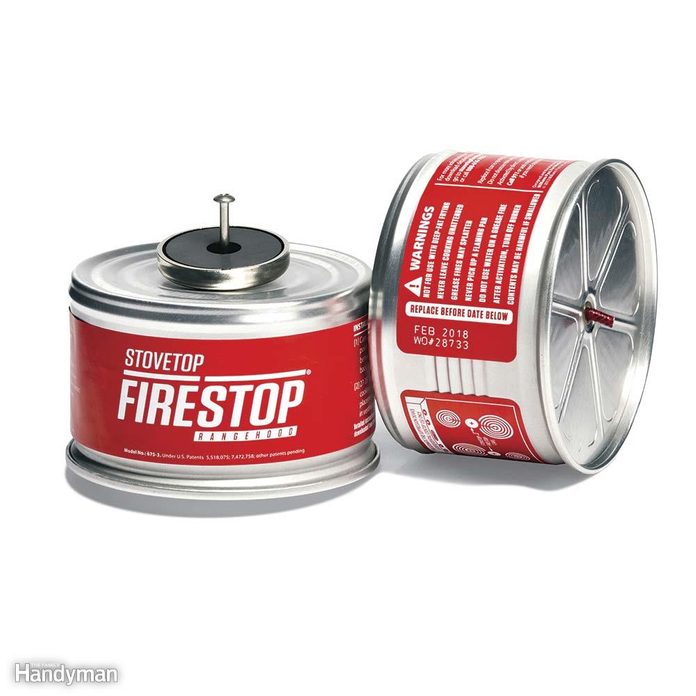
Install Stovetop Fire Suppressors
Kitchen fires can quickly get out of hand, and with colder weather on the horizon you’ll likely be cooking inside more. Do yourself a favor and get a pair of fire suppressors. These magnetically-mounted cans live in your range hood and are activated when flames reach the fuze on the can.
37
/
50
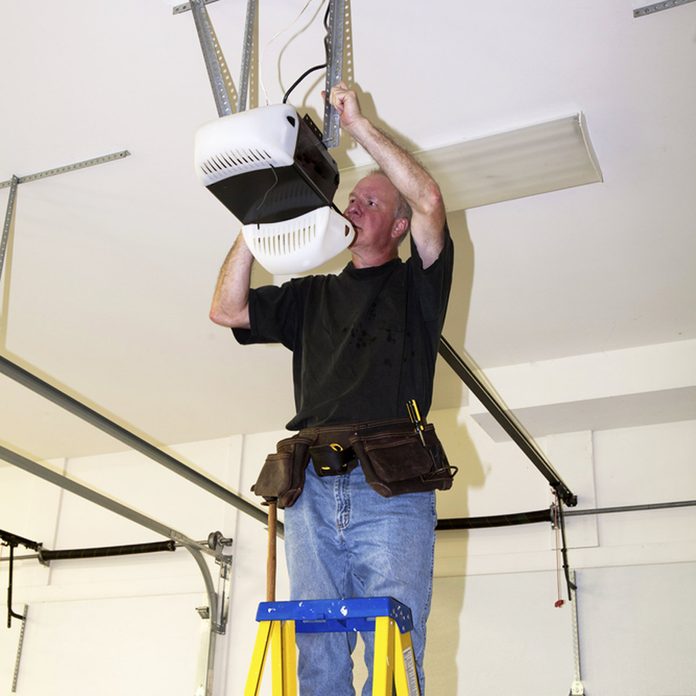
Inspect and Fix Your Garage Door
Cold can wreak havoc on garage door tracks. Make sure your garage door is in good shape so you don’t find yourself stuck in the garage — or worse yet, stuck outside. Learn all you need to know about fixing your garage door here.
38
/
50
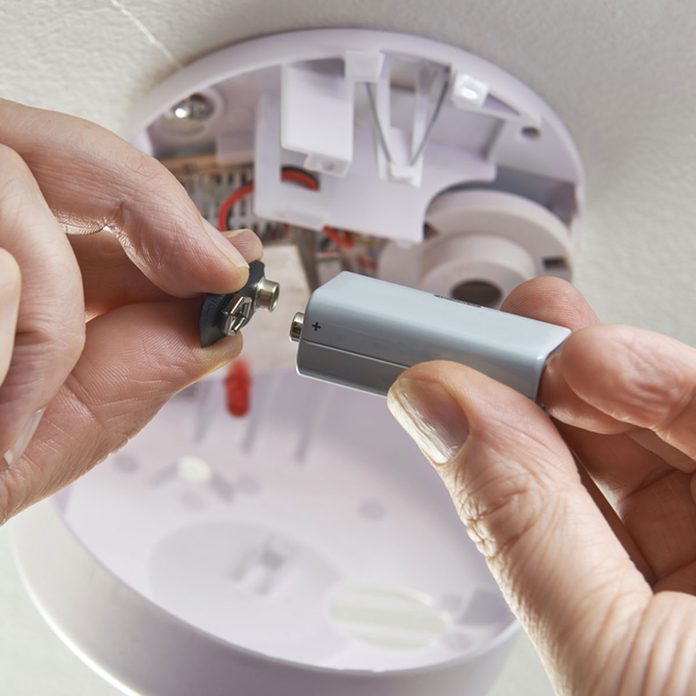
Check Your Detectors
With furnaces turned on, the windows closed and portable heaters humming along, fall is a great time to make sure your smoke and carbon monoxide detectors are working. Check batteries and expiration dates. Smoke detectors are typically good for 10 years, and CO detectors last for about six years.
39
/
50
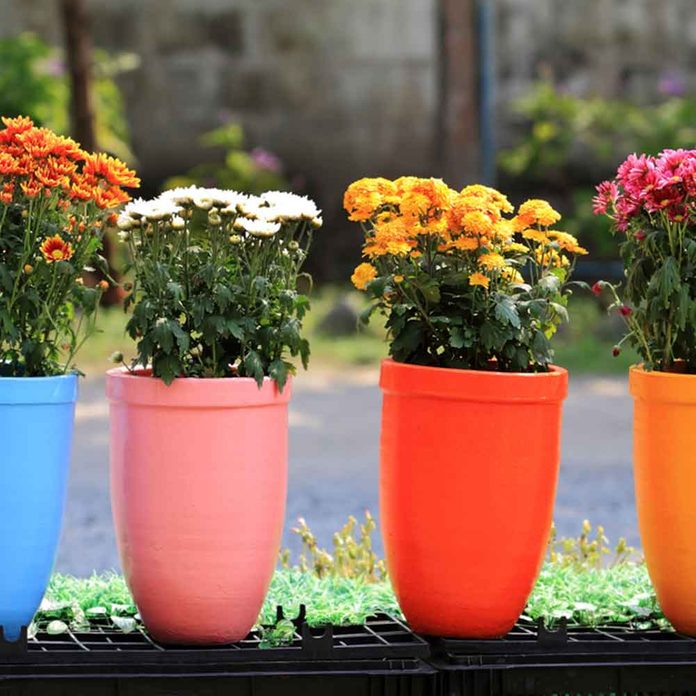
Empty Pots and Planters
The water in soil left in flower pots and planters over winter can freeze and expand. Make sure to empty your clay and ceramic planters so they’ll survive for next season.
40
/
50
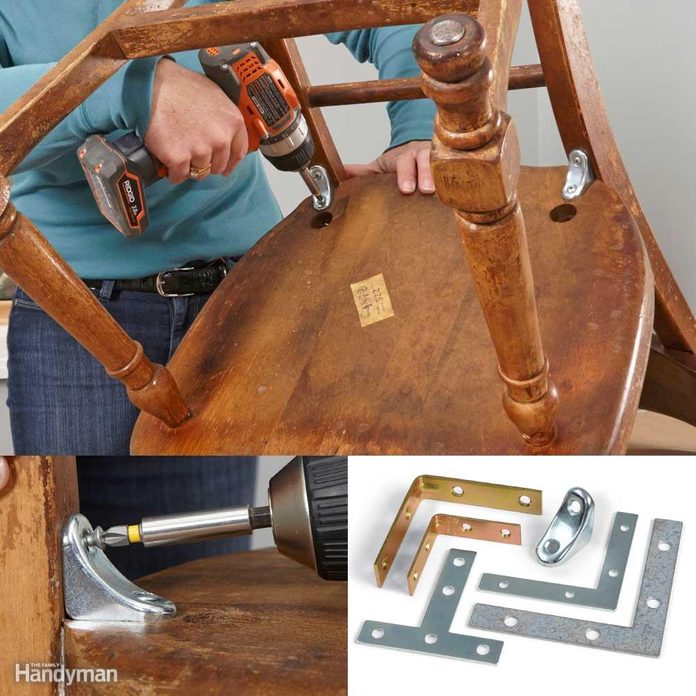
Fix Your Furniture
Not only is fixing your furniture a fun and easy indoor project, you’ll be glad to have sturdy, good-looking chairs and tables when guests stop by for holidays.
41
/
50
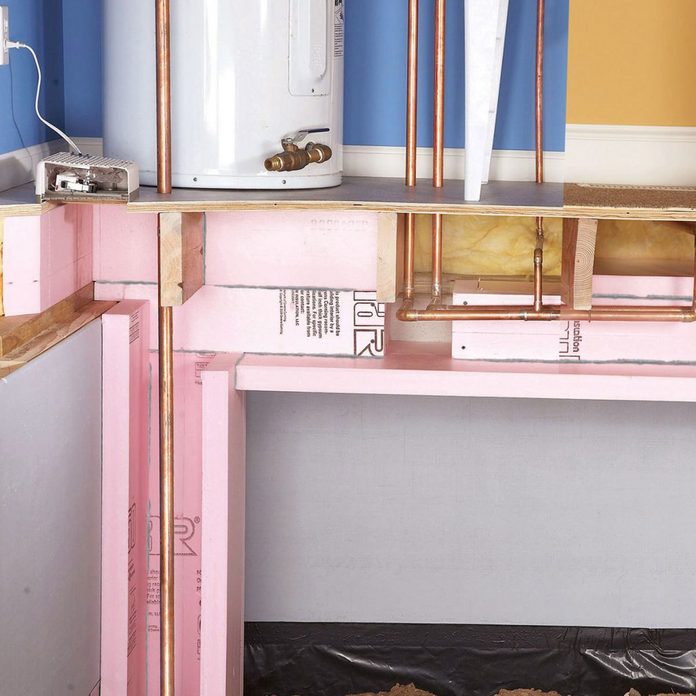
Insulate Pipes
Pipes running through unheated basements and crawl spaces as well as exterior walls can be prone to freezing during winter (and causing bigger problems). Make sure it doesn’t happen to you. Check out these easy ways to insulate pipes.
42
/
50
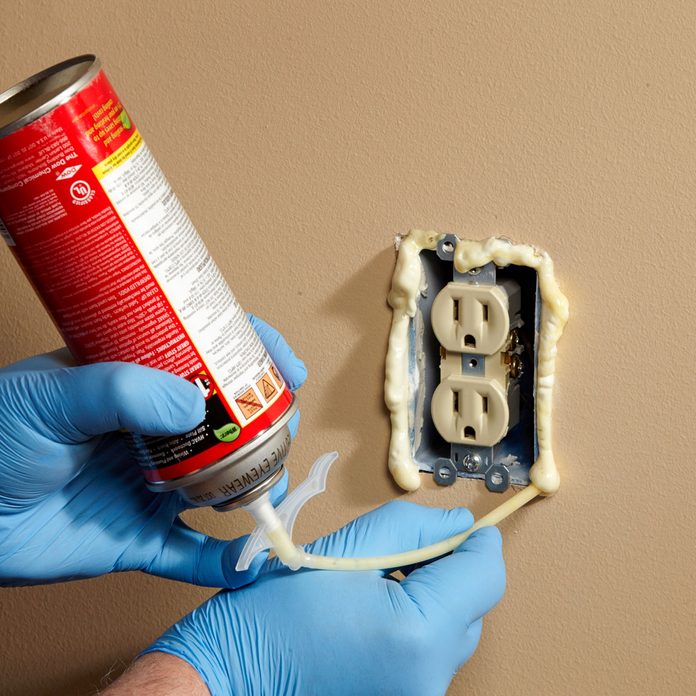
How to Seal Outlets and Ceiling Boxes
The tiny gaps around outlets on exterior walls and ceiling boxes let cold air in (and warm air out). Sealing these areas takes just half a day and will help cut down on drafts (and your heating bill!).
43
/
50
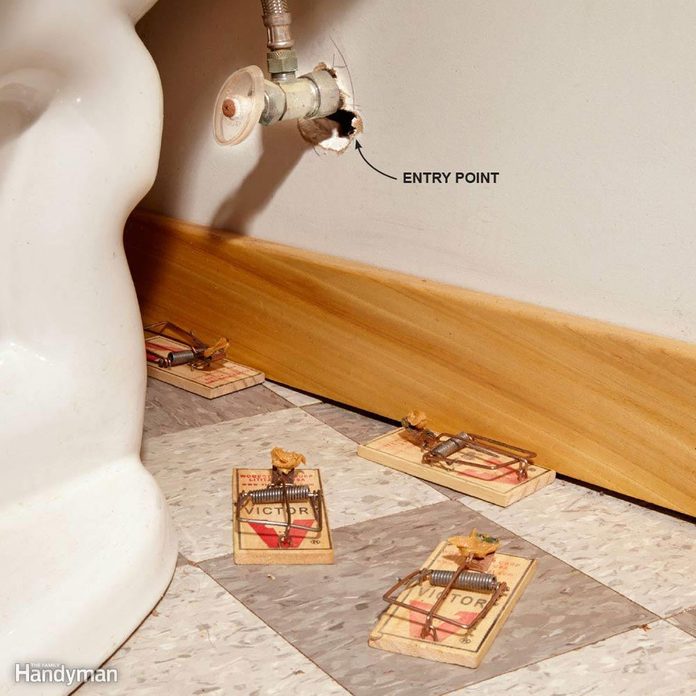
Protect Your House from Critters
As temperatures drop, mice and other vermin will want to find a warm place to hunker down. Don’t let it be your house! Seal up any critter gaps and have a game plan for getting rid of any pests that might make themselves at home.
44
/
50
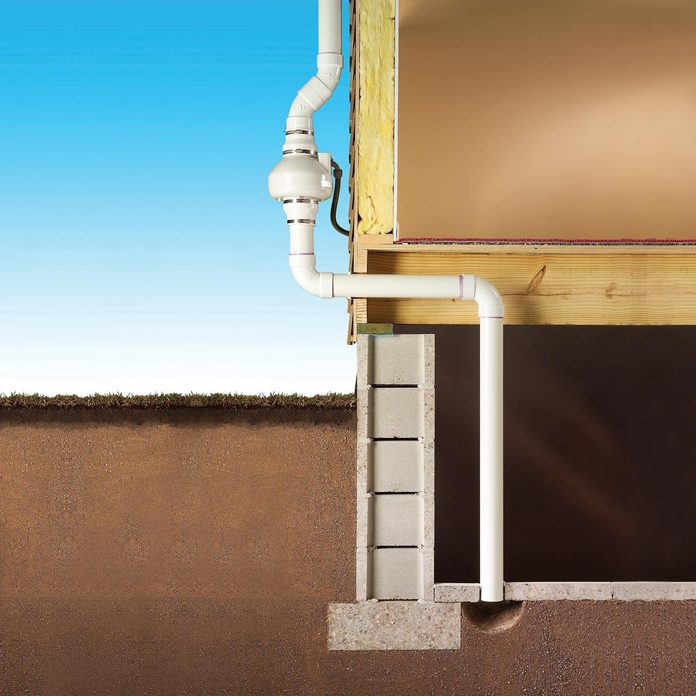
Test for Radon
If you haven’t tested your house for radon, now is the time to do it. Sealing up your house for the winter also means you’re trapping potential cancer-causing radon gas. Get your house tested and take means to mitigate it if it’s a problem.
45
/
50
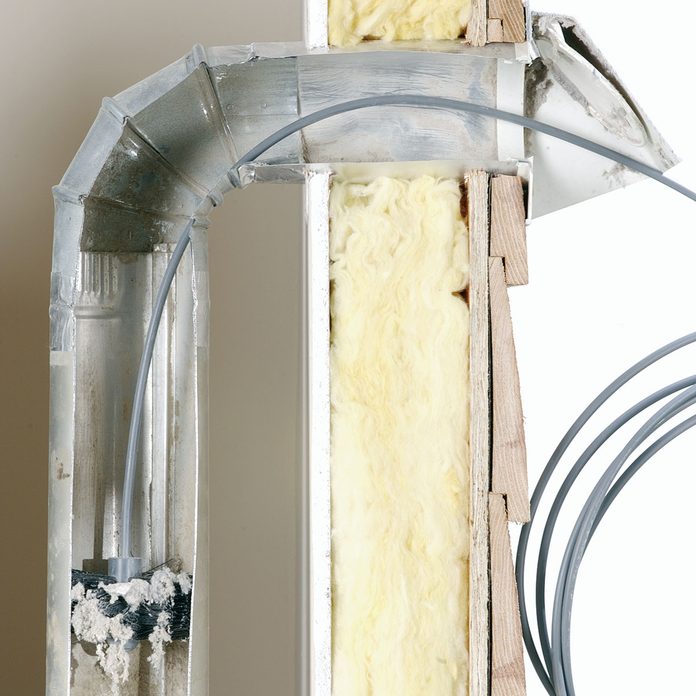
Clean Dryers and Vents
Thousands of dryer fires are caused by lint every year, yet they can be easily prevented with a few minutes of cleaning. With drier air and cooler temperatures approaching, make it a fall ritual to clean out your dryer and vent.
46
/
50
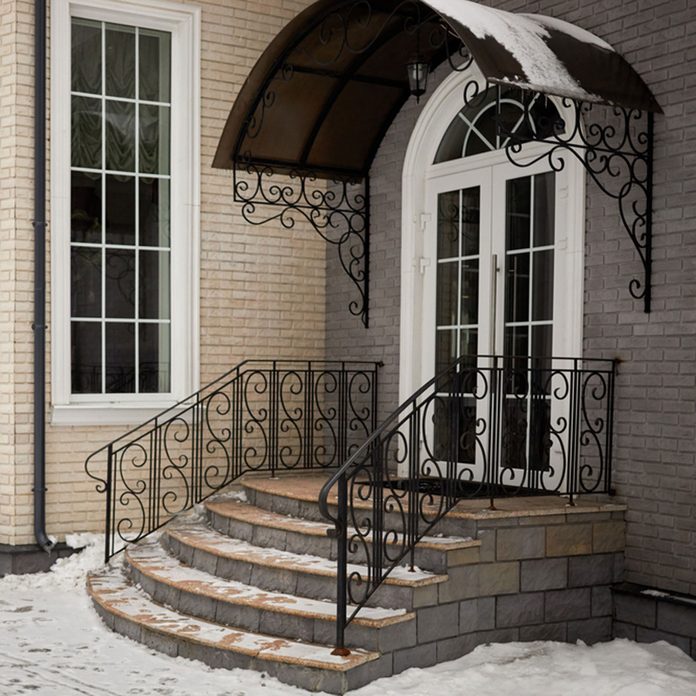
Handrail Safety Check
Go around your property and test and secure any loose handrails. Think about someone grabbing a handrail when slipping on some ice or snow, and make sure it’s up to the task.
47
/
50
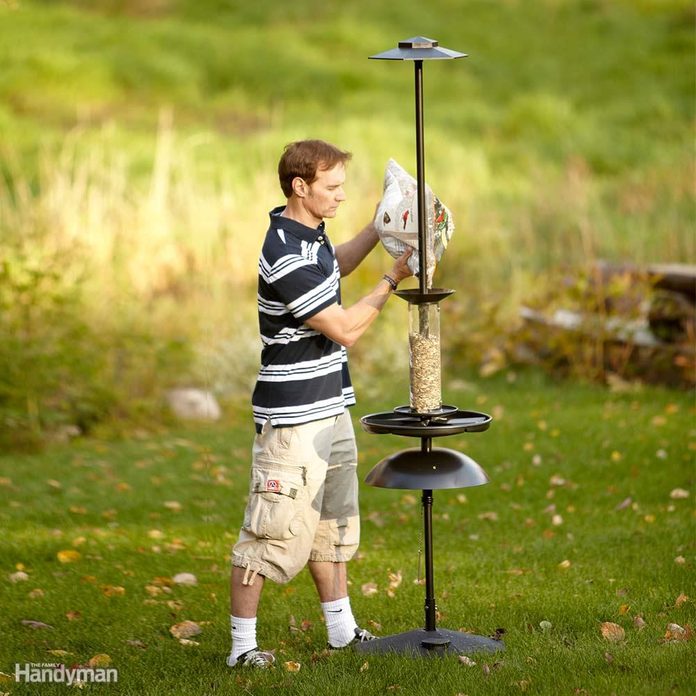
Fill Your Bird Feeders
If you’ve been feeding birds around your property, make sure to keep the bird feeders full through winter. They’ll come back to the area looking for food, and you want to make sure they don’t go hungry.
48
/
50
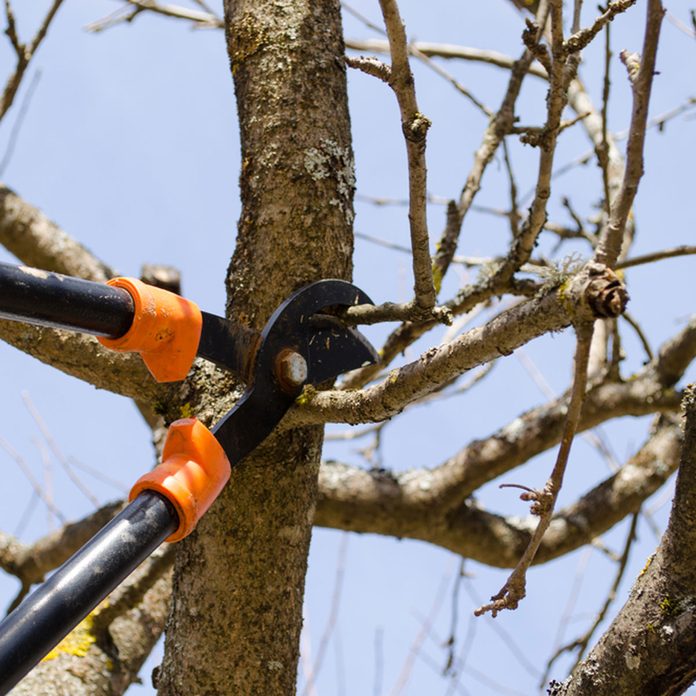
Don’t Prune Your Trees
While intuition might want to make you get out your chainsaw and start pruning after the leaves fall, you could do more harm than good. Most trees are still active in the fall and any pruning during fall will encourage new growth at the wrong time. Wait until your trees are truly dormant to do your tree trimming – during winter or early spring.
49
/
50
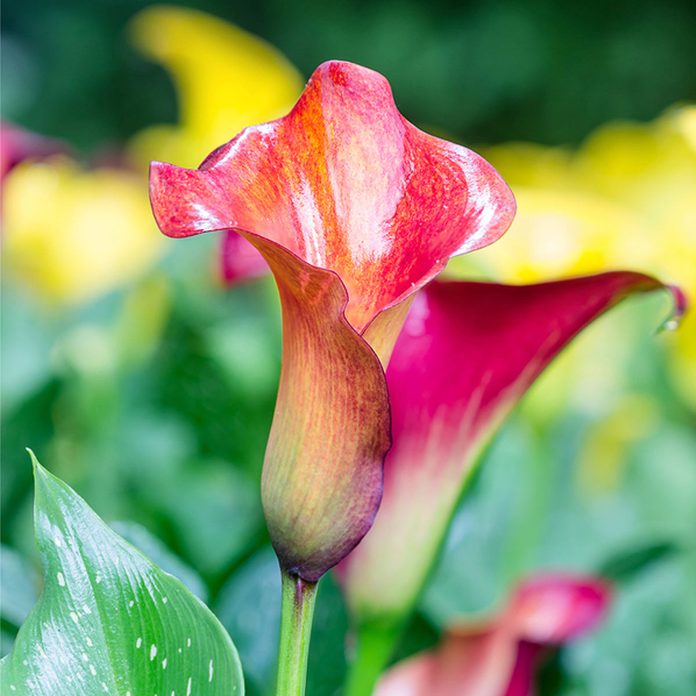
Save Your Tender Bulbs
A lot of northern gardeners treat tender bulbs as annuals, allowing them to die at season’s end. Instead, overwinter them. To make it simpler, plant tender bulbs in containers. Then, after frost kills the tops, whisk the containers into cool storage in a basement or attached garage. Water sparingly while they’re dormant, maybe once a month, so the soil doesn’t dry out. Then bring the containers back out in spring.
50
/
50
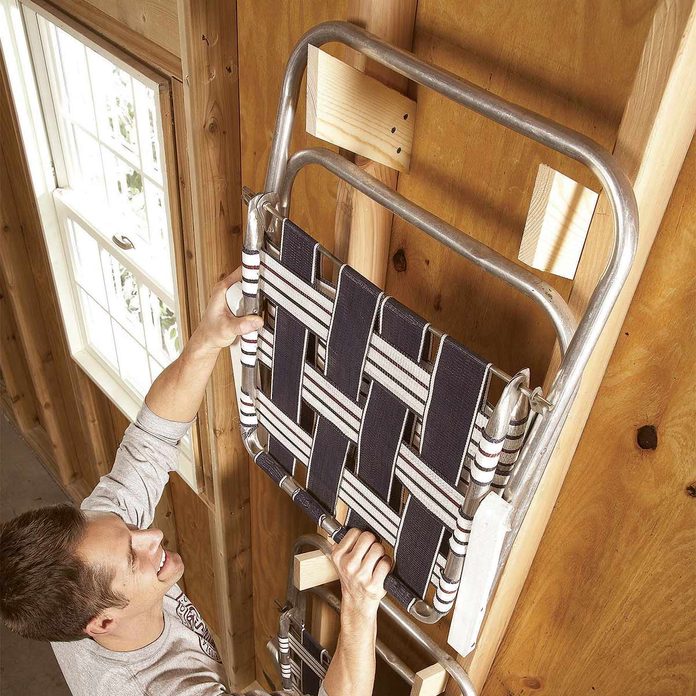
Store Lawn Chairs
Here’s how to store your lawn and folding chairs so they’re out of your way. Take two pieces of 1×4 lumber (any scrap lumber will do) and create some simple, cheap and useful brackets on the wall. Cut each board 7-3/4-in. long with a 30-degree angle on both ends. Fasten pairs of these brackets with three two-inch screws to the side of the exposed wall studs, directly across from each other, and you’ve got a perfect place to hang your chairs. Get more ideas for garage storage.