Time

Four Days

Complexity

Intermediate

Cost

$2000 - $3000

Introduction

Add beauty and value to your kitchen.

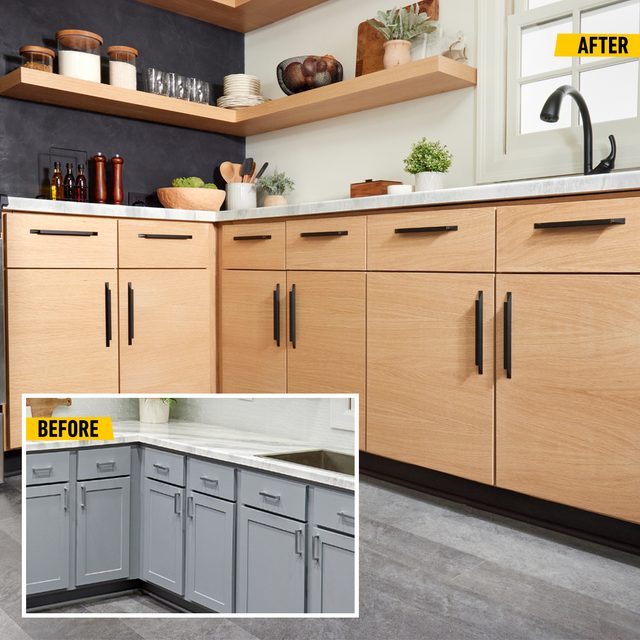
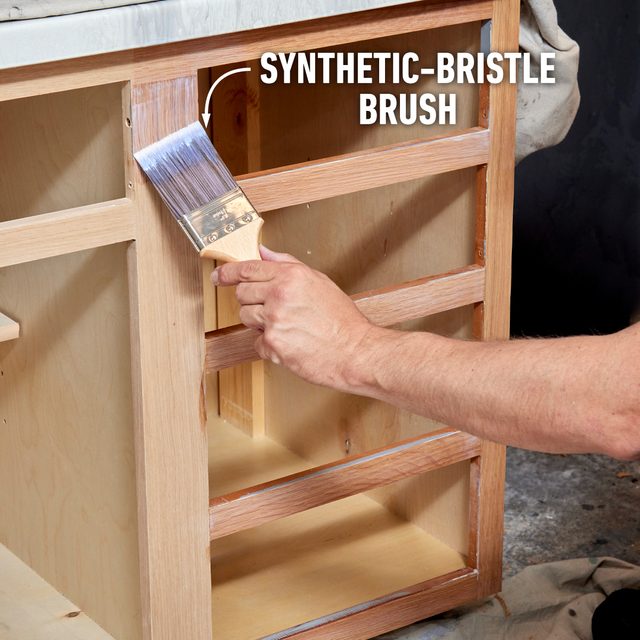
We’ve all seen ugly kitchens: Cabinets stained from decades of use, or outdated, cringeworthy styles that take us back decades. It sure would be nice to have new cabinets, but who has the money, or time? Remodeling not only costs a bundle, it can take your kitchen offline for weeks or even months. I’m an experienced woodworker, and I know building furniture from scratch takes time. Sometimes you need a faster solution.

What if you could give your kitchen a fresh new look for a fraction of the cost and disruption? You can! Refacing your kitchen cabinets is a DIY-able project that will give your kitchen a needed facelift, and there’s no need to rip out your old cabinets. As long as the “bones” are good, replacing the old drawers and cabinet doors will make your kitchen look brand new again.

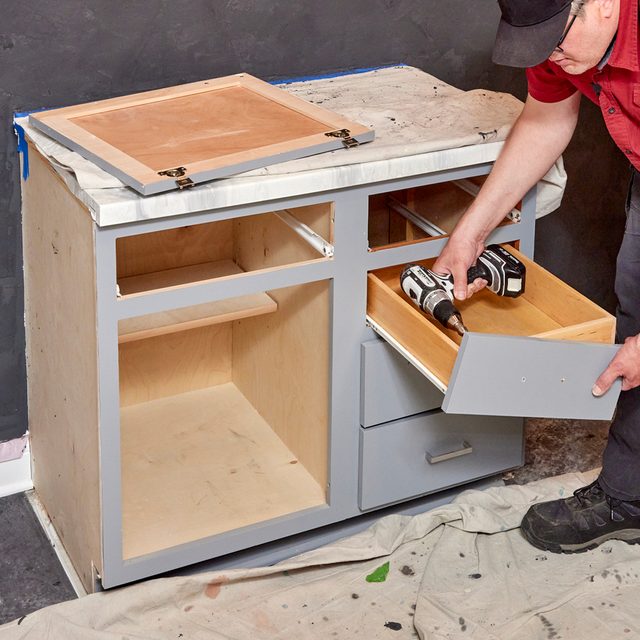
You may wonder if you can use the old drawers and doors and just repaint them. Well, it’s possible, especially with custom or expensive cabinetry. Many people have veneered cabinets, though, and it’s better to start new. Will James, an experienced handyperson and virtual expert at Frontdoor home maintenance app, says it often depends on the finish and the condition.

“If veneer is peeling, moisture has most likely absorbed into the wood, and it should be replaced,” James says.

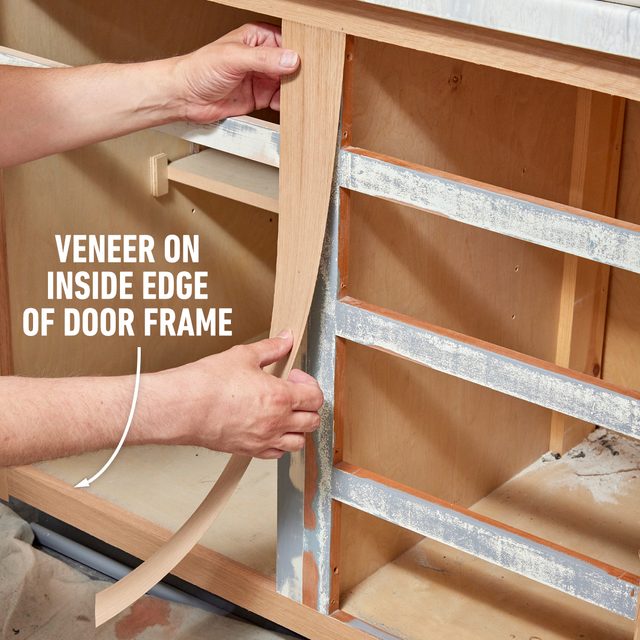
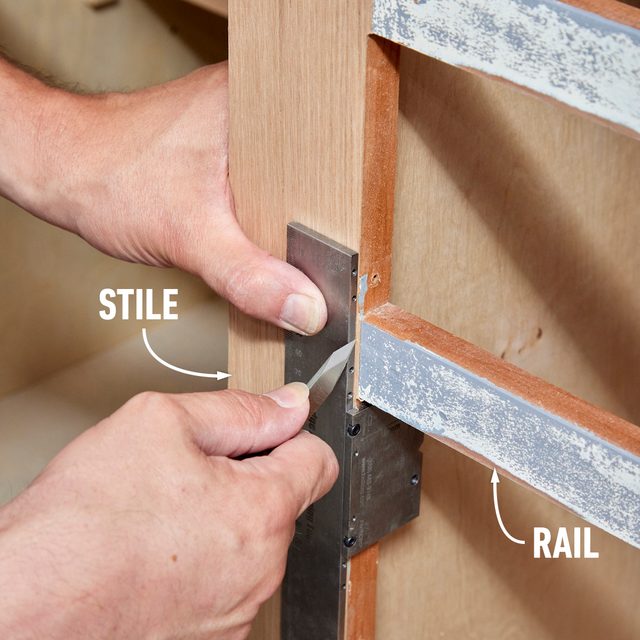
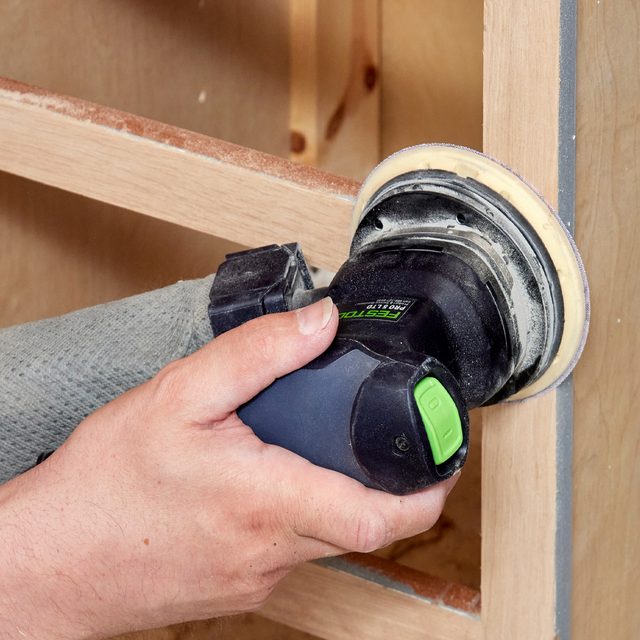
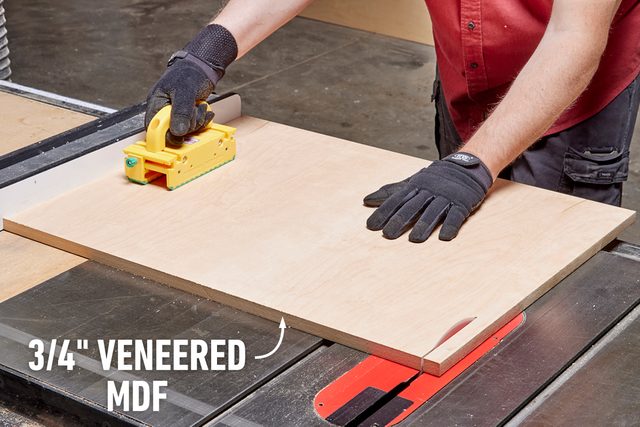
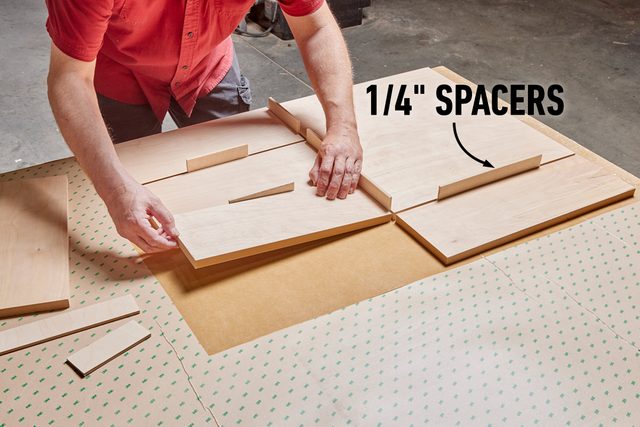
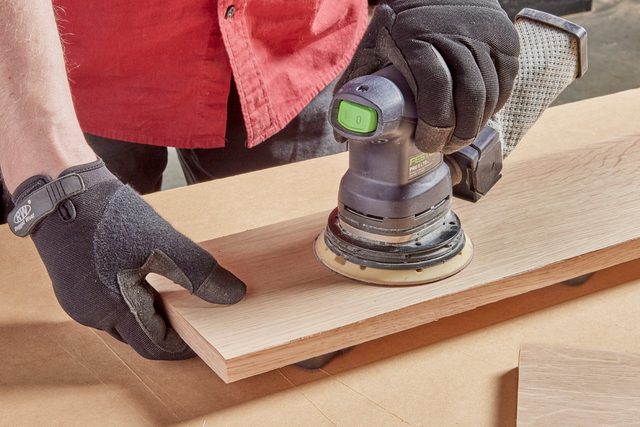
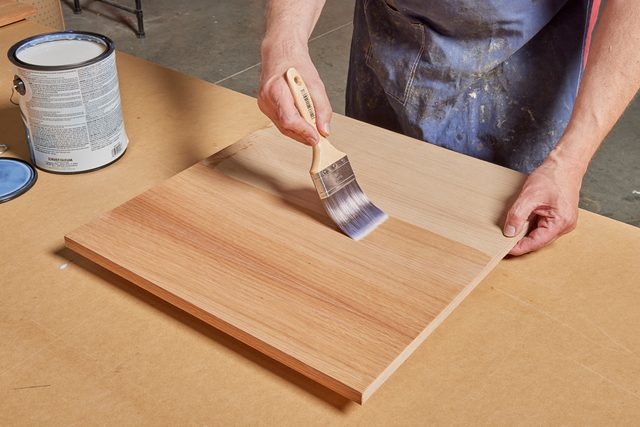
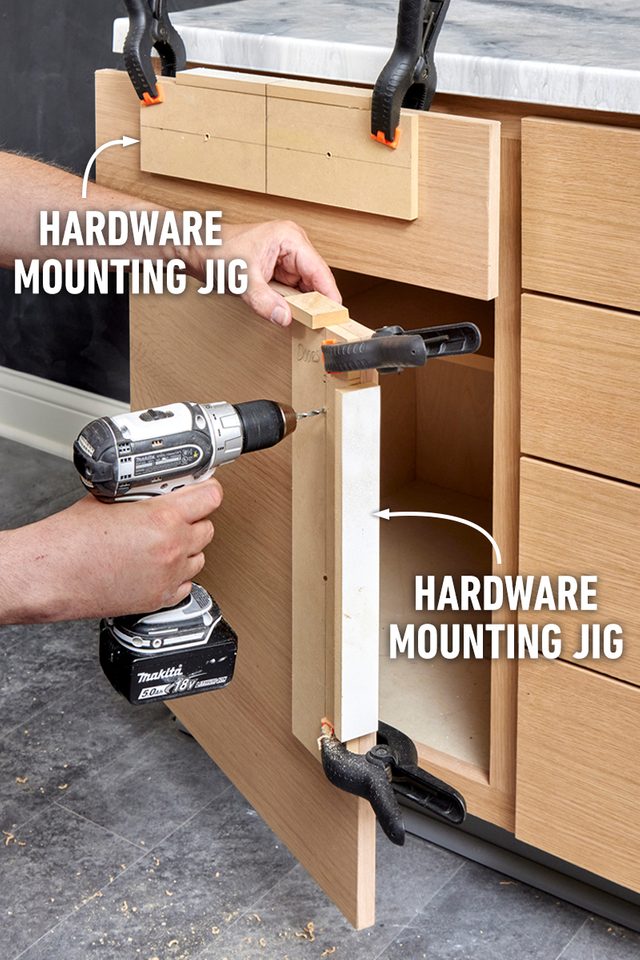
Ahead, I’ll walk you through my cabinet refacing project featuring medium-density fiberboard (MDF) drawers and doors, faced with a beautiful oak wood veneer. Follow along!

Fh22ono 621 52 025 070 How To Reface Your Kitchen CabinetsFamily Handyman

Tools Required

  • Cordless drill
  • marking knife
  • Router
  • special cabinetry tools
  • Table saw
  • veneer roller

Materials Required

  • PSA Veneer
  • Wood finish of your choice

Watch How to Reface Your Kitchen Cabinets

Project step-by-step (21)

Step 1

Gather Your Tools

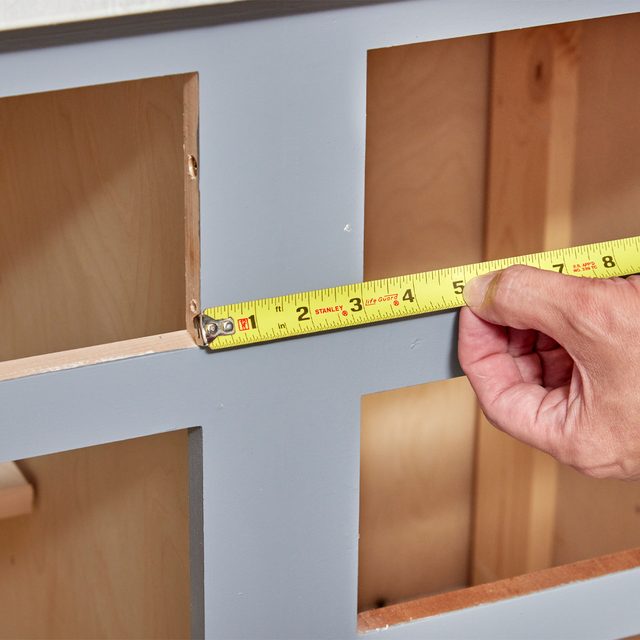
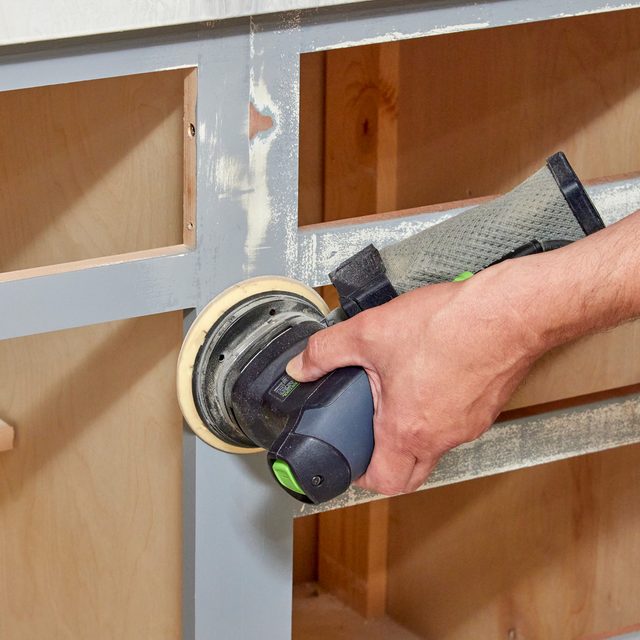
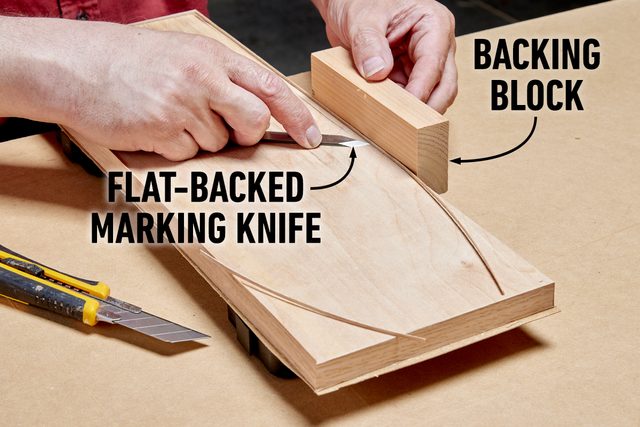
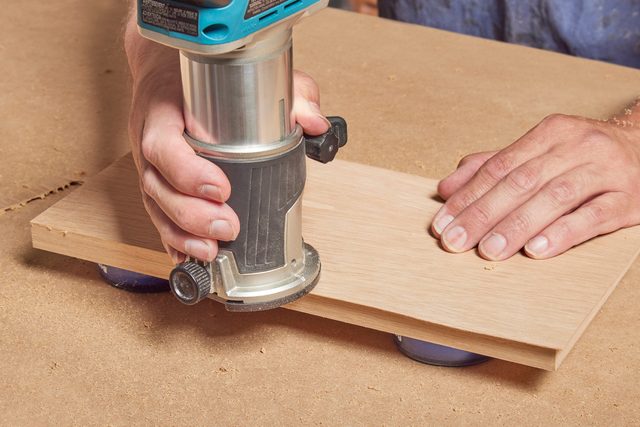
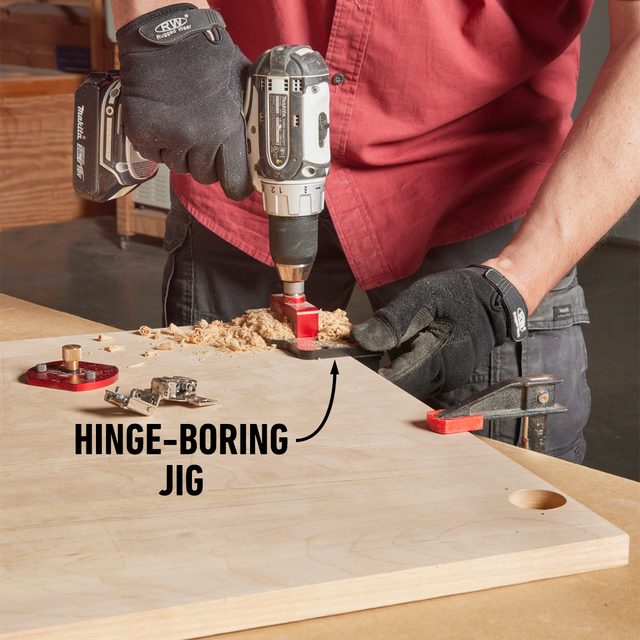
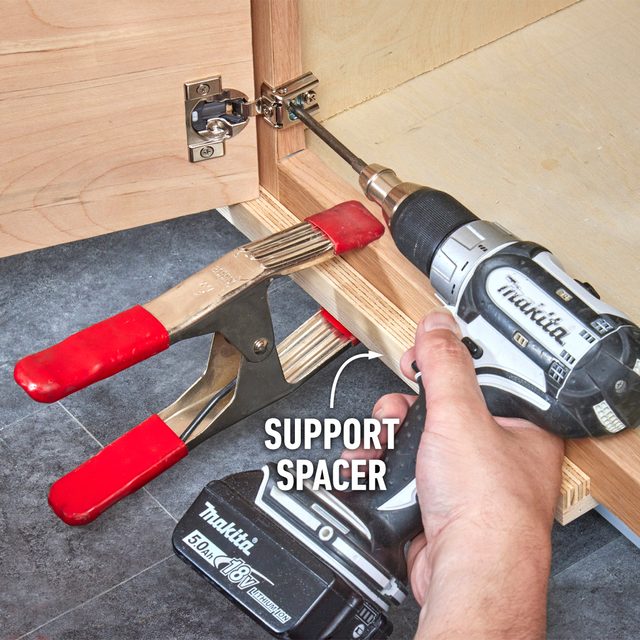
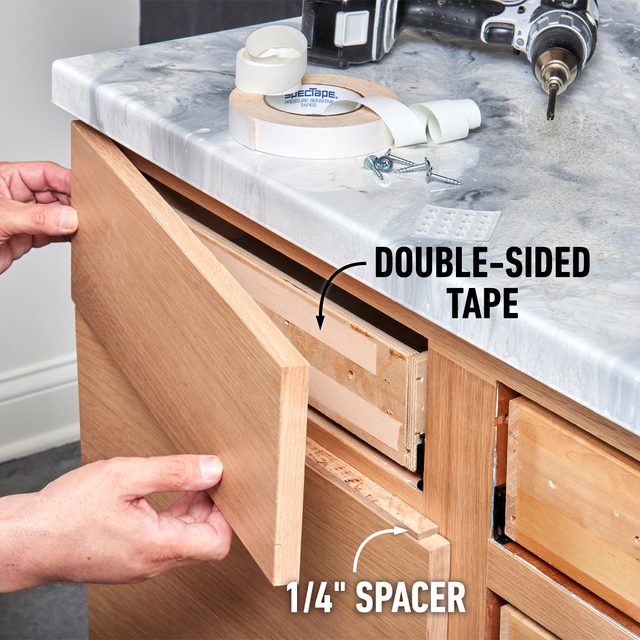
For this project, you’ll need basic hand tools like a drill, tape measure and utility knife, as well as a router. I also used some specialized tools that make refacing cabinets so much easier. These can be found online or at a home improvement center, and while some of them aren’t exactly cheap, they’ll help you get the job done in no time.

  • Veneer trimmer. This tool makes seaming veneer joints a snap.
  • Veneer cutter, aka laminate slitter. Cut long strips of wood veneer safely with no snags.
  • Hinge-boring jig. Hinges are hard to get in the right spot without a jig.
  • Marking knife. A flat-backed knife that’s perfect for trimming edge banding.
  • Flush-trim router bit. This bit routs one piece of wood flush with an adjoining piece.
  • Veneer roller. Apply pressure to adhesive-backed veneer with a roller.
Step 2

Strip Down the Cabinets

  • Remove all the doors, hinges and drawer fronts.
  • Label all the parts for reference later. I used numbers, but you can choose anything that helps you remember what goes where.
  • Allow the veneer to relax in your workspace for 24 hours, to acclimate to the temperature in your home.

Fh22ono 621 54 037 Family Handyman

Step 3

Take Measurements

  • Determine the overall size of each cabinet by taking multiple measurements.
  • Measure each rail (horizontal support) and stile (vertical support), and the inside visible edges of the door openings.
  • Measure all doors and drawer fronts, and give each one a name or designation.
  • Sketch your design on graph paper, or use a 3D modeling program like SketchUp.

Fh22ono 621 54 038 Family Handyman

Step 4

Sand the Face Frames

  • Sand the painted surface of the rails and stiles with 320-grit sandpaper. I’m using a pressure-sensitive adhesive (PSA)-backed wood veneer, which requires a smooth substrate for best adhesion.
  • Stop when the surface is smooth—no need to remove every stitch of paint.
  • Clean off all sanding residue with a tack cloth or denatured alcohol.

Fh22ono 621 54 043 Family Handyman

Step 5

Cut Veneer Strips

  • Lay out the veneer on your work surface.
  • Mark the dimensions of your cabinet face (rails and stiles), including the inside edges of the door frames, with a 1/8-inch overhang. No need to go bigger, or you’ll waste material.
  • Cut the veneer for the rails and stiles using a veneer cutting tool, if using, or “you can cut it with a utility knife and a straight edge,” James says, just make sure you’re on a flat surface, and wear gloves.

Fh22ono 621 54 029 Family Handyman

Step 6

Veneer the Stiles

  • Start by veneering the inside edges of the door frames, which creates the look of solid wood when the doors are open.
  • Apply the veneer, then apply firm pressure with veneer roller or a firm scraping tool to activate the adhesive.
  • Apply veneer to the front of the stiles using the same technique.
  • Trim the veneer flush with a compact router and flush-trim bit.

Fh22ono 621 54 048 Family Handyman

Step 7

Veneer the Rails

  • Trim the stile veneer flush to the rail seams (where your router can’t reach) using a seaming tool or a sharp knife and straightedge.
  • Apply veneer to the rail, using the knife and seaming tool or straightedge to trim.
  • Roll or press hard to activate the adhesive.

Fh22ono 621 54 050 Family Handyman

Step 8

Sand the Face Frames

  • Sand the face frame, using up to a maximum of 180 grit sandpaper.
  • Use a random orbital sander to avoid directional sanding scratches.
  • Watch for signs the sander is removing too much material. Wood veneer is thin; dark spots could be the glue showing through, so stop before you see them.
  • Wipe the surface with a tack cloth or denatured alcohol to remove sanding residue.

Fh22ono 621 54 051 Family Handyman

Step 9

Apply Finish

  • Apply a water-based urethane with a synthetic-bristle brush. Water-based urethane is perfect for this project, because it won’t turn the oak veneer amber over time, and “will be a good sealer and protective layer against most kitchen mishaps and moisture,” James says.
  • Allow to dry.
  • Apply a second and third coat, according to the package directions.

Fh22ono 621 54 059 Family Handyman

Step 10

Cut the New Parts

  • Cut the doors and drawers on a table saw, using the dimensions you took earlier, or
  • Have a woodshop or home center cut the pieces for you. “I would not recommend cutting MDF doors unless you have the proper tools and knowledge,” James says. (I wanted a continuously-oriented horizontal grain pattern, so I cut the parts myself.)
  • Label each part accordingly as you cut it.

Fh22ono 621 54 011 Family Handyman

Step 11

Veneer the Faces

  • Lay the veneer face down on a flat work surface.
  • Set the doors and drawer faces into position one at a time. I used 1/4-in. spacers to help position them.
  • Press down firmly on the backs.
  • Cut them apart with a utility knife, making sure to run the blade down the center of the gap. (It’s okay if there’s overhang; you’ll take care of that with a router.)

Fh22ono 621 54 013 Family Handyman

Step 12

Roll the Veneer

  • Separate the parts, then flip them over.
  • Apply pressure to the faces with a veneer roller.
  • Press hard! Pressure-sensitive adhesive needs to be activated.

Fh22ono 621 54 018 Family Handyman

Step 13

Apply the Edge Banding

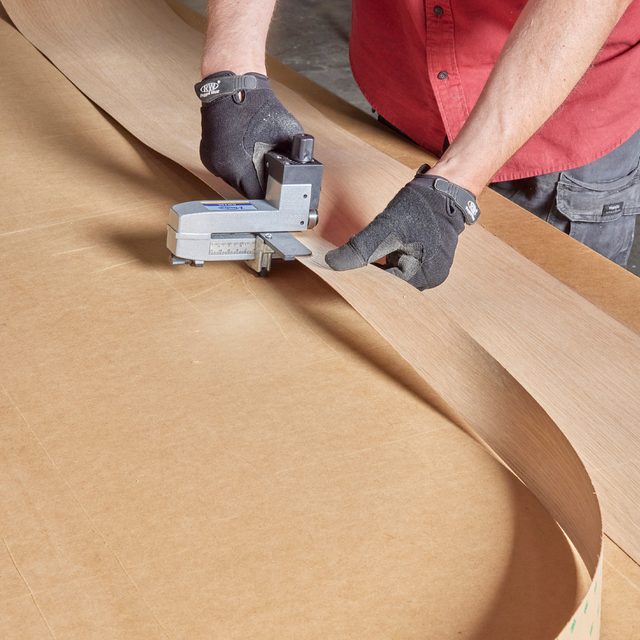
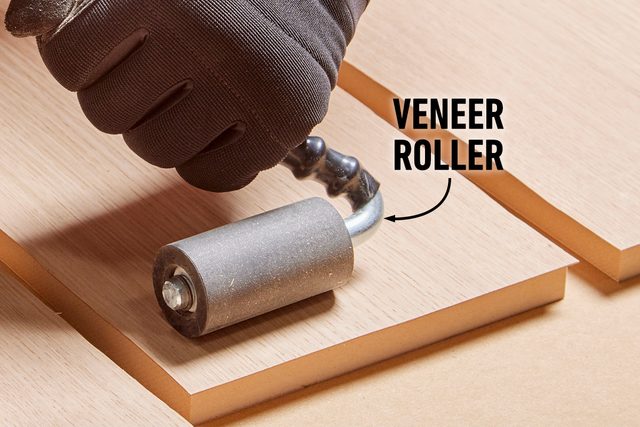
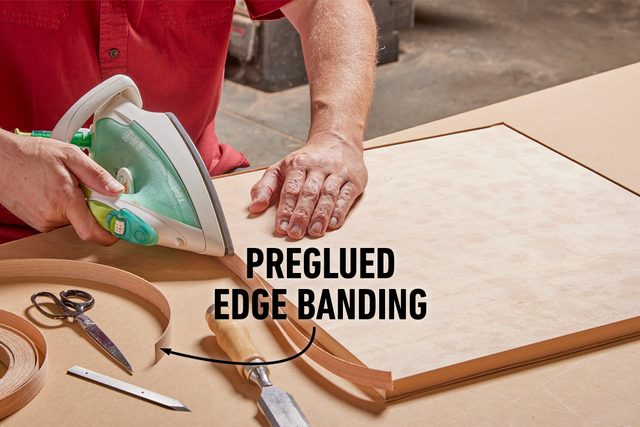
Edge banding is a thin strip of iron-on veneer used to cover the edges of doors and drawers.

  • Flip the drawer fronts and doors veneer-side down.
  • Apply the edge banding before trimming the veneer on the faces. Start with the bottom of the drawers and doors.
  • Iron on the bottom edge banding, then trim the ends with a sharp chisel.
  • Apply the side banding next, then finish with the top. Doing it in this order helps hide the seams on the corners.

Fh22ono 621 54 019 Family Handyman

Step 14

Trim the Edge Banding

  • Leave the drawer fronts and doors face down.
  • Hold a scrap piece of wood (called a backing block) against the edge as you work.
  • Trim the overhanging edge banding with a flat-backed knife pressed against the backing block. (You can use a regular utility knife, but flat-backed knives give you greater control.)

Fh22ono 621 54 023 Family Handyman

Step 15

Trim the Face Veneer

  • Flip the drawers and doors veneer-side up, and prop up them on blocks.
  • Trim the face veneer using a compact router with a downward spiral flush-­cutting bit.
  • Use a knife and backing block if you don’t have a router, but I prefer the perfectly clean edge the spiral bit produces. (It’s much faster, too.)

Fh22ono 621 54 074 Family Handyman

Step 16

Drill for Cup Hinges

  • Clamp doors to your workbench, veneer side down.
  • Use a hinge-boring jig to space and drill cup holes for your chosen door hinges (I went with European soft-close hidden hinges.)
  • Drill the holes using a forstner bit, which drills flat-bottomed holes in wood.
  • Drill 35mm holes for the cup hinge, 4mm from the edge and 68mm from the top and bottom. (The jig automatically spaces the holes.)

Fh22ono 621 54 028 Family Handyman

Step 17

Sand the Parts

  • Sand the doors and drawer faces, with up to 180-grit sandpaper.
  • Ease the corners by hand with a used sanding disc.

Fh22ono 621 54 026 Family Handyman

Step 18

Apply the Finish

  • Apply three coats of water-based urethane, lightly sanding with 320-grit sandpaper between coats.
  • Use a foam roller on the larger flat surfaces, if desired.
  • Smooth out the finish by dry-brushing in the grain direction.

Fh22ono 621 54 034 Family Handyman

Step 19

Install the Doors First

  • Attach the doors to the cabinet. “Depending on the hinges used you may just need a level and screwdriver,” James says. “If not, I would use blocks with squeeze clamps on the face frame so the door edge can set on the blocks [as] you square and level the door.”
  • Adjust doors so they are square and level.
  • Attach the hinge plates to the face frames with 3/4-in. No. 6 screws.

Fh22ono 621 54 064 Family Handyman

Step 20

Attach the Drawer Fronts

  • Line the drawer fronts up with the tops and bottoms of the doors, after the doors are in place.
  • Use double-sided tape to hold the drawer fronts in position.
  • Attach drawer fronts to the drawer boxes with 7/8-in. drawer mounting screws through the existing 1/4-in. holes in the drawer box.

Fh22ono 621 54 066 Family Handyman

Step 21

Install the Pulls

  • With a shop-made hardware drilling jig, drill the holes for the handles and drawer pulls with a 5/32-in. drill bit.

Fh22ono 621 54 068 Family Handyman

Meet the Experts

Will James a versatile handyperson with over 12 years of experience and a passion for helping others. As a virtual handyperson expert at Frontdoor, James helps homeowners solve problems via tech-enhanced video chats, empowering others with his deep knowledge of multiple home maintenance issues.

Jay Cork is a woodworker, teacher and author at Family Handyman, where he loves giving new life to old things. Refacing cabinets is right up his alley.