


Assembling cabinetry is not as difficult as you might think. We'll show you how.
A few hours
Beginner
Varies
Introduction
Ready-to-assemble (RTA) cabinets are an affordable alternative to custom cabinetry. You can achieve a gorgeous custom cabinet look in your kitchen without breaking the bank. Assembly is much easier than you think; here's the step-by-step process.
You’ve braved the weekend crowds at Ikea, and your new flat-packed, ready-to-assemble (RTA) cabinets are sitting in your kitchen. You eagerly tear open the boxes and get down to business. The instructions are a study in Scandinavian efficiency, but fast-forward to Sunday night and you’re surrounded by dozens of identical-looking parts and piles of hex-head screws and wooden pegs.
So why go with RTA cabinets? For one thing, they’re cheaper than custom built-ins, says Lori Reese, master carpenter and owner of Wonderwoman Construction in Minneapolis, Minnesota. Corey Buscher, a virtual handyperson expert at Frontdoor, the all-in-one home services app, agrees: “Since you are handling the assembly, you save on labor costs,” and because they come flat-packed, they’re “easier and cheaper to ship.”
Plus, there’s no waiting: “Many RTA cabinets are available for purchase immediately or with minimal lead time compared to custom-built cabinetry, which can take weeks or months to fabricate,” Buscher says. Flexibility is another major benefit of RTA cabinets, and because they’re so popular, they come in styles to fit any kitchen. “You can mix and match components to fit your space,” Buscher says.
Of course, some drawbacks exist, too. “If your space has irregular measurements, corners, or angles, installing the cabinets could be tricky,” Buscher says. Customization is limited and might result in “less-than-perfect fits.” And then there’s the assembly. “If a person is good at reading directions and very patient, [RTA] is a good option,” Reese says. Unfortunately, “the instructions are not always that great.” Not to worry. This easy-to-follow project walks you through putting together RTA cabinets step by step. Follow along!
Tools Required
- Damp cloth
- Drill/driver
- Magnetic driver bit holder
- Phillips bit
- Rubber mallet
- Worktable
Watch How to Assemble RTA Cabinets
Project step-by-step (11)
Step 1
Identify the Parts
- Open the box. If you are using a utility knife, don’t cut too deeply because you could scratch the parts.
- Grab the assembly instructions and make sure you have all the parts and hardware. For the base cabinet, you should have two sides, one bottom, one back panel, four support rails and one adjustable shelf, plus dowels and hardware.
- Identify the right and left sides of the cabinet by the 1/4-in. groove near the back edge of each panel. Identify the bottom of the cabinet sides by the holes drilled near the bottom edge; Ours had nine holes.

Step 2
Apply glue
- Lay both side panels flat with the holes pointing up and the back edges facing each other.
- Squeeze a small amount of wood glue into all the dowel holes on both sides. Do not put glue in the through-holes.
Step 3
Install the Bottom
- Align the 1/4-in. groove on the bottom board with the 1/4-in. groove on the left side.
- Insert the bottom six dowels into the six dowel holes on the left side.
- Using a rubber mallet, gently tap the edge of the bottom to drive the dowels into the holes.
- Wipe away any excess glue with a damp cloth.

Step 4
Install Support Rails
- Each of the support rails is drilled universally — there is no wrong way to install them.
- Install two support rails into the four dowel holes along the top edge of the left side. (See photo.)
- Install two support rails into the dowel holes along the back edge of the left side, just behind the 1/4-in. groove.
- Gently tap all the support rails with a rubber mallet.

Step 5
Insert the Back Panel
- Fit the back panel into the 1/4-in. groove on the bottom panel.
- Slide the panel down and fit it into the groove on the left side.

Step 6
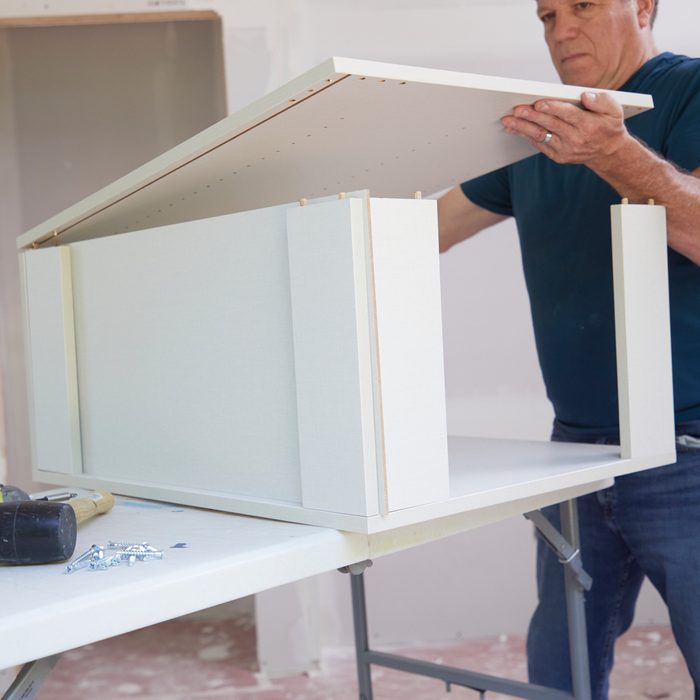
Attach the Right Side
- Flip the right side over and align the dowel holes with the dowels in the bottom panel and support rails while allowing the back panel to fit into the right side groove. Work quickly so the glue doesn’t drip all over.
- Gently tap the right side with a rubber mallet.
- Wipe away any excess glue with a damp cloth.
- Secure the cabinet together with the provided lag screws into each of the seven holes on both sides.
Step 7
Attach the Legs
- Insert four legs into the pre-drilled holes on the bottom panel.
- Secure the legs to the bottom using the screws provided — four screws per leg.

Step 8
Adjustable Shelf
- Insert four-shelf pins into the pre-drilled holes on each of the sides at the desired height.
- Slide the shelf onto the shelf pins.
Step 9
Assemble the Drawer
- Attach the two brackets to the drawer back using the six screws provided.
- Attach the two brackets to the drawer front using the four screws provided.
- Assemble the two sides to the back by sliding them onto the brackets. (See photo.)
- Insert the drawer bottom into the grooves on the drawer sides.
- Install the drawer front by inserting the brackets into the drawer sides until it clicks. (See photo.)
- Secure the drawer slides to the bottom and back using the screws provided.


Step 10
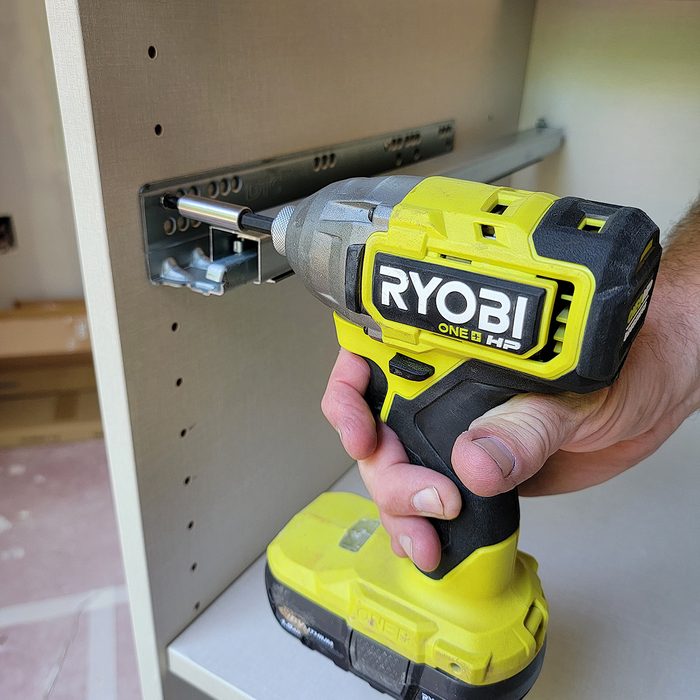
Install Drawer
- Attach the left drawer glide to the inside of the left side, and the right drawer glide to the inside of the right side, at the desired height using two screws per glide. (See photo.)
- Place the drawer on the glides and push it in until it clicks and locks. (See photo.)

Step 11
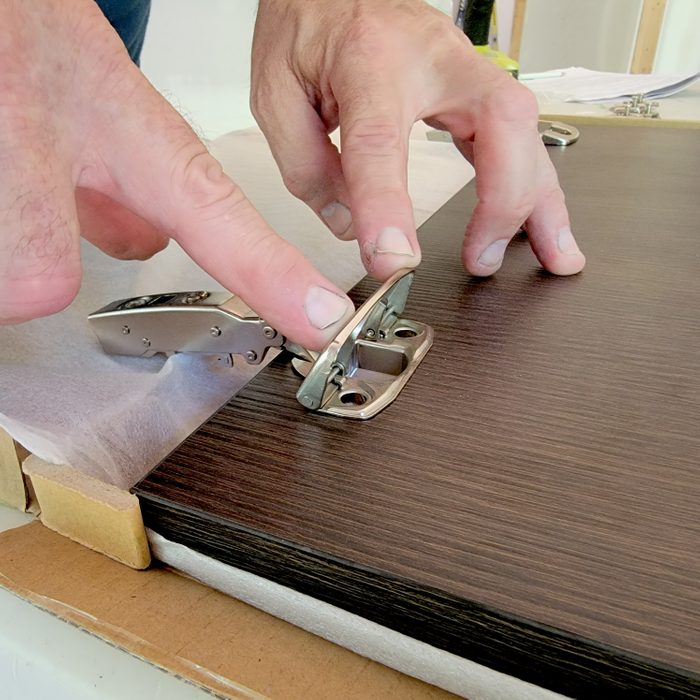
Install the Door
- Lay the door flat with the two hinge holes facing up.
- Insert the hinge into the hole and push the hinge cover down to secure the hinge to the door. (See photo.)
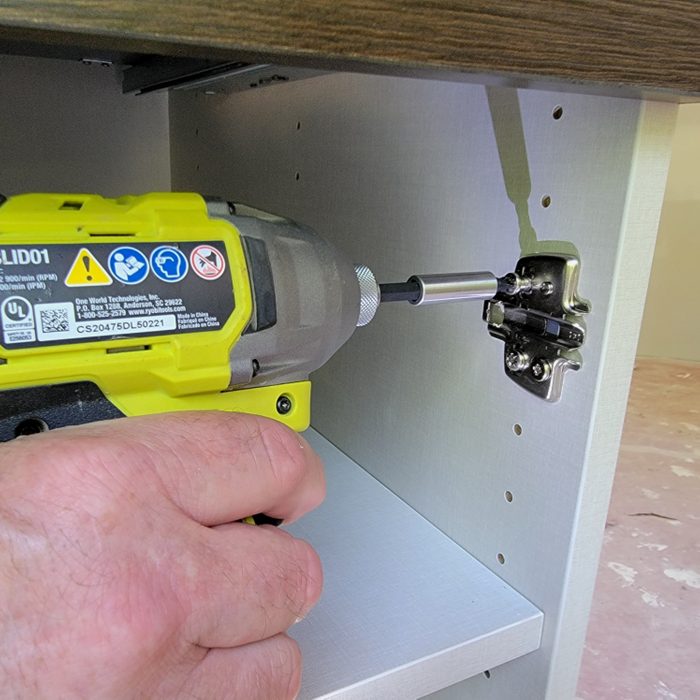
- Attach two hinge plates onto the left side into the pre-drilled holes. (See photo.)
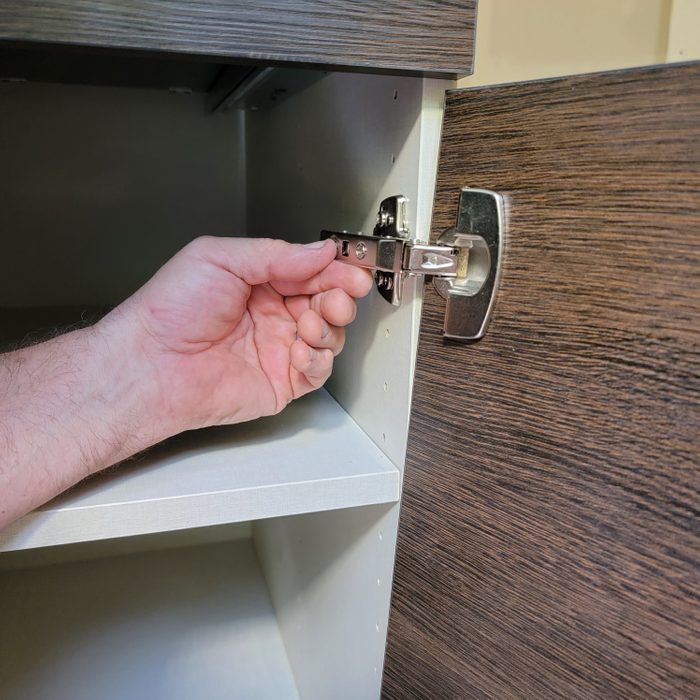
- Align the hinge arms with the hinge plates and push toward the back of the arm until you feel it click.
- Peel and stick two rubber bumpers to the inside corners of the door.
About the Experts
Lori Reese is the owner of Wonderwoman Construction in Minneapolis, Minnesota. A master carpenter and building scientist, Reese focuses on sustainable building practices to maximize health, comfort, durability and energy savings. Wonderwoman Construction is a full-service building and electrical contracting company.
Corey Buscher is a seasoned handyperson with over 10 years of experience and serves as a virtual handyperson expert at Frontdoor, a home services app that matches you with on-staff technicians to help solve your maintenance needs. Buscher’s experience covers new construction, general repairs, ongoing maintenance and pool and spa care.