


Five minutes is all the time you need for this quick, easy valve stem fix.
Introduction
Fix a leaky tire valve in five minutes using an inexpensive valve core tool and replacement cores.
Tools Required
- Valve core tool
Project step-by-step (3)
Step 1
Diagnose and fix a leaky valve stem
You topped off the air in your tires, but a few days later, you notice that one of them is low again. It could be a hole, but before you go through the hassle of searching for one or making an appointment at the tire shop, first check for a leaky valve stem.
“Leaking tire valve stems are common, leading to air loss over time,” says Duane “Doc” Watson, a technical trainer at Bosch Mobility Aftermarket. “Age, weather exposure and regular use can all lead to them leaking.”
If the valve stem is your culprit, you can probably fix it yourself with a valve stem tool (aka valve core tool) and a package of new valve stem cores, both of which are inexpensive and relatively easy to use. Here’s how.
How to diagnose a leaky valve stem?
To determine if the valve stem is the cause of your deflating woes, remove the cap. “If you hear or feel air rush out, if the cap is cracked or if the stem bubbles when you put soapy water on it, all are signs of a leaking valve stem,” says Chris “Moose” Pyle, an auto repair expert at JustAnswer.com.
Check and remove the valve stem
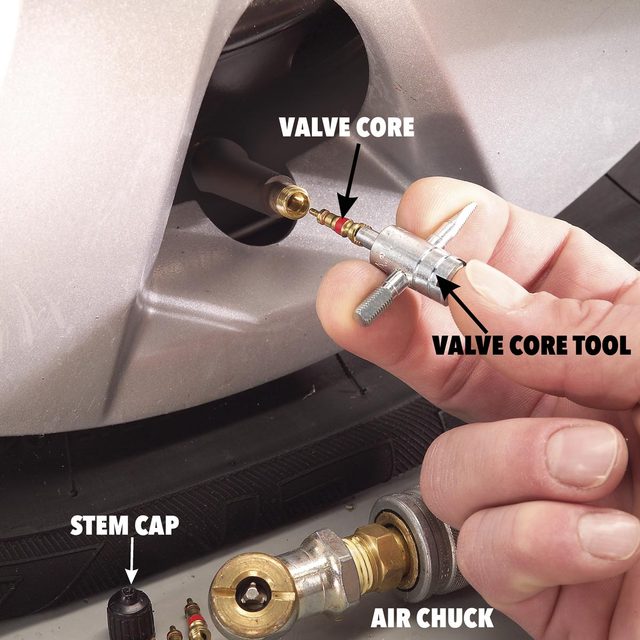
Use your valve stem tool to check the tightness of the valve stem. If it wasn’t tight, then tightening it and adding a little more air into your tire might be all you have to do. If it is tight, use the tool to pull out the stem (wearing safety glasses to protect your eye from any debris that might ensue).
“When you remove the stem, all the air is going to come rushing out, and the stem may shoot across the driveway,” says Pyle. “So hold it tight and do realize you need a way to refill the tire with air.”
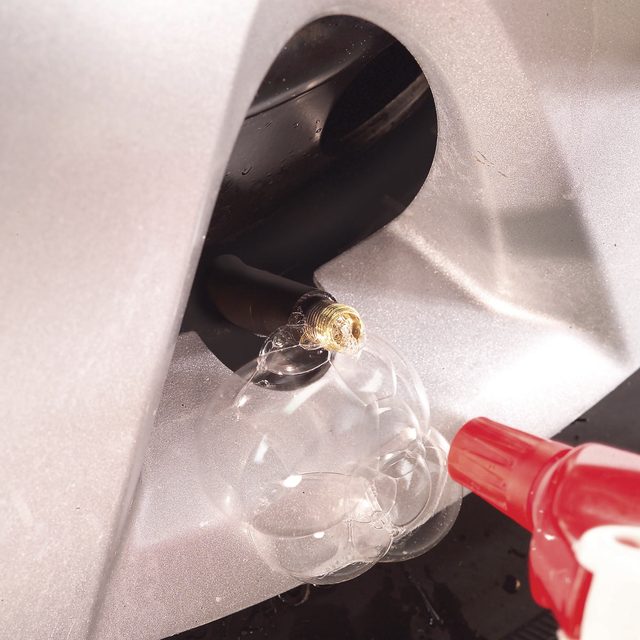
Squirt soapy water into the tire valve stem. If you see bubbles form, you have a slow leak. We’ll show you how to fix a tire leak.
Car Maintenance: Make Your Tires Last
Step 2
Check for corrosion
Look closely at the old core threads. If they show any sign of corrosion, clean the interior threads of the valve stem with the tap end of the valve core tool.
Reinstall the valve stem
Screw in a new valve stem core. Snug is fine; take care not to put in too much pressure, which will strip the threads.
Refill the tire and check the new stem for leaks by spraying it with soapy water and watching for any bubbles that might arise.
Don’t forget to reinstall the valve stem cap, too, which will keep the dirt out and help prevent a leak from happening again.
A valve core tool is four tools in one. The forked end removes and installs valve cores. The tapping end cleans and restores the interior threads, and the die end cleans and restores the cap threads. It’s an invaluable valve stem tool.
Step 3
Close-up of valve core tool
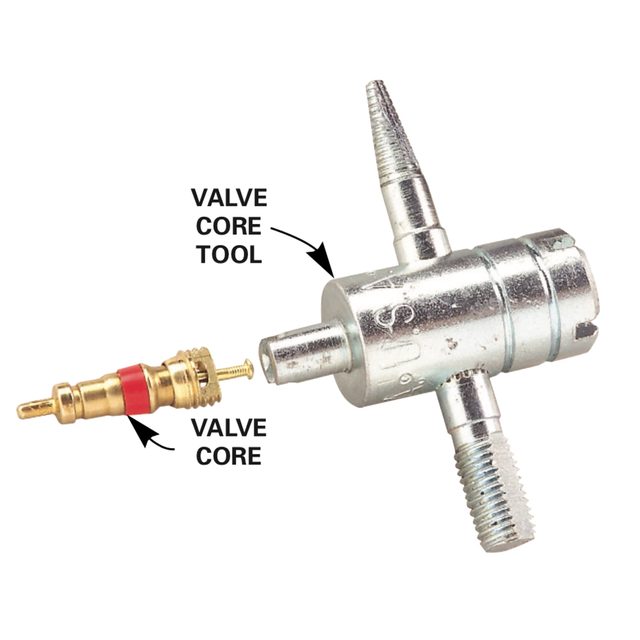
Your valve core tool is actually several tools in one: The forked end removes and installs valve cores; the tapping end cleans and restores the interior threads; and the die end cleans and restores the cap threads.
About the Experts
- Duane “Doc” Watson is a technical trainer at Bosch Mobility Aftermarket. He has more than 45 years of experience in automotive repair, has trained thousands of technicians and earned many industry awards, including Chevrolet Technician of the Year and Buick Service Master of the Year.
- Chris “Moose” Pyle is a master-certified technician with 20-plus years of automotive experience. He has also worked as an expert for JustAnswer.com since 2006, where he answers hundreds of car maintenance and repair questions a day.