How to fix the insulation on burned wire quickly and easily
Introduction
Fix burned wire inside electrical boxes by replacing charred insulation. You can do this quickly and easily without pulling in new wires.
Assessing the problem
So you’re finally getting around to replacing the ceiling light fixture when you discover that the wiring insulation has turned to charcoal and cracked off. Insulation typically gets ruined when the bulbs in the fixture exceed the fixture’s wattage rating. That extra heat literally bakes the insulation. Usually, the insulation outside of the ceiling box will be okay. But you’ll have to repair the damaged insulation inside the box. No, you can’t just wrap the bare wires with electrical tape. That might make you feel better, but it’s not an acceptable long-term solution. Here’s the right way to fix the problem.
Tools Required
- Wire stripper/cutter
Materials Required
- 12 gauge electrical wire
- Heat shrinkable tubing
Project step-by-step (3)
Step 1
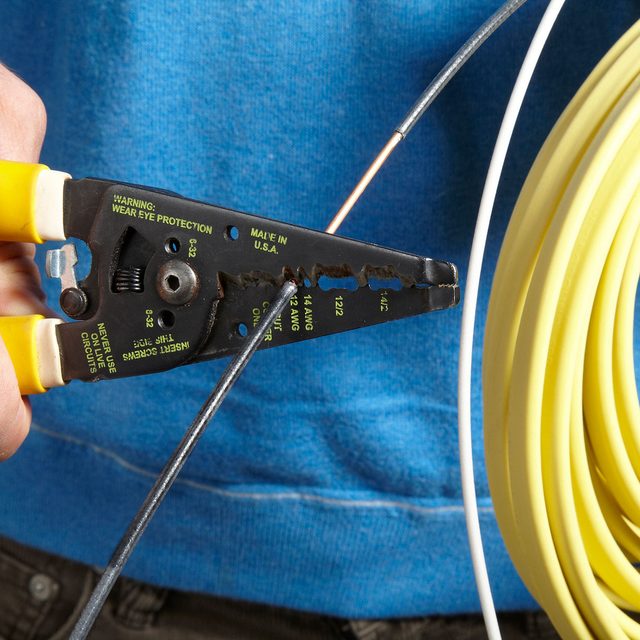
Get new wire insulation
Since the wiring in a ceiling fixture is usually 14-gauge, you can fix it with insulation stripped from a 12-gauge wire. Pick up a short length of 12-2 nonmetallic cable and a package of heat shrinkable tubing. Peel off the outer jacket of 12-2 nonmetallic cable. Then strip off about 8 in. of insulation from the black and white wires.
Step 2
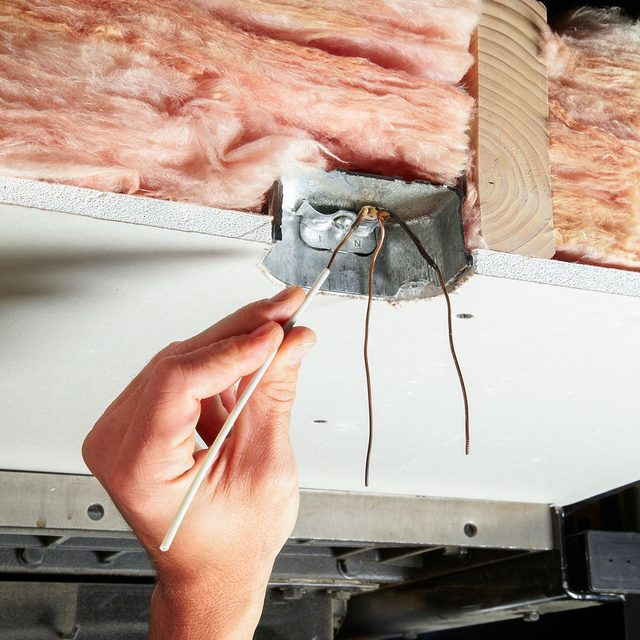
Reinsulate the old wires
Remove as much old insulation as possible. Then straighten out the old bare wire. Slide on new insulation (white goes on the neutral, black on the “hot”). Hold the insulation in place and slide on a short piece of heat-shrinkable tubing.
Step 3
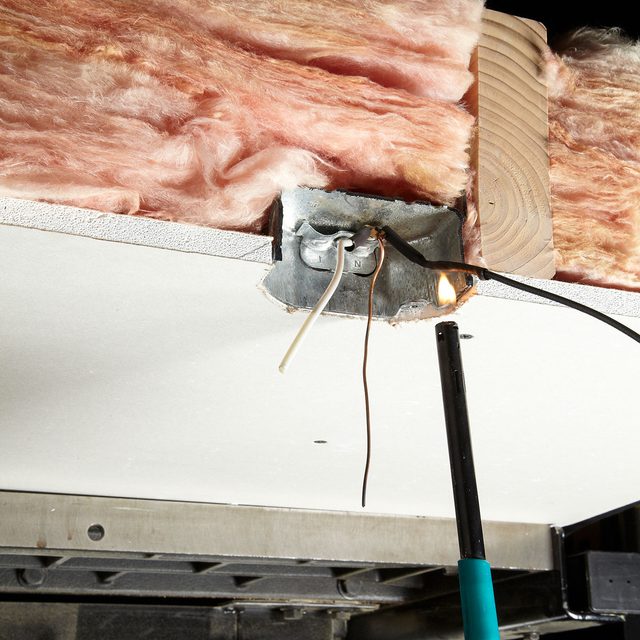
Shrink the tubing
Wave the flame from a lighter under the heat-shrinkable tubing. Keep the flame moving so the heat does all the work and the tubing doesn’t burn. When you’re done, you can connect the new fixture without worrying about the old wires shorting out. Just be sure to follow the wattage maximum of the fixture when you select bulbs.